
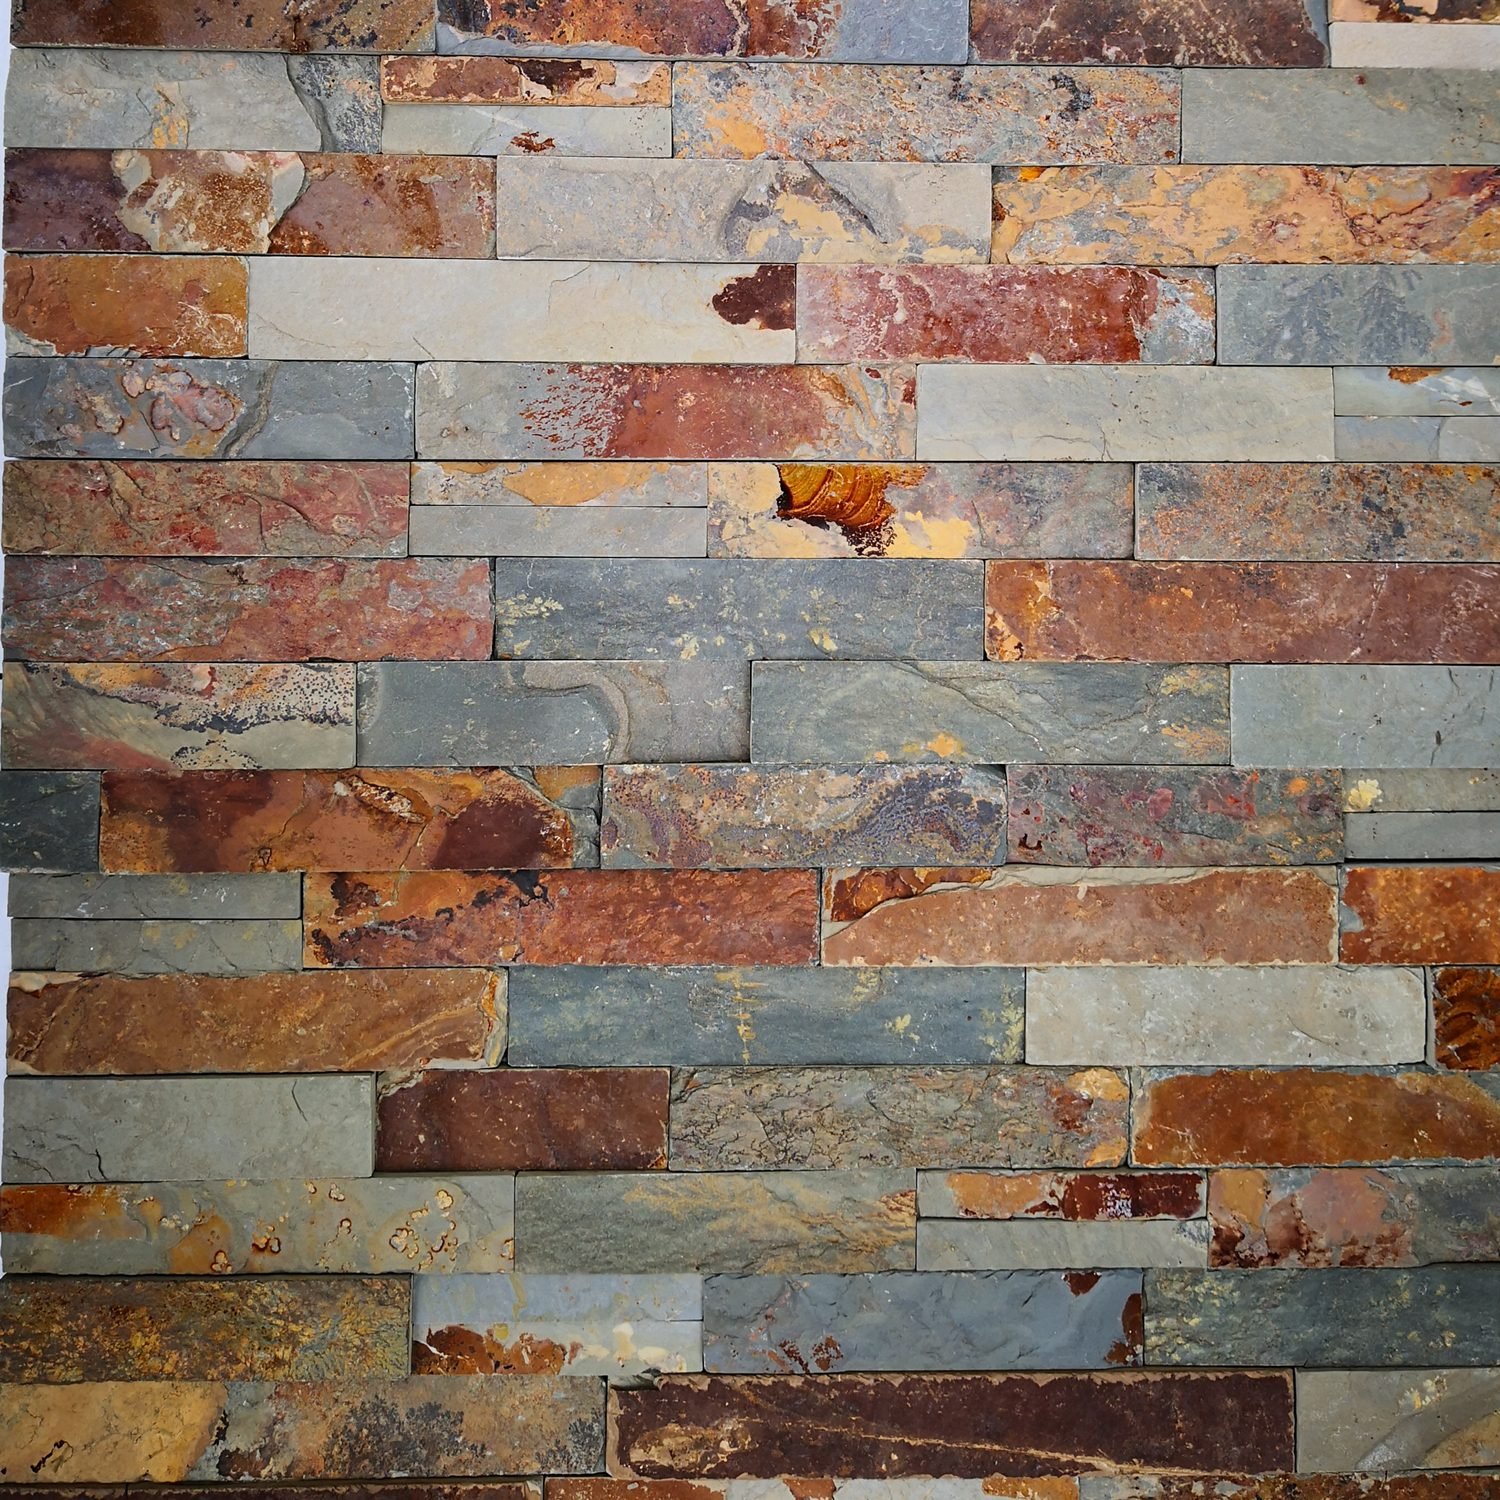
A well-installed stacked stone veneer wall can transform a plain surface into a high-impact architectural statement — and the process is far more straightforward than most contractors assume, provided the substrate, mortar, and sequence are correct from the start. If you have been searching for a practical breakdown of how to install stacked stone veneer panels, this guide covers every stage from the first sheet of backer board to the final pass of sealer.
The instructions below are written for professional installers working with factory-pre-assembled stacked stone panels (15×60 cm or 15×55 cm modules with cement or mesh backing). DIY homeowners tackling an accent wall will also find the detail useful, though we always recommend a trained crew for exterior and commercial projects. For a deeper understanding of what these panels are and how they are manufactured, see our companion article What Are Stacked Stone Panels? For island bases specifically, see our stacked stone kitchen island design guide for layout and corner details.
Let’s get into it.
1. Tools & Materials Needed
Gathering everything before you mix the first bag of mortar is half the battle. A disorganized site means cold joints, wasted panels, and callbacks. Here is the checklist we recommend for every stacked stone veneer installation, organized by category.
Substrate & Prep
- Cement backer board (12 mm HardieBacker, Durock, or equivalent) if installing over drywall or wood framing
- Alkali-resistant fiberglass mesh tape for backer board seams
- Thin-set mortar for bedding backer board
- Waterproofing membrane or building paper (for exterior walls)
- Metal lath (optional — required when applying over masonry with poor surface profile)
Mortar & Adhesive
- Polymer-modified thin-set mortar meeting ANSI A118.4 or ANSI A118.15 (extended open time preferred)
- Non-sanded grout or color-matched caulk for expansion joints
- Penetrating stone sealer (silane/siloxane base, breathable formula)
Cutting & Layout
- Wet saw with continuous-rim diamond blade (for natural stone)
- Angle grinder with diamond cup wheel (for notch cuts around outlets)
- Tape measure, pencil, chalk line, and speed square
- 4-foot level and laser level for long runs
Safety & Cleanup
- Safety glasses, hearing protection, dust mask (N95 minimum when dry-cutting)
- Buckets, mixing drill with paddle, sponge, stiff brush
- Drop cloths to protect finished floors
2. Surface Preparation
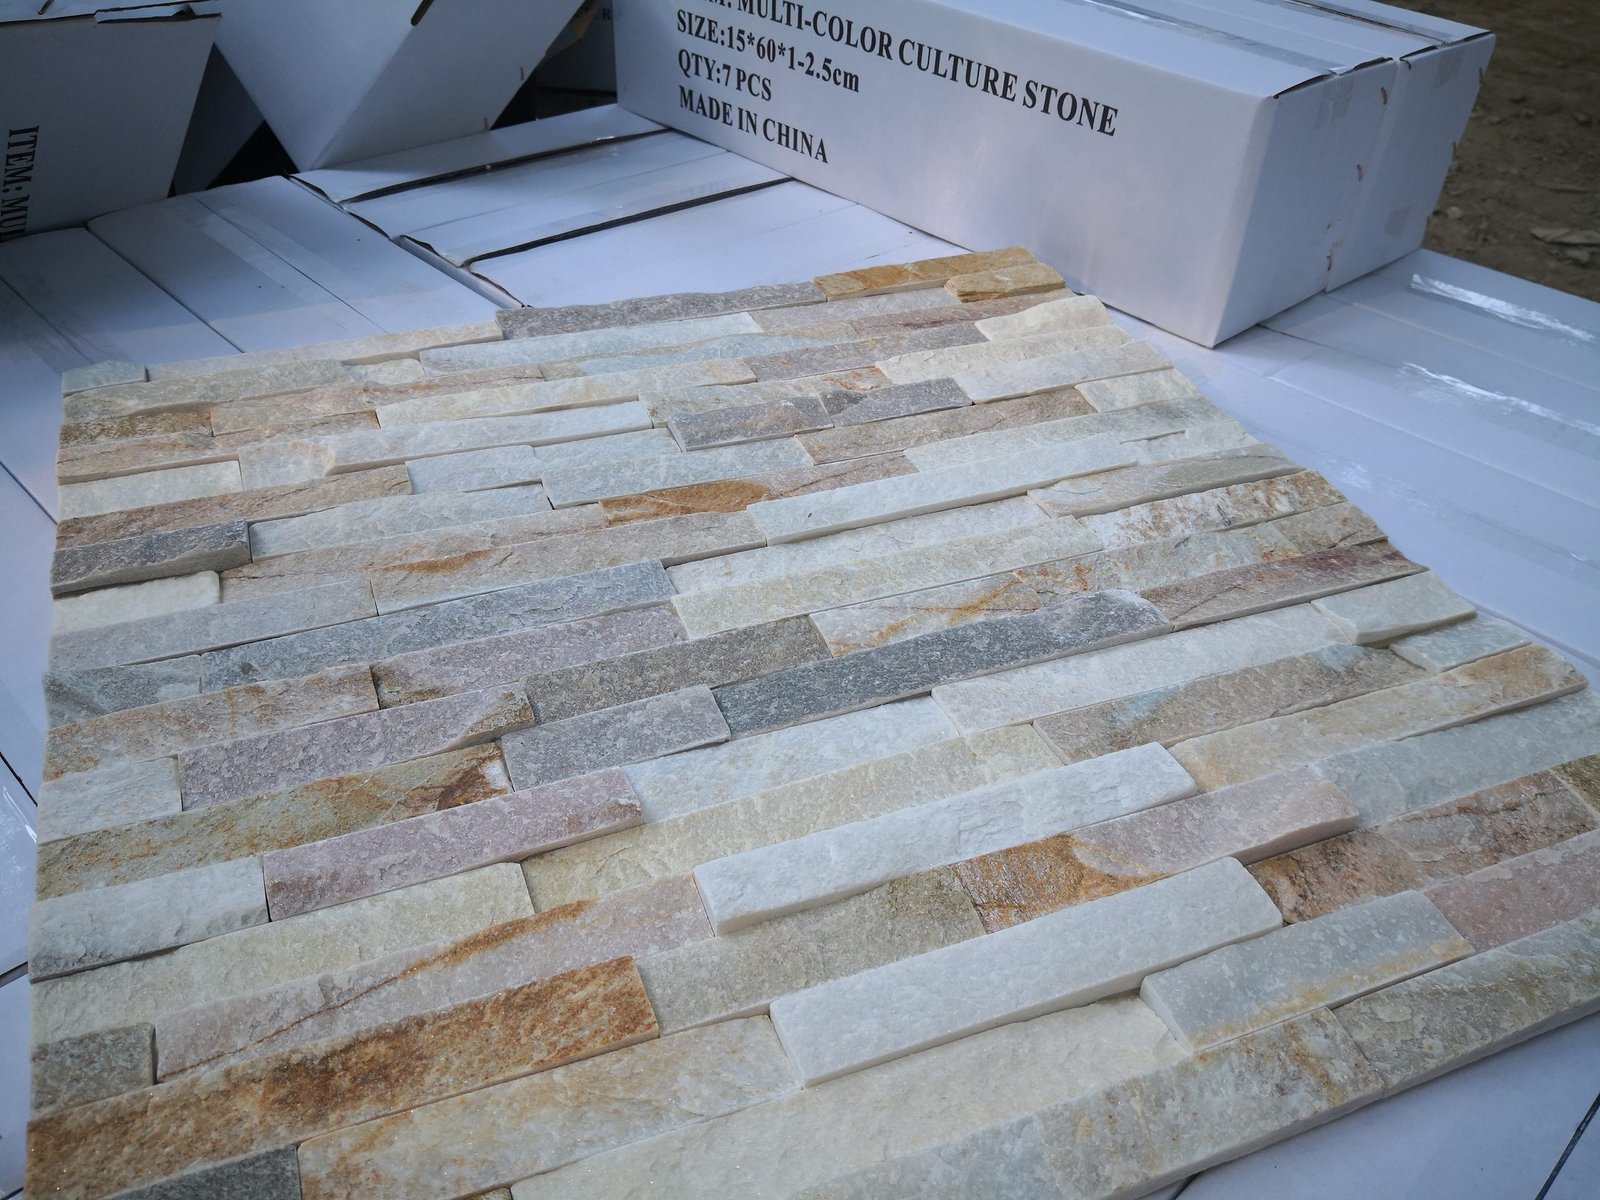
The single biggest predictor of a stacked stone veneer installation’s longevity is not the mortar brand or the panel quality — it is the substrate. Every hour you invest in surface prep saves you from cracked joints, hollow-sounding panels, and delamination down the road.
Step 1 — Evaluate the Existing Wall
Stacked stone veneer panels weigh roughly 35–55 kg/m² (7–11 lbs/ft²) depending on stone type and thickness. The wall must support this dead load indefinitely. Concrete, CMU block, and properly fastened cement backer board are all acceptable. Standard drywall is not — the gypsum core will fracture under sustained load. If the wall is framed with wood or steel studs, install 12 mm cement backer board over the studs using corrosion-resistant screws at 150 mm (6 in) centers along edges and 200 mm (8 in) in the field. Tape all seams with alkali-resistant mesh and fill with thin-set.
Step 2 — Clean & Profile the Surface
Remove all dust, grease, paint, efflorescence, and form-release agents. On existing concrete or CMU, a light acid etch or mechanical scarification may be necessary to open the pores. The surface should feel like coarse sandpaper when you run your hand across it. Wipe down with a damp sponge immediately before applying mortar.
Step 3 — Moisture Management (Exterior & Wet Areas)
For exterior walls, apply a weather-resistive barrier (WRB) behind the backer board or over the sheathing before backer board goes up. In shower surrounds or pool-house feature walls, a liquid-applied waterproofing membrane over the backer board is mandatory. Follow the TCNA Handbook guidelines for wet-area stone installations — specifically Method W243 or W244 for direct-bonded stone veneer.
Step 4 — Layout & Dry Run
Snap a level chalk line at the base of the installation and another at every 60 cm interval vertically. Lay out a row of panels on the floor to preview the pattern, check color blending between boxes, and identify where cuts will fall. Avoid placing narrow cuts (less than half a panel width) at highly visible corners — shift the starting point if needed to push cuts behind furniture or into less prominent locations.
3. Mortar / Adhesive Application
Choosing the right mortar is not a place to cut corners. For thin stone veneer and stacked stone panels made from natural slate, quartzite, marble, or sandstone, a polymer-modified thin-set mortar rated to ANSI A118.4 (modified dry-set) or ANSI A118.15 (improved modified) is the correct product. Brands like LATICRETE 254 Platinum, MAPEI Ultraflex LFT, or Custom Building Products MegaLite all meet these specifications — check the MAPEI stone adhesive range for a reference data sheet.
Mixing
Mix the mortar to a creamy, peanut-butter consistency — it should hold its ridges when combed with a notched trowel but still spread easily. Let the mixture slake (rest) for 5–10 minutes after initial mixing, then remix briefly without adding water. This slaking period allows the polymer additives to fully hydrate, which directly affects bond strength.
Trowel Selection & Application
Use a 10 mm × 10 mm (3/8 in × 3/8 in) square-notch or U-notch trowel. Apply mortar to the substrate in a single direction (not circular), holding the trowel at a consistent 45-degree angle. Coverage target: minimum 95% for interior, 100% for exterior and wet areas. For panels larger than 30 cm in any direction, back-butter the panel as well — spread a thin, flat coat of mortar on the back of the stone panel with the flat side of the trowel before pressing it into the combed mortar bed.
4. Panel Installation Step-by-Step
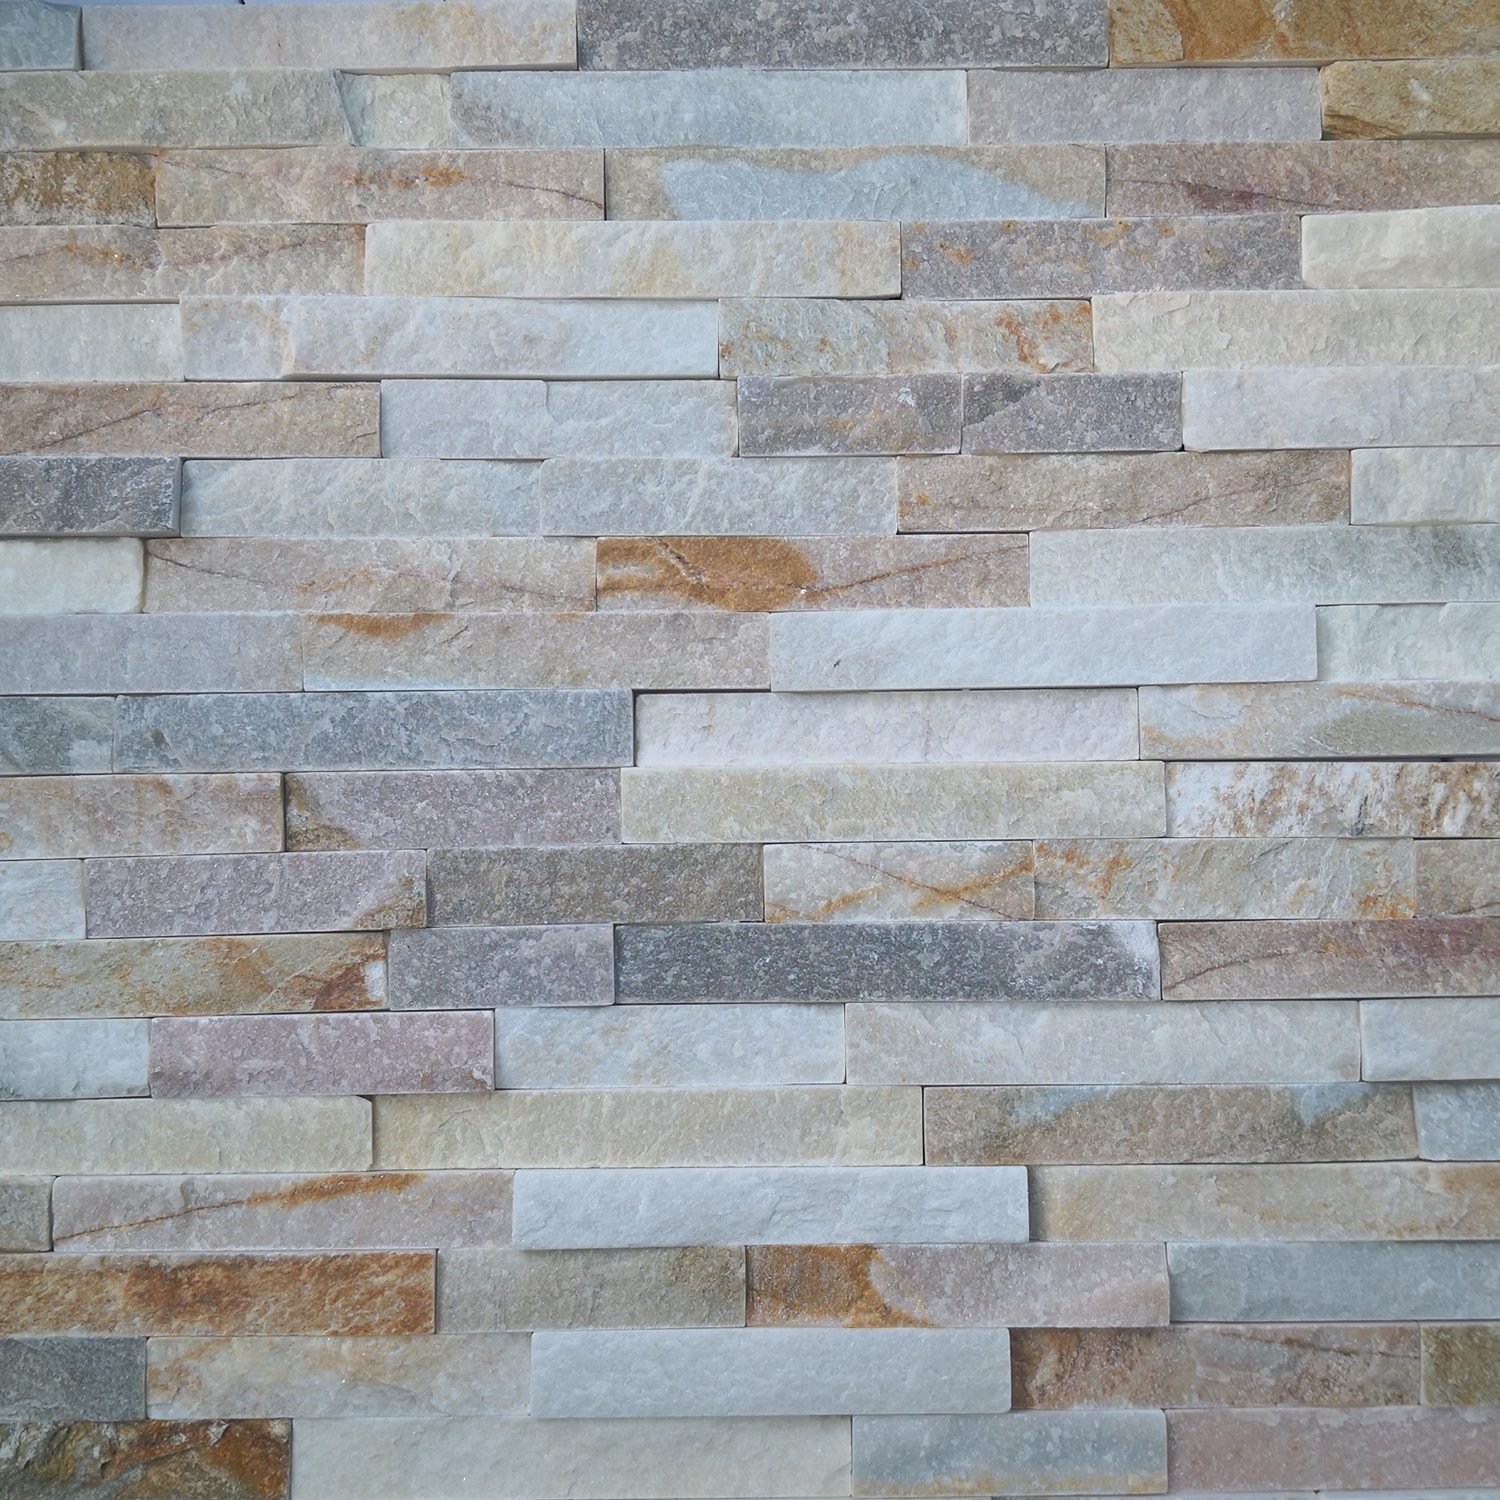
With the substrate prepared and mortar mixed, the actual installation moves quickly. Stacked stone panels are designed for tight, zero-grout-line joints between courses (rows), which is what gives them the clean, modern “stacked” appearance. Follow this sequence:
Step 1 — Start at the Bottom
Begin the first row at your chalk baseline. If the floor or ground is not perfectly level, trim the bottom edge of the first panel to follow the contour — a gap at the bottom is far more noticeable than a cut at the top. Use plastic shims (2–3 mm) under the first row to maintain a consistent height and prevent the panel from sliding while the mortar cures.
Step 2 — Press, Twist, Confirm
Press each panel firmly into the mortar bed, then give it a slight twisting motion (about 5 degrees back and forth). This collapses the trowel ridges and maximizes contact. Pull a random panel after the first few to check coverage — you should see full mortar transfer on at least 95% of the back surface. If you see bare spots, add more mortar or increase pressure.
Step 3 — Maintain the Pattern
Stacked stone panels have a repeating modular pattern. Offset each row’s vertical joints by at least 15 cm (6 in) from the row below. Most installers achieve this naturally by starting alternating rows with a full panel and a half-panel. Avoid a “stair-step” pattern where joints align every third row — it looks mechanical and draws the eye to the seams.
Step 4 — Work in Manageable Sections
Install no more than 1.2–1.5 meters (4–5 feet) of wall width at a time, then move up. This keeps you within the mortar’s open time and prevents the lower rows from being disturbed when you press panels above them. In hot weather, work in even smaller sections.
Step 5 — Check Level Frequently
Every third or fourth row, place a 4-foot level across the face of the installed panels. Stacked stone has enough surface texture to hide minor deviations, but a cumulative drift of even 3 mm per meter will become visible on a long wall. Correct early by adjusting mortar thickness rather than forcing panels.
For additional visual references, the panels shown in our thin ledgestone collection follow the same installation principles described here.
5. Corner Treatment (L-Corners)
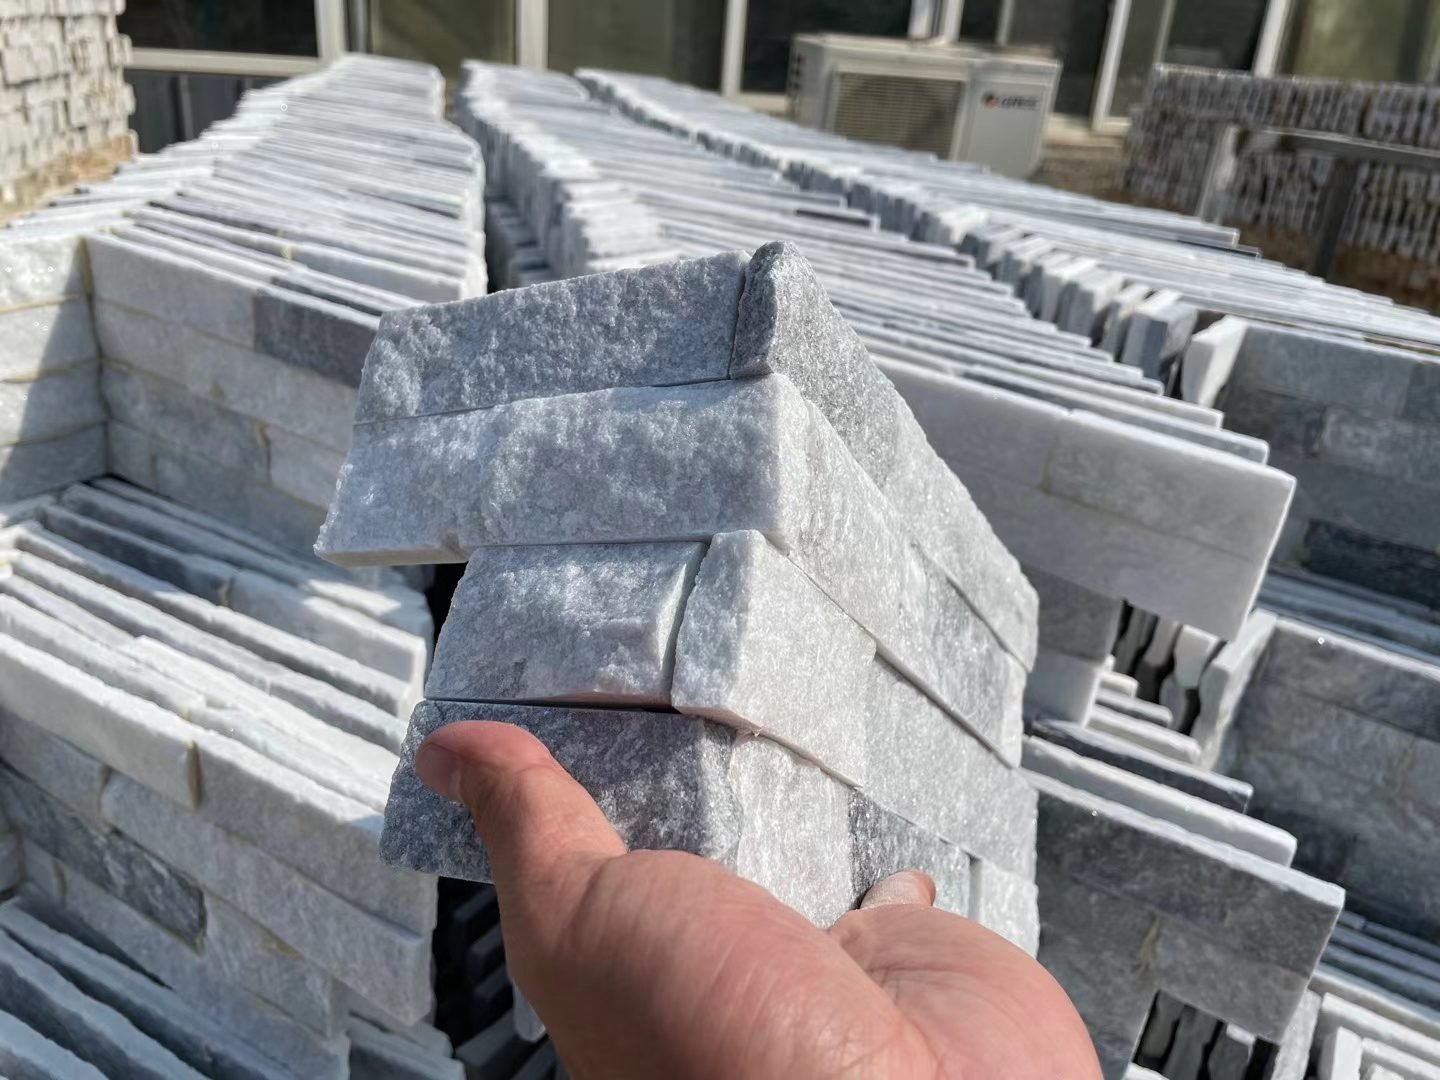
External corners are where most stacked stone installations either look factory-finished or obviously improvised. Traditional approaches require the installer to cut two panels at 45-degree miters and join them at the corner — a process that is slow, generates waste, and almost never produces a truly clean line on natural stone.
The alternative is pre-made L-corner kits. These are factory-assembled corner pieces (typically 45×15 cm per leg) that wrap around a 90-degree external corner in a single unit. The staggered stone profile continues seamlessly around the turn, and the joint between the L-corner and the adjacent flat panel blends into the normal row pattern.
How to Install L-Corners
- Alternate with flat panels. Do not install all corners first. Instead, work row by row: if row 1 starts with an L-corner on the left, install the flat panels across the wall, then place row 2’s L-corner, and so on. This keeps the horizontal joints continuous across the corner.
- Back-butter the return leg. The leg that wraps around the corner has a smaller bonding surface. Apply mortar to both the wall and the back of the L-corner for full coverage.
- Check plumb on both faces. Use a level on each leg of the corner independently. A corner that is plumb on one face but twisted on the other will be visible from certain sight lines.
- Stagger the vertical joints. The joint where the L-corner meets the flat panel should not align with the joint between flat panels on the same row. Offset by at least 10 cm.
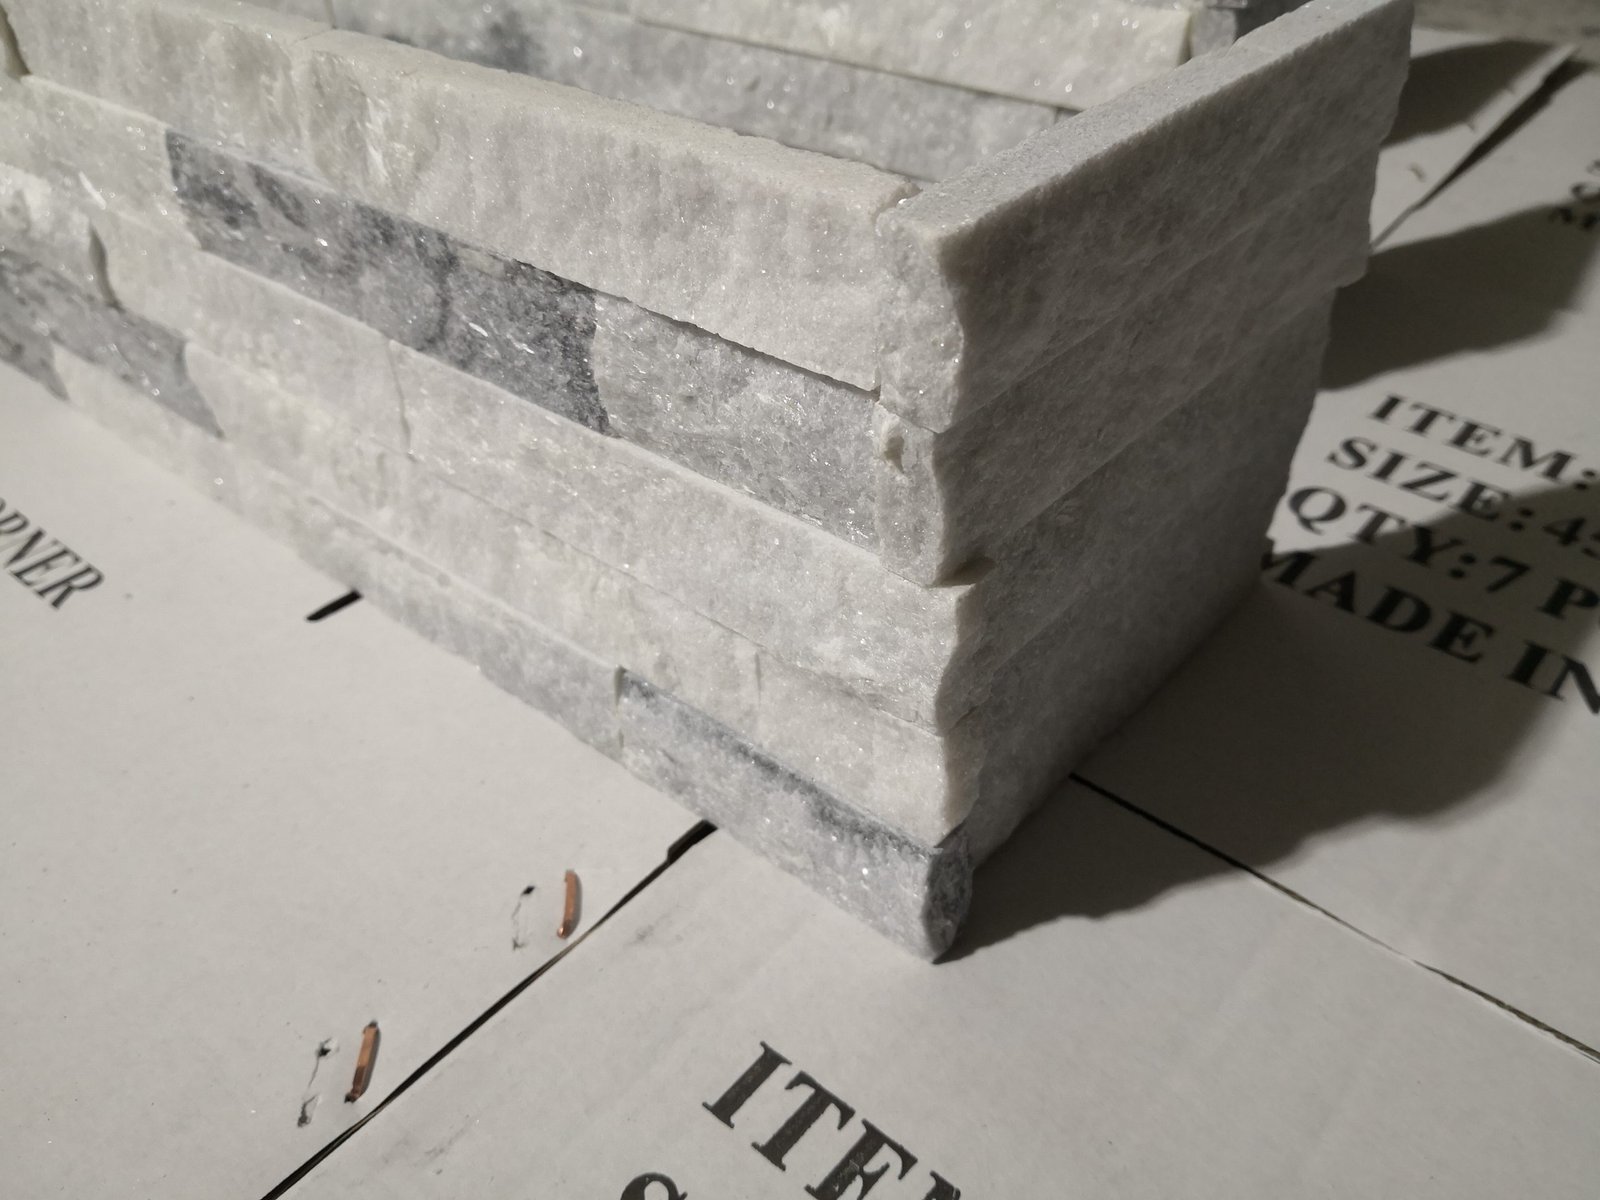
For projects that include freestanding columns or pillars, our stone column cladding range uses the same L-corner logic adapted to curved and multi-face geometries.
6. Cutting & Fitting
No matter how carefully you plan the layout, you will need to cut panels — around electrical outlets, at ceiling lines, beside door frames, and at the ends of rows. Natural stone cuts cleanly with the right blade, but the wrong approach can chip edges, crack the backing, or produce a visible burn mark on lighter stones like marble.
Wet Saw (Primary Cutting Tool)
A wet saw with a continuous-rim diamond blade designed for natural stone produces the cleanest edge. Feed the panel slowly and let the blade do the work — forcing the cut causes chipping at the exit point. For stacked stone panels with cement backing, the blade will cut through both the stone strips and the backing in a single pass. Support the panel on both sides of the cut to prevent the waste piece from breaking off prematurely and taking a chunk of the keeper side with it.
Angle Grinder (Notch & L-Cuts)
For L-shaped cuts around outlets or pipe penetrations, use a 4.5-inch angle grinder with a turbo-rim diamond blade. Score the cut line on both faces if the panel is thick, then snap and clean up with a rubbing stone. Always wear a respirator — dry-cutting stone generates respirable crystalline silica dust, which is a serious health hazard and an OSHA-regulated exposure on commercial job sites.
Fitting Tips
- Cut the panel 2–3 mm undersized and fill the gap with color-matched caulk rather than mortar. This creates a soft joint that accommodates thermal movement.
- For cuts at ceiling lines, leave a 5 mm gap and fill with paintable caulk. Rigid mortar at the top of a wall will crack as the structure deflects under live loads.
- When cutting around recessed niches or shelves, install the stone first and let the carpenter or cabinet maker scribe their trim to the stone — not the other way around.
If your project calls for larger-format modular panels that reduce cutting even further, consider our Z-panels, which feature an interlocking profile for faster coverage on broad commercial walls.
7. Grouting & Finishing
Stacked stone veneer is typically installed with tight, “dry-stack” joints between courses — meaning no visible mortar or grout between horizontal rows. The vertical joints within each panel are filled at the factory during the bonding process. This is one of the features that makes stacked stone faster to finish than individual loose stone, where every joint must be pointed by hand.
That said, some finishing work is still required:
Joint Cleanup
After the mortar has set (usually 24 hours), use a stiff, dry nylon brush to remove any mortar squeeze-out that has dried on the stone face. Work in the direction of the stone grain. For stubborn mortar spots, dampen the brush slightly — but avoid soaking the wall, as excess water can carry dissolved minerals to the surface and cause efflorescence.
Expansion Joints
Every 3–4 meters (10–13 feet) vertically and horizontally, include a soft joint filled with a color-matched, high-quality polyurethane or silicone sealant. These joints absorb thermal expansion and structural movement. Place them at floor-to-wall transitions, at changes of substrate, and at control joints in the underlying structure. The Tile Council of North America recommends movement joints every 3.6–6 m for exterior stone installations — refer to TCNA Method EJ-171 for specifics.
Sealing
Apply a penetrating, breathable stone sealer after the mortar has fully cured (14–28 days depending on conditions). A silane/siloxane-based sealer penetrates the stone’s pore structure and repels water and oil-based stains without forming a surface film that can peel or yellow. For exterior installations in freeze-thaw climates (the panels are rated from −30 °C to +50 °C), sealing is strongly recommended to reduce water absorption and the risk of spalling. Interior feature walls in low-traffic areas may be left unsealed, though sealing simplifies cleaning.
Caulking Perimeter
Where the stone meets dissimilar materials — trim, cabinetry, countertops, ceiling — use a paintable, flexible caulk rather than mortar. A bead of caulk hides the cut edge, provides a clean visual termination, and allows for differential movement.
For projects that incorporate natural flagstone paving adjacent to the cladded wall, coordinate the sealer type so that both surfaces can be maintained on the same schedule.
8. Common Mistakes to Avoid
After 18 years of supplying stacked stone to distributors and contractors across four continents, we have seen the same installation errors surface repeatedly. Here are the ones that cost the most time and money to fix:
| Mistake | Why It Fails | Fix |
|---|---|---|
| Installing directly over drywall | Gypsum core cannot support 35–55 kg/m² long-term; panels delaminate. | Install 12 mm cement backer board over studs first. |
| Skipping the dry layout | Color variation between boxes creates obvious banding on the wall. | Pull panels from 3–4 boxes simultaneously and blend during install. |
| Using unmodified thin-set mortar | Insufficient bond strength and flexibility; fails under freeze-thaw cycling. | Use polymer-modified mortar (ANSI A118.4 minimum). |
| Applying mortar in hot sun without shading | Mortar skins over before panels are set; bond is compromised. | Erect temporary shade; mix smaller batches; work in early morning. |
| No back-buttering on large panels | Center of the panel has no mortar contact; hollow sound, eventual failure. | Back-butter every panel over 30 cm in any dimension. |
| Mitering corners by hand | Inconsistent 45° angle on natural stone; visible gaps and chip-outs. | Use pre-made L-corner kits for clean 90° wraps. |
| Sealing before mortar cure | Traps moisture behind the sealer; causes efflorescence and bond degradation. | Wait 14–28 days after installation before applying sealer. |
| Omitting expansion joints | Thermal stress has nowhere to go; panels crack or pop off. | Place soft joints every 3–4 m and at all substrate transitions. |
9. FAQ — Stacked Stone Veneer Installation
Can I install stacked stone veneer over drywall?
Standard drywall alone is not a suitable substrate for stacked stone veneer. The weight of natural stone panels (typically 35–55 kg/m²) exceeds what gypsum board can safely carry long-term. Best practice is to install cement backer board (e.g., 12 mm HardieBacker or Durock) over the studs, or over existing drywall if it is structurally sound and well-fastened. Always verify the backer board manufacturer’s load rating before proceeding.
What type of mortar or adhesive should I use for stacked stone veneer?
For natural stone veneer panels, a polymer-modified thin-set mortar meeting ANSI A118.4 or A118.15 is the industry standard. Modified mortars provide better bond strength and flexibility than unmodified versions, which matters for exterior applications subject to freeze-thaw cycles. For interior accent walls with lighter panels, a high-quality construction adhesive rated for natural stone may be acceptable, but mortar remains the professional choice for durability.
How long does stacked stone veneer installation take?
An experienced two-person crew can typically install 15–25 square meters of flat wall per day, including surface prep and mortar application. A standard fireplace surround (approximately 5–8 m²) usually takes one full day. Larger commercial feature walls of 50+ m² may require 3–5 days. Add extra time for complex corner work, cuts around outlets or fixtures, and grouting.
Do I need to seal stacked stone veneer after installation?
Sealing is recommended for all natural stone veneer, especially in exterior or wet-area applications. A penetrating, breathable stone sealer (silane/siloxane-based) protects against moisture ingress and staining without altering the stone’s appearance. Apply after the mortar and grout have fully cured (typically 14–28 days). Re-seal every 2–3 years for exterior walls, or every 3–5 years for interior installations.
What is the difference between stacked stone panels and individual stone pieces?
Stacked stone panels are pre-assembled modules where multiple stone strips are bonded to a backing (cement, mesh, or epoxy) in a factory. This means one panel covers a larger area in a single step, dramatically reducing installation time and ensuring consistent pattern repetition. Individual loose stone pieces require the installer to hand-place and align each stone, which takes 3–5 times longer and demands more skill to achieve a uniform look.
Ready to Start Your Project?
If you are planning a stacked stone veneer installation — whether it is a distributor stocking up for regional contractors, a commercial builder specifying for a multi-unit development, or an architect sourcing for a hospitality project — Top Stone Panels supplies factory-direct stacked stone panels in slate, quartzite, marble, and sandstone with pre-made L-corner kits, batch-matched color consistency, and a zero-breakage packaging protocol built for container shipping.
Minimum order: 1 × 20GP container. Samples ship within 1–3 days. Production lead time: 20–25 working days. FOB Xingang, CIF, and DDP terms available. Request a quote and we will send panel specs, pricing, and a container loading plan within 24 hours.



