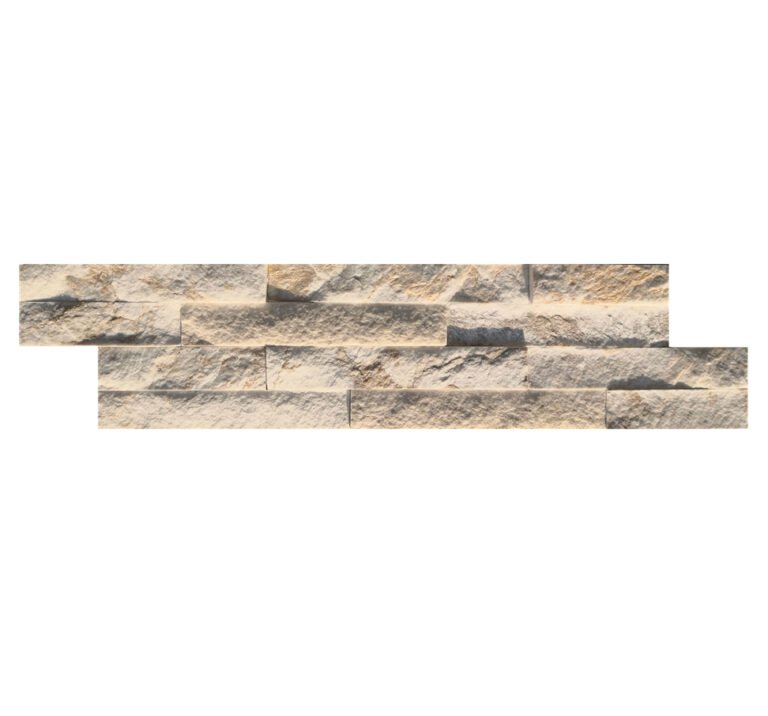
Suppose the general contractor walks your facade after the scaffold drops, marks a dozen hollow panels and a gap at the base, and asks whether the stone caused it. Nobody can answer, because nobody inspected the wall while its layers were visible. A stone veneer inspection checklist settles that by sequencing checks, not by who complains first. Most field guidance treats acceptance as a defect list, which is the wrong frame: an adhered wall is five assemblies stacked, and four get buried.

- Four of five assemblies get covered up, so barrier, lath, flashing and bed checks missed before closure cannot be made later.
- Water-resistive barrier goes on in two layers, shingle fashion: 2 inch horizontal laps, 6 inch vertical laps, 16 inches past corners.
- Lath is self-furring corrosion-resistant metal lath to ASTM C847 at 2.5 lb per square yard minimum, embedded only with 1/4 inch of mortar behind it over 50 percent of the area.
- Base flashings hold 4 inches above grade and 2 inches above paving, dropping to 1/2 inch only on a walking surface on the same foundation.
- ASTM C1780-26a states in its own scope that it “does not cover all flashing or moisture management requirements,” putting the dominant failure mode outside the installation standard.
- No document we could read sets a hollow-sound acceptance threshold, so this page publishes its own protocol and labels it.
Which Rulebook Governs Your Wall
The installation standard is written around cast units
Ask a subcontractor which standard governs and you will hear ASTM C1780. Read the scope notes and the ground shifts. C1780 states that its units are made to ASTM C1670/C1670M or C1877, which are adhered manufactured stone and dry-cast concrete. Note 2 then says the standard “was developed for the installation of cement-based adhered veneer units manufactured from wet-cast concrete or dry-cast concrete.” It tells you to “refer to Guide C1242 for installation of adhered natural stone veneer.”
Follow that referral and it dead-ends. C1242 covers “the categories of anchors and anchoring systems” for dimension stone. It is written about mechanically held stone, and its scope says nothing about mortar, setting beds or surface-bonded veneer. The standard a crew cites for your natural thin stone wall hands you to a guide that does not cover how your wall is bonded.
The same standard says what actually governs. C1780 section 1.4 requires that all workmanship and materials meet the requirements of “the contract documents and building code having jurisdiction over the project.” Your leverage is therefore what you put in the contract, not which guide the subcontractor read.
The gap inside the standard itself
C1780 adds a second silence of its own. Its scope states the practice “does not cover all flashing or moisture management requirements.” The standard tells you how to hang stone. It declines to say how to keep water out of the wall behind it. Water at flashings is the failure mode every inspection source leads with, because it surfaces as rotted sheathing rather than a loose panel.
Check the Concealed Layers First
Two barrier layers, unless the wall is drained
The MVMA guide requires the water-resistive barrier in two separate layers, installed shingle fashion from the bottom of the wall up. The upper layer laps the lower by 2 inches (51 mm) minimum, vertical joints lap 6 inches (152 mm), and corners overlap 16 inches (406 mm) past the angle. The inner layer plus flashings form the drainage plane; the outer layer keeps scratch coat off it. Acceptable barriers are two layers of No. 15 felt to ASTM D226 Type 1, Grade D paper or house wrap to ICC-ES AC38, integrated with all flashing accessories, adjacent WRBs, doors, windows and penetrations.
One qualifier changes what a one-ply wall means, because the same guide records that codes may allow a single layer where a drainage space is built into the wall. A one-ply wall is not a defect by itself, but it is only defensible as a drained assembly. Count plies and read laps before lath goes up.
Lath weight is a specification you can weigh
MVMA and CMHA MSV TEC-001 both require self-furring corrosion-resistant lath at 2.5 lb per square yard minimum to ASTM C847. The heavier class is 3.4 lb, and 18-gauge woven wire mesh to ASTM C1032 is an alternative. Self-furring legs hold the mesh off the barrier so mortar keys through it, and lath pressed flat loses that key, so check the mill ticket.
Installation follows ASTM C1063. MVMA places lath horizontal, perpendicular to framing, lapping 1 inch at vertical seams and 1/2 inch at horizontal, while Echelon asks for 1 to 2 inches at both. Fastener heads or washers must be large enough not to pull through the lath.
Neither fastener spacing nor penetration is settled
This is where a field checklist earns its keep, because the published guides contradict each other on both numbers. On spacing, CMHA MSV TEC-001 caps fasteners at 7 inches and Old World Stone Veneer allows no more than 7 vertically, while Echelon Masonry fastens every 6 inches on centre vertically on each stud at 16 inches maximum horizontally. On penetration, MVMA and CMHA require a minimum 3/4 inch into wood and 3/8 inch into metal. Echelon asks for a minimum 1 inch into framing, and 1-1/4 inches where screws pass through insulation into wood studs.
No reconciliation is available from the documents, and searching for one wastes a site meeting. The pass condition is agreement with the accepted submittal: a 6-inch pattern at 1 inch bite is not a defect; a submittal specifying it on a wall fastened at 12 inches with a 3/4-inch bite is.
The embedment check is worth more than the lath ticket
Two authorities state this checkpoint identically. MVMA and CMHA consider lath embedded only where a nominal 1/4 inch (6 mm) of mortar sits between the back plane of the lath and the back plane of the coat. That must hold across at least 50 percent of the surface area. Break a patch at a corner and read the cross-section. Under-embedded lath is the quiet failure: the wall looks right, the stone bonds, and the assembly carries the veneer on mesh sitting partly in air.
Inspect the Flashing Before the Stone
Where flashing is mandatory
ASTM C1780 disclaims moisture management, but the guidance still in play is unambiguous. MVMA requires all flashing and accessories to be corrosion resistant and integrated with the WRB, and requires flashing at every through-wall penetration and veneer termination on exterior work. Interior walls not exposed to water are exempt; one that gets wet counts as an exterior assembly. Check four places where the third trade drops the ball: window and door heads and sills, every pipe, conduit and light penetration, deck ledger and stair transitions, and the roofline. On that last one MVMA requires verifying all flashing including roofing kickout flashing, and extending it above horizontal terminations and drainage planes.
The integration check, not the presence check
Flashing present is not flashing working. The deciding rule is lap direction: the WRB must overlap the weep screed flange, and lap over the vertical leg of the flashing for positive drainage. Installed the other way, a correctly supplied flashing becomes a funnel into the wall. The screed has geometry too. MVMA requires a minimum vertical attachment flange of 3.5 inches (89 mm) terminating behind the WRB, and metal screeds no thinner than 0.0179 inch, which is 26 gauge. A short flange or a curled light-gauge screed fails the detail even when the reveal looks right.
Keep the drainage space out of the mortar
On a drained wall the gap works only if nothing fills it. MVMA names the component that protects it, a mortar screen, defined as sheet material installed to stop the scratch coat filling the drainage space. With no screen, the coat bridges the gap the first time a crew backs a hawk hard to the wall. Inspect at the base and every penetration before stone hides it. A bridged drainage space fails the wall the same way an obstructed weep does, and the screen is the only thing standing between the two.
Openings carry the three dimensions crews skip
Window details are where MVMA does publish hard numbers, and they are the three checks most often missing from a punch list. At the sill, the WRB is tucked under the sill flashing, and that flashing drains to the exterior of the primary WRB or of the veneer. A barrier run up the face instead of under the flashing is a defect you can only see before the sill unit is set.
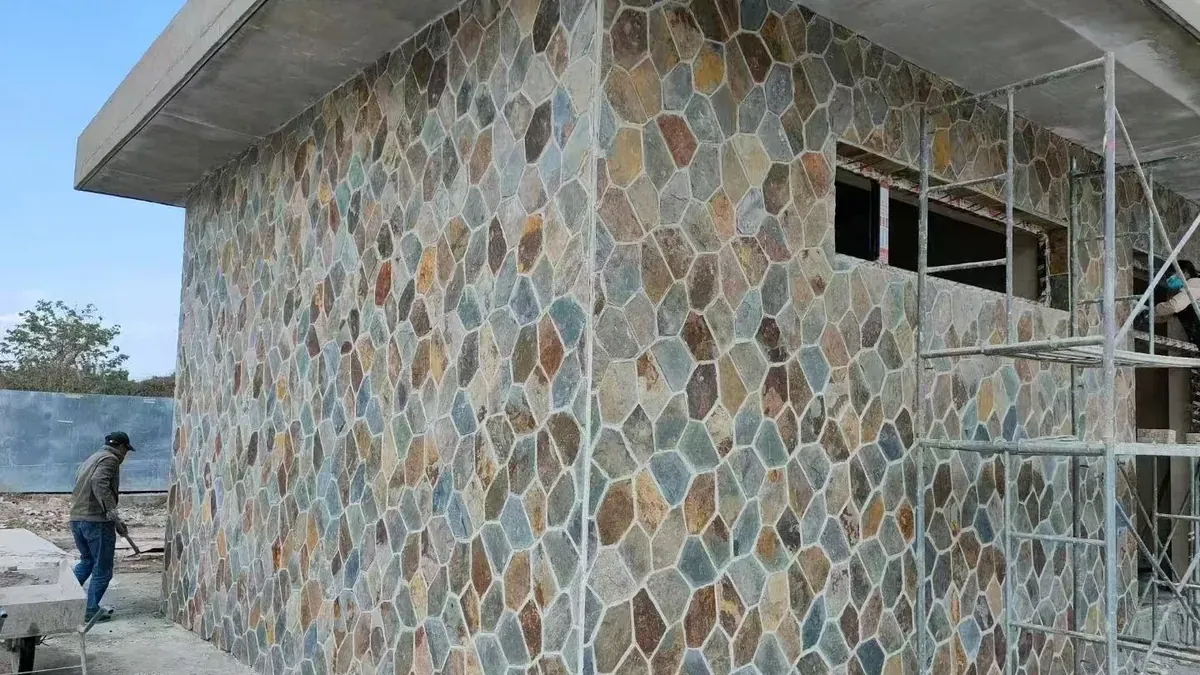
At the jamb, backer rod and sealant sit between the window frame and the veneer to allow movement between dissimilar materials. A mortared butt with no sealant channel is a cracked joint inside two seasons. At the head, flashing is set in sealant with a minimum 9 inches (229 mm) over the head fin. The WRB may be sealed to the frame with self-adhered flashing. All three interfaces carry a 3/8 inch (10 mm) dimension. Rough openings must be flashed before the window is installed, which puts the check upstream of both the glazier and the mason.
Window interface, drawn to the MVMA detail set
WRB tucked under the sill flashing. Flashing drains to the exterior of the primary WRB or of the veneer. Interface 3/8 in (10 mm).
Backer rod and sealant between frame and veneer, so the dissimilar materials can move. Interface 3/8 in (10 mm).
Flashing set in sealant, minimum 9 in (229 mm) over the head fin. Self-adhered flashing may seal WRB to frame.
Hold the Base Clear of the Ground
Four inches, two inches, and one exception
MVMA, CMHA and the producer guides agree on the base line. On exterior stud walls, weep screeds and other base flashings are held a minimum of 4 inches above grade and 2 inches above paved surfaces such as driveways and patios. The value recurs across sources, so you can enforce it without a documentation fight, treating that as agreement among the guidance reviewed rather than a code citation. The exception is narrower than crews remember. MVMA drops the 2-inch paving clearance to 1/2 inch only where the paved surface is a walking surface supported by the same foundation that supports the wall. A driveway slab on grade beside a foundation wall does not qualify. Inspect at finished grade, and check the walkway case specifically because the reduced number gets abused.

The same gap belongs at every other hard surface, and the two sources do not do the same job. Home-inspection practice, documented by Structure Tech, keeps veneer 2 inches above roof surfaces as well as above soil and paving. MVMA Figure 34 covers the deck case but does not dimension it. It requires the WRB lapped over the weep screed and floor framing, and a “gap between adhered manufactured stone veneer and decking for drainage,” with no number given. Treat 2 inches at a deck as inspection practice, not a guide requirement, and expect that argument on site.
Where veneer runs down a foundation the numbers split, and reading the wrong line writes a false acceptance. MVMA holds 2 inches from grade, or 1/2 inch from paving, where veneer continues down a concrete or CMU wall with a weep screed in the transition. The same pair governs a bare exterior concrete or CMU wall. It holds 4 inches from grade, or 2 inches from paving, where veneer continues down a CMU wall with the WRB and lath run down to the screed at the bottom. The 2-inch and 1/2-inch pair also governs non-conditioned work such as landscape walls, pillars and columns. Detailing adds one rule: stop stone a minimum of 1 inch below the foundation top.
The transition most caulk jobs fail
Inspection practice adds a gap of about 3/8 inch, then flashed and sealed, where veneer butts siding vertically. The two claddings move on different moisture cycles and a tight butt line cracks the caulk inside two seasons. Structure Tech lists that transition among recurring field defects.
Verify the Bed and the Back
The assembly has a nominal total thickness
MVMA sets the target for assembled mortar rather than each layer. Coat plus setting bed should be nominally 1 inch (25 mm), measured from the outer surface of the WRB to the back of the unit. That catches both failure modes at once, the thin skin that cannot carry the unit and the over-thick bed that adds weight and invites slump. The scratch coat itself is a nominal 1/2 inch (13 mm), pressed hard enough to encapsulate the lath and scored horizontally once thumbprint hard. Read the finished bed against the 1 inch target with a story stick at an exposed edge.
Cure is a condition, not a clock
Do not look for a single hour count in the primary documents. MVMA says the bed goes on after the coat has cured sufficiently, and that the coat should be moist cured to limit cracking. Producer instructions differ, with Old World allowing 24 hours and CMHA working to 48. Adopt whichever interval the delivered product states.
MVMA supplies the visual test that replaces the clock: before stone goes on, the coat is dampened until it appears wet but free of standing water. Skipping that lays mortar onto a thirsty coat which pulls water from the bed. Two more hold points sit in the same passage. MVMA warns against moving a unit once initial set has begun, requiring it pulled, scraped clean and re-buttered. It also puts grouting only after cure sufficient that light contact will not break the bond.
Back-buttering is coverage first
Coverage is the rule every source agrees on, and MVMA states both halves: the back of each unit should be entirely buttered to a nominal 1/2 inch, not just around the perimeter. The guide permits the equivalent of troweling the bed onto the coat so it covers it completely, or combining both. That matters on a natural stone wall, where a crew can be accused of skipping back-buttering when they built the bed on the wall instead. So the field proof is not which side got the mortar but squeeze-out in a volume producing a full setting bed. Natural thin stone bites hardest here, because a sawn back varies in plane while a crew working from a cast-stone sheet expects a flat uniform void to fill.
Weather bounds are acceptance criteria too
MVMA requires protection below 40 degrees F (4 degrees C) during and immediately after installation and does not recommend anti-freeze admixtures. Above 90 degrees F (32 degrees C), extra water, shade or misting is called for, and cold-weather practice follows TMS 602. Log the temperature at the hold point, because a wall laid at 36 degrees F is a rework conversation, not a stone warranty argument.
Test the Hollow Sound
The test everyone runs has no published threshold
Every inspector taps installed veneer, working a grid and listening for a note that rings higher than solid bedding. It is the most-used field test in the trade and has no published acceptance number. We checked.
The 68-page MVMA Installation Guide, stamped April 27, 2015, fourth edition, third printing, is the field reference the trade still installs from. C1780 Note 1 names CMHA’s Installation Guide and Detailing Options for Compliance with ASTM C1780 as the compliance document. Neither guide sets a tap-test criterion: the MVMA text, once extracted, returns zero occurrences of hollow and zero of drum. The CTASC expert answer is blunt about the method’s limits. “Sounding is a qualitative test and is subjective,” it states, describing a hollow note as higher or lower pitched depending on the materials and the assembly. It publishes no numeric threshold either. That is a silence across four sources, not proof that no threshold exists anywhere.
The protocol we use, and why the lines sit where they do
Because no standard sets it, we publish ours and label it as ours. Nothing here is a code limit or an ASTM pass/fail. Tool: a coin or plastic screwdriver handle, not a steel hammer, which chips the face and changes the note. Method: tap each unit at center and at four quadrant points on a grid no coarser than about 300 mm. Judge terminations, corners and penetrations on movement and detailing rather than on tone. Mark every field note that differs from the mock-up reference.
- Isolated note at a unit center, with the perimeter bonded: accept. Isolated means the note stops at the edges of that one unit and the perimeter of that unit is bonded, which you confirm from squeeze-out at installation or by lifting an adjacent unit. A sawn back on natural thin stone varies in plane, so a bounded central void is geometry rather than bond failure.
- A note crossing a joint into an adjacent unit: reject. Continuity across a joint puts the void in the bed rather than behind one irregular back, which makes the cause systemic.
- A note at a termination or around a penetration, accompanied by movement, an open joint or a missing sealant channel: reject and open it. Those are restraint and water entry lines, so a void there has somewhere to go. A quiet note at a termination with no movement and a sealed joint is a watch item, logged and re-tapped after the first winter, not an immediate rejection.
- A unit that moves under hand pressure alongside any note: reject, photograph, mark and log. Movement plus note is delamination, and MVMA already requires a unit moved after initial set to be pulled and re-buttered.
- Notes clustering on one elevation after the first freeze-thaw season: escalate the wall. A pattern that follows an elevation follows an installation condition, not the stone.
Set the reference tone on the mock-up first. MVMA already asks for a jobsite layout of a minimum of 25 square feet (2.3 square metres) before installing. Both sides then hear a solid wall on the actual units before arguing about hollow ones.
When sound is not enough, there is an instrumented route most buyers do not know exists. C1780’s Note 3 warns that surface preparations outside its Section 7 may need the engineered design provisions of TMS 402-22, and that shear bond strength may have to be evaluated. It points to Appendix X1, a shear bond method built on a modified ASTM C482. That is a number to demand rather than an argument about tone. The alternative stays destructive and is worth knowing before you authorise it. 45th Parallel Home Inspections drills two quarter-inch holes just deep enough to reach the sheathing and inserts probes to read moisture content. The holes are then filled with sealant to ASTM C920, matched as close as possible to the mortar colour. That is a real reading at a permanent price on the finish, so agree the drill locations in writing first.
Check the Finished Face
Flatness has no veneer standard, so use a straightedge
One number buyers expect here does not exist. MVMA returns no hits for flatness. The 1/4 inch in 10 feet figure circulating on job sites is borrowed from ANSI A108 and TCNA ceramic tile standards, which do not govern adhered stone veneer. So do not launder a tile tolerance into a masonry argument. On a finished wall, run a straightedge across adjacent units, sight the plane at an elevation break, and reject lippage a bare hand catches. Before the wall is built, plane is a factory control, set by our flatness and warpage controls.
Efflorescence tells you which layer is wrong
A white bloom is the post-handover symptom with diagnostic value, because its cause sits behind the stone. Efflorescence is carried by water moving through the assembly, depositing salts as it evaporates. A bloom returning after cleaning therefore points at a water path: usually a lap, a flashing or a plugged weep. Treat it as a symptom of the concealed layers, not a cleaning problem; the causes and cures have their own guide.
Separate Factory Defects From Field Defects
What a panel plant owns before the container seals
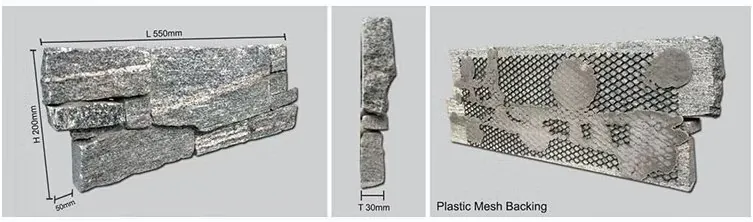
Half the arguments in a veneer claim are about which side of the shipping line created the defect. Four things come off our line rather than out of your wall: face thickness and its tolerance, panel flatness, corner return geometry, and the color range in a batch. A bonded thin stone veneer panel leaves as a 15×60 cm or 15×55 cm unit on adhesive or mesh backing. An interlocking Z or S panel leaves as 20×55 cm or 15.2×61 cm on cement or mesh backing.

Batch color is what a distributor gets blamed for late. We lock a batch to one quarry vein and hand-sort it, so split-face loose stone holds 95 percent or better color transition consistency. A wall mixing veins reads as patchwork however well it was installed. Pre-made L-corner sets come as asymmetric 6×12 plus 6×6 or 6×16 plus 6×8 inch legs and symmetric 6×12 plus 6×12 inch sets. They remove the field 45-degree miter that causes most corner rejects, cutting about 20 percent of corner material loss and better than 50 percent of corner labor.
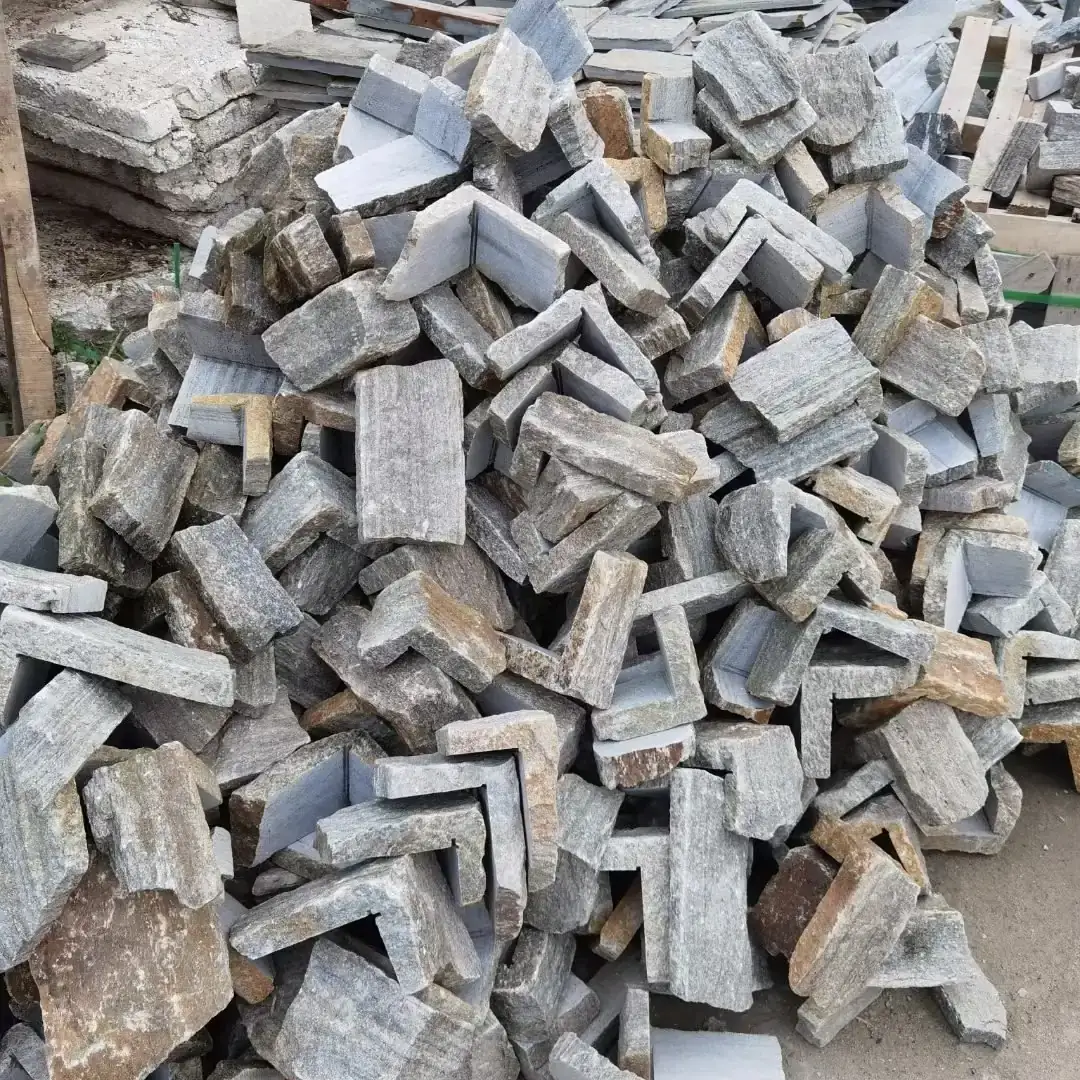

Face stones separating from a backing before the container opens is the other factory-side failure, and the one most often pinned on the installer. Our panels use marine-grade epoxy bonding and ship under a 26.5 tonne ocean load across a -30 to +50 degree C range. That is the transport condition the bond is specified for, not a field adhesion result.
What only the field owns
Everything below the stone belongs to the installer, and none of it exists yet when the container seals. A pre-shipment inspection protects landed cost and receipt, and a third-party factory inspection settles whether product matched the order. Neither one reaches the wall behind the stone.
The Walkthrough Table
Column three is the point. Each checkpoint is tagged to the document that owns it, so you know which side of the manufactured-versus-natural line you stand on before arguing.
| Checkpoint | Pass Condition | Owning Document | Inspection Window |
|---|---|---|---|
| Water-resistive barrier | Two layers shingle-lapped, 2 in horizontal, 6 in vertical, 16 in past corners; one ply only on a drained wall | MVMA; CMHA TEC-001; adopted code | Before lath |
| Lath | 2.5 lb/sq yd self-furring to ASTM C847; lap size per the accepted submittal | ASTM C1063 and C847; MVMA and Echelon differ on lap size | Delivery and before coat |
| Fasteners | Spacing and bite match the accepted submittal; published guides range 6 to 7 in spacing and 3/4 to 1-1/4 in bite | Guides conflict; C1780 1.4 makes the contract documents decisive | Before scratch coat |
| Lath embedment | 1/4 in mortar between lath back and coat back over 50 percent of area | MVMA and CMHA, stated identically | Before setting bed |
| Flashing | Corrosion resistant at all penetrations and terminations; WRB laps the flashing, 9 in over the head fin, sealed jamb joint at windows | MVMA; disclaimed by ASTM C1780 | Before lath |
| Weep screed | 3.5 in attachment flange terminating behind the WRB, metal 26 gauge minimum, WRB lapped over the flange | MVMA | Before coat, then handover |
| Base clearance | Stud wall: 4 in above grade, 2 in above paving, 1/2 in only on a walking slab on the same foundation. Foundation and CMU cases differ; see text | MVMA, CMHA and producer guides agree on the stud-wall pair | After finished grade |
| Drainage space | Unbridged by scratch coat; mortar screen present or gap proven clear | MVMA | Before stone |
| Mortar assembly | Coat nominal 1/2 in; coat plus bed nominal 1 in from WRB to unit back, with squeeze-out | MVMA | During installation |
| Pre-set dampening | Coat cured to the delivered product’s interval, damp to appearance, no standing water | MVMA; producers differ at 24 and 48 hours | Signed hold point |
| Weather bounds | Protected below 40 F during and after install; water, shade or mist above 90 F | MVMA; TMS 602 cold-weather practice | Daily log |
| Hollow sound | House protocol above; no published threshold in the sources reviewed | None. This is our rule | Mock-up and handover |
The Sign-Off Sheet
Eight lines, one per hold point. Print it, initial it, photograph the layer before it closes, and file by elevation, because a dated sheet is what converts the table above into evidence.
| Hold Point | Signed Off Before | Elevation | Initials and Date |
|---|---|---|---|
| Barrier plies, lap direction, corner laps | Lath | ☐ | |
| Flashing at penetrations and terminations | Lath | ☐ | |
| Screed flange behind WRB, gauge, WRB lapped over flange | Lath | ☐ | |
| Lath weight, lap, fastener pattern to submittal | Scratch coat | ☐ | |
| Embedment breakout at 1/4 in over 50 percent | Setting bed | ☐ | |
| Cure interval, dampening, air temperature logged | Stone | ☐ | |
| Base and transition clearances at finished grade | Backfill and paving | ☐ | |
| Mock-up tap map agreed as the reference tone | Production start | ☐ |
Write the Checklist Into the Order
The contract is where the checklist becomes enforceable
The field checklist starts at the purchase order, the only place you can still choose your terms, and the sentence below is the one to put there. Pair it with a jointly approved mock-up, which is what gives your hollow-sound reference tone standing, and check panel numbers against the veneer thickness ranges your substrate and joint detail can carry.
Contract sentence to place in the purchase order: “The manufacturer’s written installation instructions issued with the delivered lot govern workmanship and constitute the acceptance standard for all concealed-stage hold points. Work not signed off at a hold point before the subsequent layer is applied shall be removed and reinstalled at the contractor’s cost, without recourse to the product warranty.”
The consequence half is the operative part. Without it, a concealed defect you cannot prove becomes an argument about the stone, and the stone is the one party with paperwork on its side.
Commercial work adds an inspector you did not hire
On engineered and commercial projects, adhered masonry veneer normally carries special inspection under the administrative provisions of the building code, performed to the masonry inspection manual by an accredited agency. That is a third set of eyes on the same concealed layers at the moments this walkthrough marks as windows. Ask who the inspector is before the barrier goes up and put your sign-off sheet beside theirs so the two records agree on dates and elevations.
What to do when a check fails
Failures sort three ways. Fix now where the layer is exposed: add a barrier ply, restripe a lap, re-fasten lath. Rework with records where the stone is on and the failure is isolated: photograph, mark, log the grid location and cut out units with a note crossing a joint. Escalate the elevation where the failure is systemic. A bridged drainage space or a lap running the wrong way over a flashing repeats on every square foot the crew has not touched. Keep the evidence in one folder per elevation: your hold-point signatures and tap map beside the loading video, pre-shipment photos and installation guide from our file. That closes the argument about which side of the line created a defect.
Conclusion
Acceptance is a timing problem, not a taste problem. A buyer who inspects only the finished face is inspecting the one layer that cannot hide anything. The durable value here is the table’s third column: knowing which document owns a number tells you whether you cite a requirement or an analogy.
- Close the gap between C1780 and C1242 by naming the manufacturer’s instructions as the acceptance document in the contract, and score every conflicted number against the accepted submittal rather than whichever guide the crew read.
- Publish your tap protocol before the mock-up, and ask for an Appendix X1 shear bond when a dispute will not settle on sound.
Send elevations to Top Stone Panels and we return the installation instructions, module data and corner geometry for your submittal.
Frequently Asked Questions
What does an inspector check on stone veneer?
Two groups. Visible at handover: base clearance, terminations, joint detailing, color and thickness consistency, efflorescence, and hollow sound on a tap grid. Checkable only before closure: barrier plies and lap direction, flashing at penetrations and terminations, screed flange and gauge, lath weight and embedment, fastener penetration and spacing, bed thickness, and the drainage space.
Is natural thin stone veneer inspected against the same standard as manufactured stone?
Not cleanly. C1780 is written for wet-cast or dry-cast units, and its Note 2 refers adhered natural stone veneer to Guide C1242, which covers anchors and anchoring systems rather than surface bonding. C1780 section 1.4 makes the contract documents and the code having jurisdiction govern workmanship, so name the manufacturer’s instructions in the submittal.
How high off the ground should stone veneer stop?
A minimum of 4 inches above grade and 2 inches above paved surfaces such as driveways and patios on a stud wall. MVMA drops the paving figure to 1/2 inch only where the surface is a walking slab supported by the same foundation as the wall. Veneer run down a foundation or CMU wall follows a different pair of numbers, so confirm which case you are standing in front of.
Is a hollow sound in stone veneer a defect?
Sometimes, and no document we could read says when. The 68-page MVMA guide contains no hollow or drum criterion in full text, and CMHA MSV TEC-001 sets none. CTASC calls sounding “a qualitative test” that “is subjective” and sets no threshold. Our protocol rejects notes crossing a joint into an adjacent unit, sitting at a termination or penetration, or accompanied by visible movement, and accepts an isolated center note with full perimeter contact.
Who inspects adhered stone veneer on a commercial building?
Usually two parties: the contractor’s own quality check, and a special inspection agency engaged under the building code for engineered and commercial work, observing masonry to the applicable inspection manual. Get that agency’s hold-point list before the barrier goes up, since their windows and yours cover the same concealed layers.