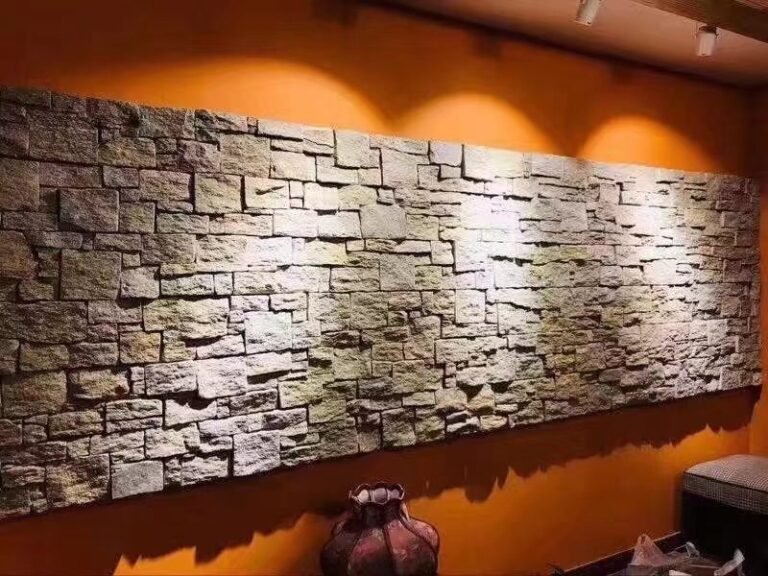
The kitchen island has quietly become the most photographed surface in the house. It is the breakfast table, the homework desk, the buffet, and the first thing visitors walk toward — yet most islands still wear plain cabinet panels on every vertical face while the stone budget gets spent flat on the countertop. A stone backsplash treatment on the island itself flips that logic: the vertical faces are what people actually look at across the room, and natural stone is the material that rewards that attention.
These five layout ideas cover the ways thin stone veneer can work on an island, from a full waterfall wrap to a single splash panel behind the prep sink. Each one names the format and color family that carries it best, using Top Stone Panels products at real dimensions — 36×10 cm ledgestone for tight and curved zones, 15×60 cm stacked panels for tall faces. Kitchen planning standards from the National Kitchen and Bath Association treat the island as the room’s primary work and gathering hub; these layouts assume exactly that role. If you want the broader kitchen picture first, our eight kitchen designs with natural stone panels covers perimeter walls as well.
Key Takeaways
- Islands reward stone on vertical faces — ends, bar fronts, and splash zones — not just on the countertop.
- 36×10 cm thin ledgestone at 0.7-1.2 cm is the default island format; 15×60 cm panels suit tall waterfall faces.
- Natural stone is Class A fire-rated, so splash zones behind island cooktops are safe territory.
- Seal splash zones near sinks and hobs; dry faces need little more than dusting.
- L-corners and mesh-backed panels solve island edges and curves without field improvisation.
1. Waterfall Stone Ends
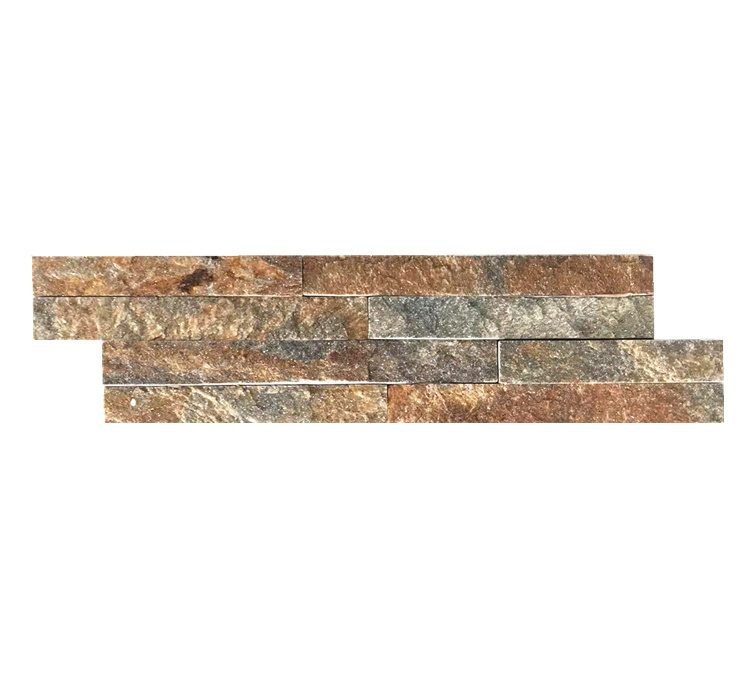
The waterfall concept runs the island’s surface material down its ends to the floor. Designers usually do it with the countertop slab, which costs a fortune in mitered stone. Thin ledgestone delivers the same visual move for far less: panels run vertically down both end faces, and L-corner pieces give the top edge a crisp 90-degree return where the “waterfall” begins.
Rustic Copper and Bronze Sparkle quartzites catch kitchen lighting with mica flecks, so the ends read as warm metal in the evening. For calmer kitchens, Sparkle Ice Grey keeps the geometry without the warmth. This layout flatters islands that sit perpendicular to sight lines — the ends are the faces your living room sees.
Verdict: The highest-impact single move for a freestanding island. Best on islands viewed end-on from living or dining areas.
Consider first: end faces must be flat and plumb; both ends should come from one batch for matching shade.
2. Wet-Zone Splash Panel
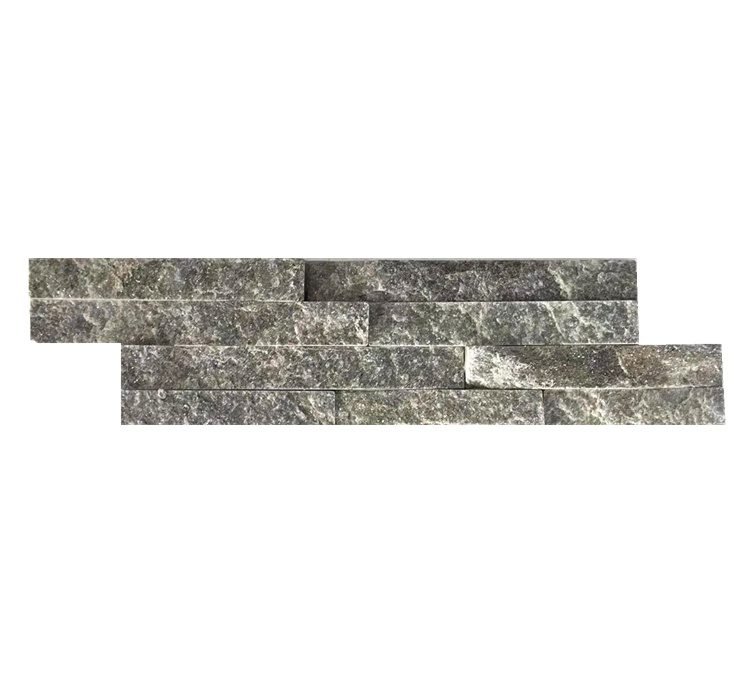
Islands that carry a prep sink or a rinse station need a real splash surface, and this is the layout where stone earns its keep. A single stone panel field rises from the countertop behind the wet zone, protecting the wall or the island’s raised back from splashes while giving the kitchen a composed, built-in look. Green Quartzite and Cream Quartzite both work beautifully here — the greens bring a botanical note that pairs with herb pots and timber boards.
Seal this panel after installation: splash zones meet oils, acids, and food color, and a penetrating sealer keeps those stains on the surface where they wipe off. Stone’s Class A fire performance also matters if the wet zone sits near a hob — one material covers both risks.
Verdict: The most functional layout — protection plus beauty where the island works hardest. Best for islands with sinks or hobs.
Consider first: sealing is mandatory here, and the panel top needs a clean termination (cap strip or shadow gap).
3. Breakfast Bar Front

Where the island extends into a raised breakfast bar or an overhang seating area, the fascia facing the stools becomes a feature wall at eye level for everyone sitting there. Clad that fascia in ledgestone and the seating side of the island becomes the room’s warm center — people run their hands along it, which flat cabinet panels never invite.
Mosaic-style ledgestone in Bronze Sparkle or Oyster carries the best texture at this viewing distance: fine, varied, and lively without shouting. Keep the stone to the fascia and let the countertop overhang stay smooth; the contrast between cleft stone and polished top is the whole composition.
Verdict: The hospitality layout — turns an island into a gathering place. Best where seating faces the kitchen.
Consider first: knees and footrests brush this face; keep relief moderate and joints tight so the surface stays cleanable.
4. Two-Tone Island Base
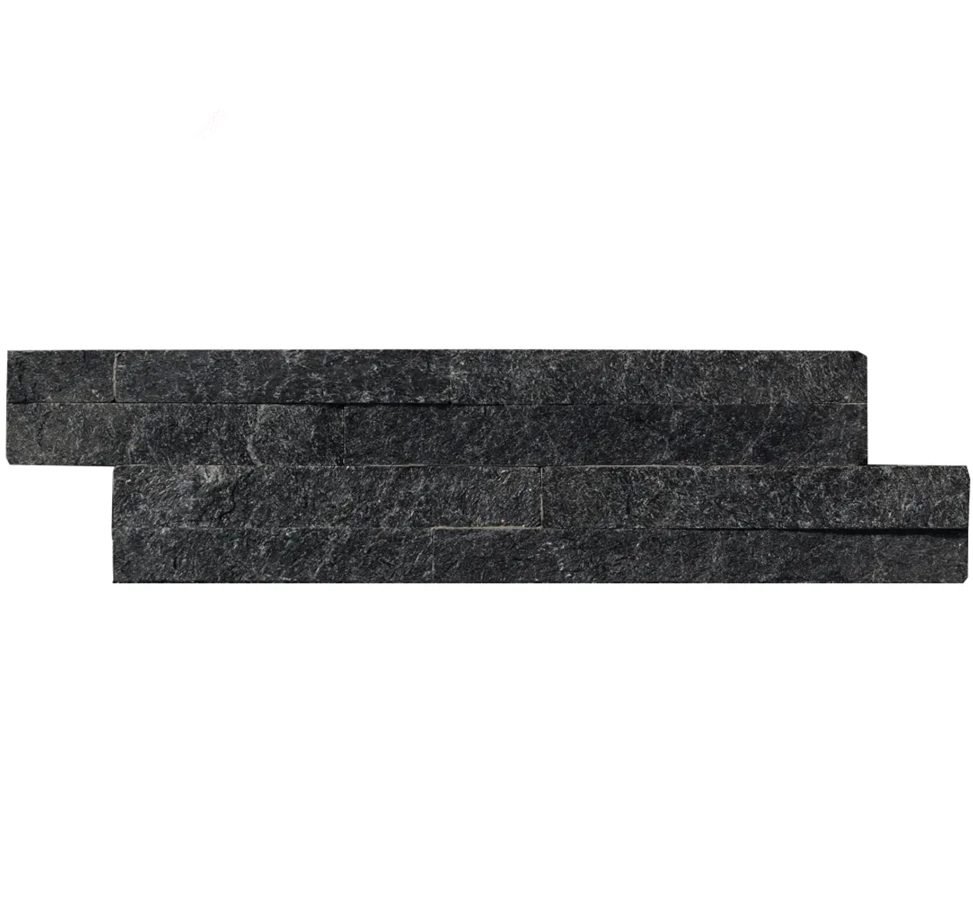
Two-tone kitchens pair a light or timber perimeter with a contrasting island, and stone is the strongest possible contrast material. Clad the island’s full perimeter base in Sparkle Black or charcoal slate and the island reads as a monolith set among cabinetry — grounded, mineral, deliberate. The sparkle in the black quartzite keeps the base from reading flat under toe-kick lighting.
This layout also hides the working scars of family kitchens: dark, textured stone faces shrug off scuffs and splash marks that show instantly on painted panels. When the island doubles as the mudroom drop zone, that forgiveness is a feature, not a compromise.
Verdict: The bold grounding move for bright or all-white kitchens. Best on islands as the room’s visual anchor.
Consider first: dark stone shows dust sheen in raking light; keep a lint-free care routine in the room.
5. Curved and Wrapped Island Geometry
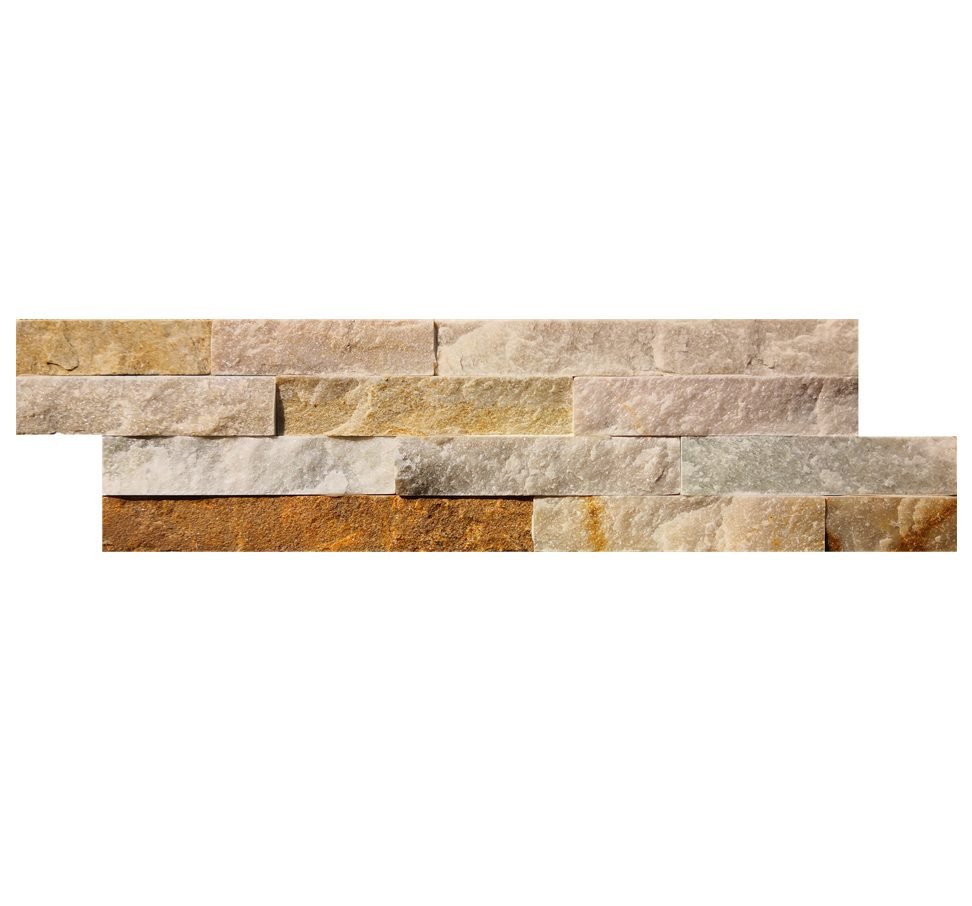
Rounded island ends, semicircular breakfast bars, and wrapped column features used to be off-limits to stone unless the budget stretched to curved fabrication. Ultra-thin, mesh-backed ledgestone changes that: at 0.7-1.2 cm and 36×10 cm per piece, panels follow gentle radii piece by piece, and the small module size keeps the coursing smooth around the bend. Oyster and Cream tones keep curved forms light and sculptural.
The design payoff is softness. Kitchens are full of rectangles; one curved, stone-clad island end gives the eye a place to rest and makes custom joinery feel genuinely custom. For installers, the rule is patience over heroics — set the curve in small increments and check the coursing line every few pieces.
Verdict: The custom-kitchen signature. Best on show kitchens and hospitality projects where geometry sells the design.
Consider first: tighter radii need smaller modules and more setting time; dry-fit the curve before any adhesive opens.
Build These Looks With Factory-Direct Panels
Every layout above runs on the same two formats: 36×10 cm thin ledgestone and 15×60 cm stacked panels in quartzite and slate color families. Physical samples ship in 1-3 days so you can approve texture and shade before committing.
If the stone is going on the island base itself rather than the splash zone, see our stacked stone kitchen island design guide for full-wrap, two-tone and waterfall base treatments with the same panel formats.
Class A fire-rated | Batch vein-matched color | L-corners for crisp island edges
Which Layout Fits Your Kitchen
The five ideas are not mutually exclusive — waterfall ends and a wet-zone splash panel combine naturally on the same island. When space and budget allow only one move, use this summary:
| Layout | Best For | Recommended Format |
|---|---|---|
| Waterfall ends | Islands viewed from living areas | 36×10 cm ledgestone + L-corners |
| Wet-zone splash panel | Islands with sink or hob | 36×10 cm ledgestone, sealed |
| Breakfast bar front | Seating-side hospitality | Mosaic ledgestone fascia |
| Two-tone island base | Bright kitchens needing grounding | Full-perimeter stacked panels |
| Curved wrap | Show kitchens, curved joinery | Mesh-backed mini ledgestone |
Whatever the layout, the substrate discipline stays the same: cement board or a properly prepared rigid base, cement-based adhesive, and batch-matched panels so one island never shows two shades. Interior wall installation, DIY vs professional walks that process, and eight interior feature wall designs shows how islands connect to the rest of the room.
One more variable deserves a decision before panels go on: lighting. Under-cabinet strips, pendant clusters over the bar, and toe-kick lighting all rake across island stone at low angles, which amplifies cleft relief and sparkle in equal measure. Check your chosen color under the kitchen’s actual fixtures — sparkle quartzites gain drama in raking light while matte slate gains shadow depth, and neither behaves the same under showroom fluorescents. When two layouts compete on the same island, the tiebreaker is usually sight lines: clad the face the main seating or entry sees first.
Planning an Island Stone Layout
Measure the Faces That Matter
Island stone is ordered by vertical face, not by countertop area — a mistake that skews quotes on every first project. Measure each face you intend to clad: end panels, bar fascia, splash zone height above the counter. Add 5-10% for cuts and pattern blending, and count corner pieces separately, because L-corners are supplied as finished components rather than cut from flat panels. The buyer’s quantity formula gives the full calculation method with worked examples.
Prepare the Island Substrate
Cabinet carcases are not a bonding surface. Island faces that will carry stone need cement board fixed to the carcass, or a masonry backing where the island is built in. The board must be flat, rigid, and dust-free before adhesive goes on, and cut edges should land on solid backing rather than spanning gaps. The substrate comparison explains why cement board wins for interior stone.
Order One Batch, Approve One Sample
Natural stone shade varies vein by vein, so a two-shade island is usually an ordering error, not a design choice. Order the whole island’s panels from a single batch — production runs are vein-selected to hold shade within one order — and approve a physical sample under your own kitchen lighting first. Samples ship in 1-3 days, which makes the approval loop fast. The 10-point sample checklist tells you exactly what to inspect when the box arrives, and the stacked stone color guide maps the color families used in these five layouts.
FAQ
Can stone backsplash panels be installed on a kitchen island?
Yes. Thin stone veneer bonds to cement board or properly prepared island substrates with cement-based adhesive, and at 0.7-1.2 cm thick, ledgestone adds minimal weight. Islands need the same preparation as any interior wall: a flat, rigid, dust-free base. Panels then set course by course, with L-corners finishing the edges.
Is natural stone safe behind a cooktop or island hob?
Natural stone is 100% non-combustible with Class A fire performance, so it is one of the safest materials you can put behind heat sources. Slate and quartzite also tolerate temperature swings from -30°C to +50°C without stress. Leave normal clearances per the appliance manual and seal the splash zone for easier cleaning.
Which stone format works best for island backsplashes?
36×10 cm thin ledgestone is the default for islands: light, easy to wrap around ends and curves, and fine-grained enough for interior scale. 15×60 cm stacked panels suit tall waterfall faces where fewer seams read calmer. Mesh-backed construction helps on curved island geometry.
Does a stone island splash need sealing?
In splash zones near sinks and cooktops, yes — a penetrating sealer keeps oil and food stains from reaching the stone’s natural pores. Reapply per the sealer manufacturer’s schedule. Away from water and cooking, natural stone faces need little beyond dusting.
What colors suit a kitchen island feature in stone?
Whites and creams (Royal White, Cream Quartzite) brighten galley-style islands; sparkle greys add movement under task lighting; sparkle black grounds bright cabinetry; multicolor slate blends hide splash marks in busy family kitchens. Batch-specific vein selection keeps the shade consistent across the order.
What is the MOQ for stone veneer for a showroom or project order?
The MOQ is one 20GP container per product line, with physical samples shipping in 1-3 days. For multi-unit residential projects or showroom displays, mixed formats from the same vein can share a container subject to production scheduling.
Conclusion
Kitchen islands deserve stone where eyes actually land — the ends, the bar fascia, the splash zone — and thin veneer formats make every one of those faces practical. Waterfall ends deliver drama, splash panels deliver function, bar fronts deliver warmth, two-tone bases deliver grounding, and curved wraps deliver the custom signature.
- 36×10 cm ledgestone covers islands’ tight zones and curves; 15×60 cm panels cover tall faces with fewer seams.
- Class A fire performance makes stone the safe choice behind island cooktops.
- Seal wet zones; match one batch per island so shade never splits across faces.
- L-corners and mesh-backed panels solve edges and radii that flat slabs cannot.
Put a real sample on your island before you decide the layout — request ledgestone samples from Top Stone Panels and see the texture under your own kitchen lighting.