This guide is a ten-point checklist for evaluating stone panel samples before committing to a bulk order. It is written for B2B buyers — distributors, importers, and procurement managers — who are sourcing natural stone cladding from China and need to verify that the sample on their desk is a reliable predictor of what will arrive in the container. Each check takes less than five minutes. Together, they take about an hour. That hour is the cheapest insurance available against a 26-ton mistake.
Key Takeaways
- Request at least three samples per stone type: one for physical testing, one for a test wall, and one as a reference standard for comparing the production shipment.
- Thickness tolerance of plus or minus 1 mm is the industry standard — anything wider indicates poor factory QC.
- Natural stone color must run through the full thickness; surface-only color signals a treated or dyed product.
- Backing quality — cement vs epoxy bond — determines the panel’s long-term performance and is visible on the reverse side of the sample.
- A simple water drop test reveals absorption rate, which predicts freeze-thaw performance for exterior applications.
- Professional suppliers send documentation with every sample: spec sheet, lab test reports, and factory profile. No documents is a red flag.
- Check 1: Surface Texture and Finish
- Check 2: Color Consistency Across the Sample
- Check 3: Thickness Tolerance
- Check 4: Backing System Quality
- Check 5: Edge Precision and Cut Quality
- Check 6: Water Absorption Test
- Check 7: Weight and Density
- Check 8: Odor and Chemical Residue
- Check 9: Accompanying Documentation
- Check 10: Installation Test on a Sample Wall
- FAQ
Check 1: Surface Texture and Finish
Hold the sample at arm’s length in natural daylight — not under a fluorescent warehouse light. The surface texture should be consistent with the product description: split-face stone should show a rough, three-dimensional profile; natural cleft slate should show smooth planar surfaces with subtle undulation; honed or polished finishes should be uniformly smooth with no visible tool marks.
Run your fingertips across the face. For split-face quartzite, you should feel sharp ridges and mineral sparkle — individual quartz grains that catch the light. For slate, the surface should feel cool, smooth, and slightly waxy, like a well-worn chalkboard. For sandstone, expect a granular texture that feels warm and slightly abrasive, like fine sandpaper.
What you are checking for is consistency within the sample. If one area of the panel is rough and another is smooth, the factory is mixing stone from different quarry faces or different processing batches. That inconsistency will compound across a container of 400 square meters, and the installer will spend hours trying to blend panels that should have matched from the crate. The geological reason for texture variation is explained in our guide to sourcing real thin stone veneer from slate, quartzite, and sandstone.
Check 2: Color Consistency Across the Sample
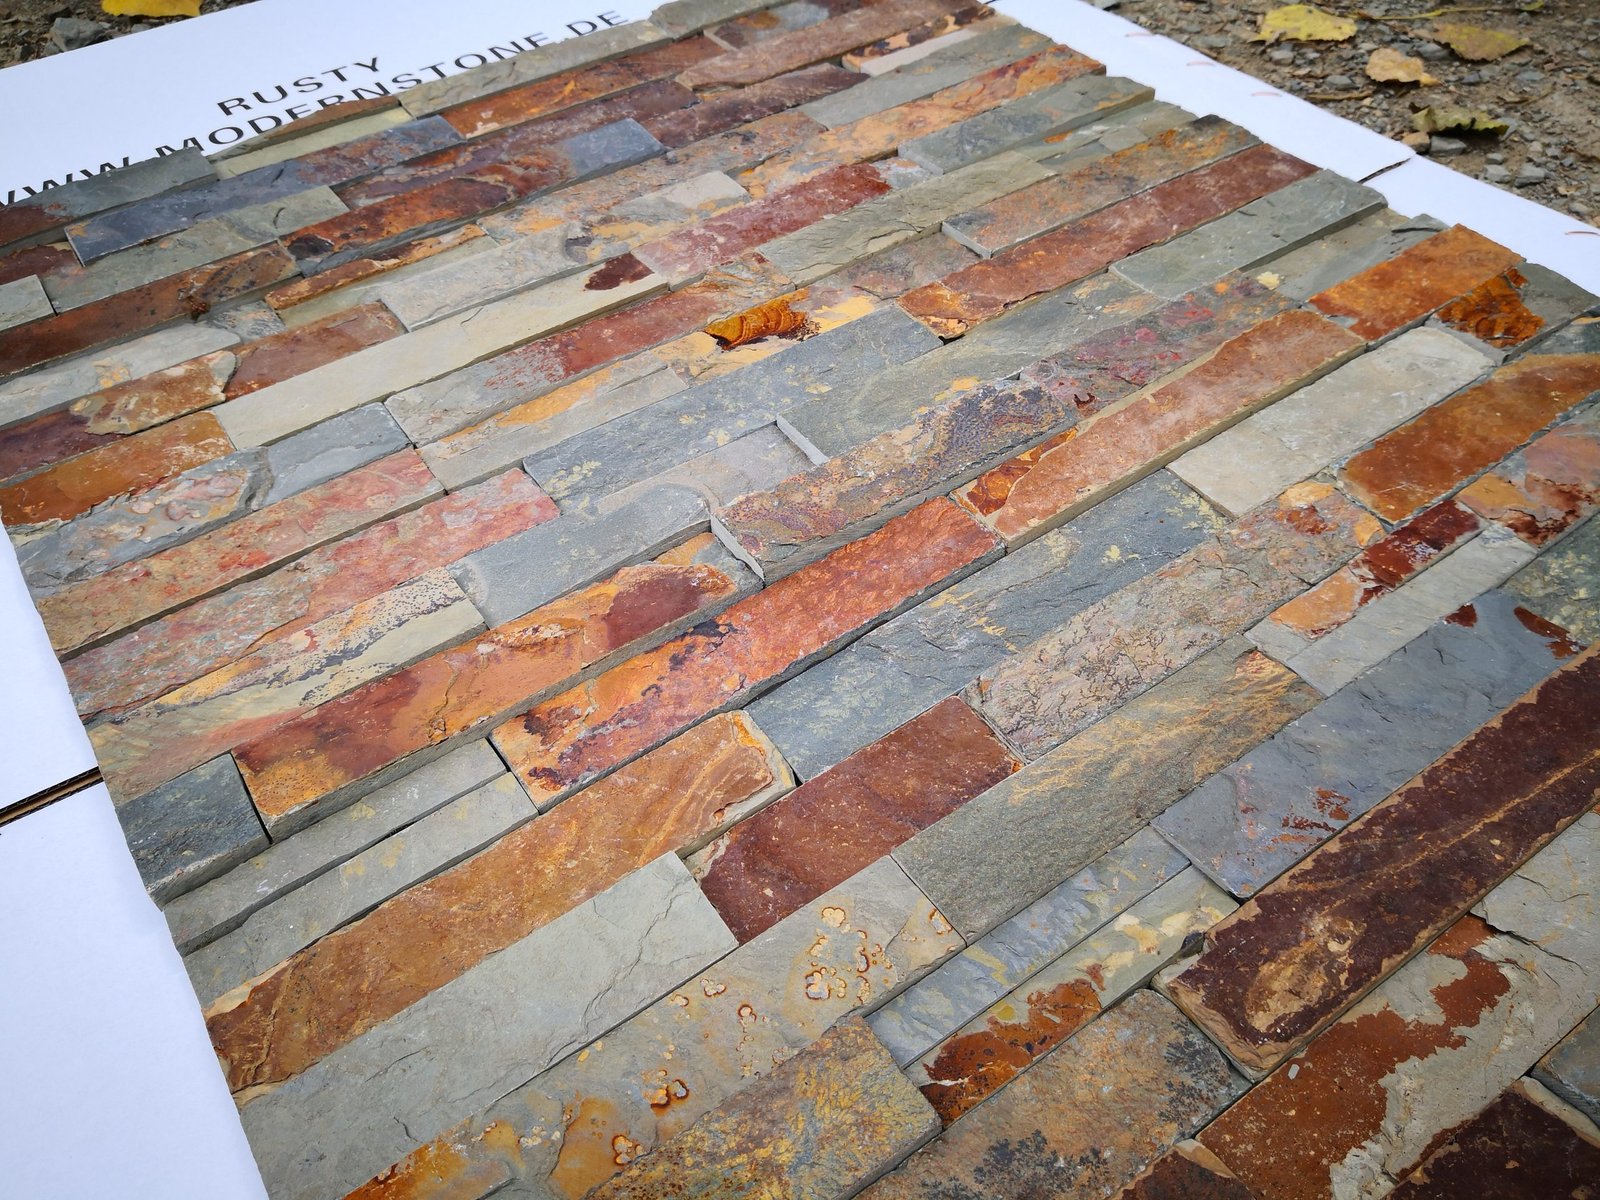
Examine the face color, the edge color, and the color visible at the back where the stone meets the backing. In natural stone, the color should run through the full thickness — the edge and the back should show the same hue and saturation as the face. If the face is dark grey and the edge is pale white, the stone has been surface-treated with a dye, stain, or pigment wash that does not penetrate the full depth of the material. That treatment will fade under UV exposure on an exterior wall within three to five years, leaving the pale core exposed.
Manufactured stone — cast concrete with surface pigment — almost always shows a color break at the edge. The core is grey concrete, the surface is colored. This is the single fastest visual test to distinguish real stone from fake stone, and it takes about two seconds. If a sample shows a color break and the supplier claims it is natural stone, the sample is mislabeled or the supplier is dishonest. The full comparison between natural and manufactured stone is covered in our analysis of real stone vs faux stone panels.
Also check for color variation between the stone strips on a single panel. Some variation is normal and desirable — natural stone is not a uniform material, and a panel where every strip is exactly the same color is either dyed or manufactured. But the variation should fall within a coherent range. A panel specified as “rusty slate” should show strips in rusty brown, dark grey, and occasional orange iron-oxide banding — not strips that are bright yellow, green, or pure white. Wide color swings indicate that the factory is mixing stone from different quarry veins on the same panel, which is a batch consistency problem. The quarry vein selection process is covered in our guide to batch color consistency and vein selection.
Check 3: Thickness Tolerance
Take a digital caliper and measure the panel thickness at five points: each corner and the center. The industry standard tolerance is plus or minus 1 mm from the specified thickness. A panel specified at 15 mm should measure between 14 and 16 mm at every point. If any reading falls outside this range, the factory’s cutting and calibration process is not controlled tightly enough for commercial-grade cladding.
Why this matters on the wall: if adjacent panels vary by more than 1 mm in thickness, the installer must shim the thinner panel to maintain a flush coursing line. On a 50-square-meter feature wall, that adds hours of labor and introduces a visible waviness in the finished surface. On an exterior facade of 200 square meters, it becomes a project-stopping problem. The thickness specification and its impact on both weight and performance is covered in our stone veneer thickness guide from 15 mm to 40 mm.
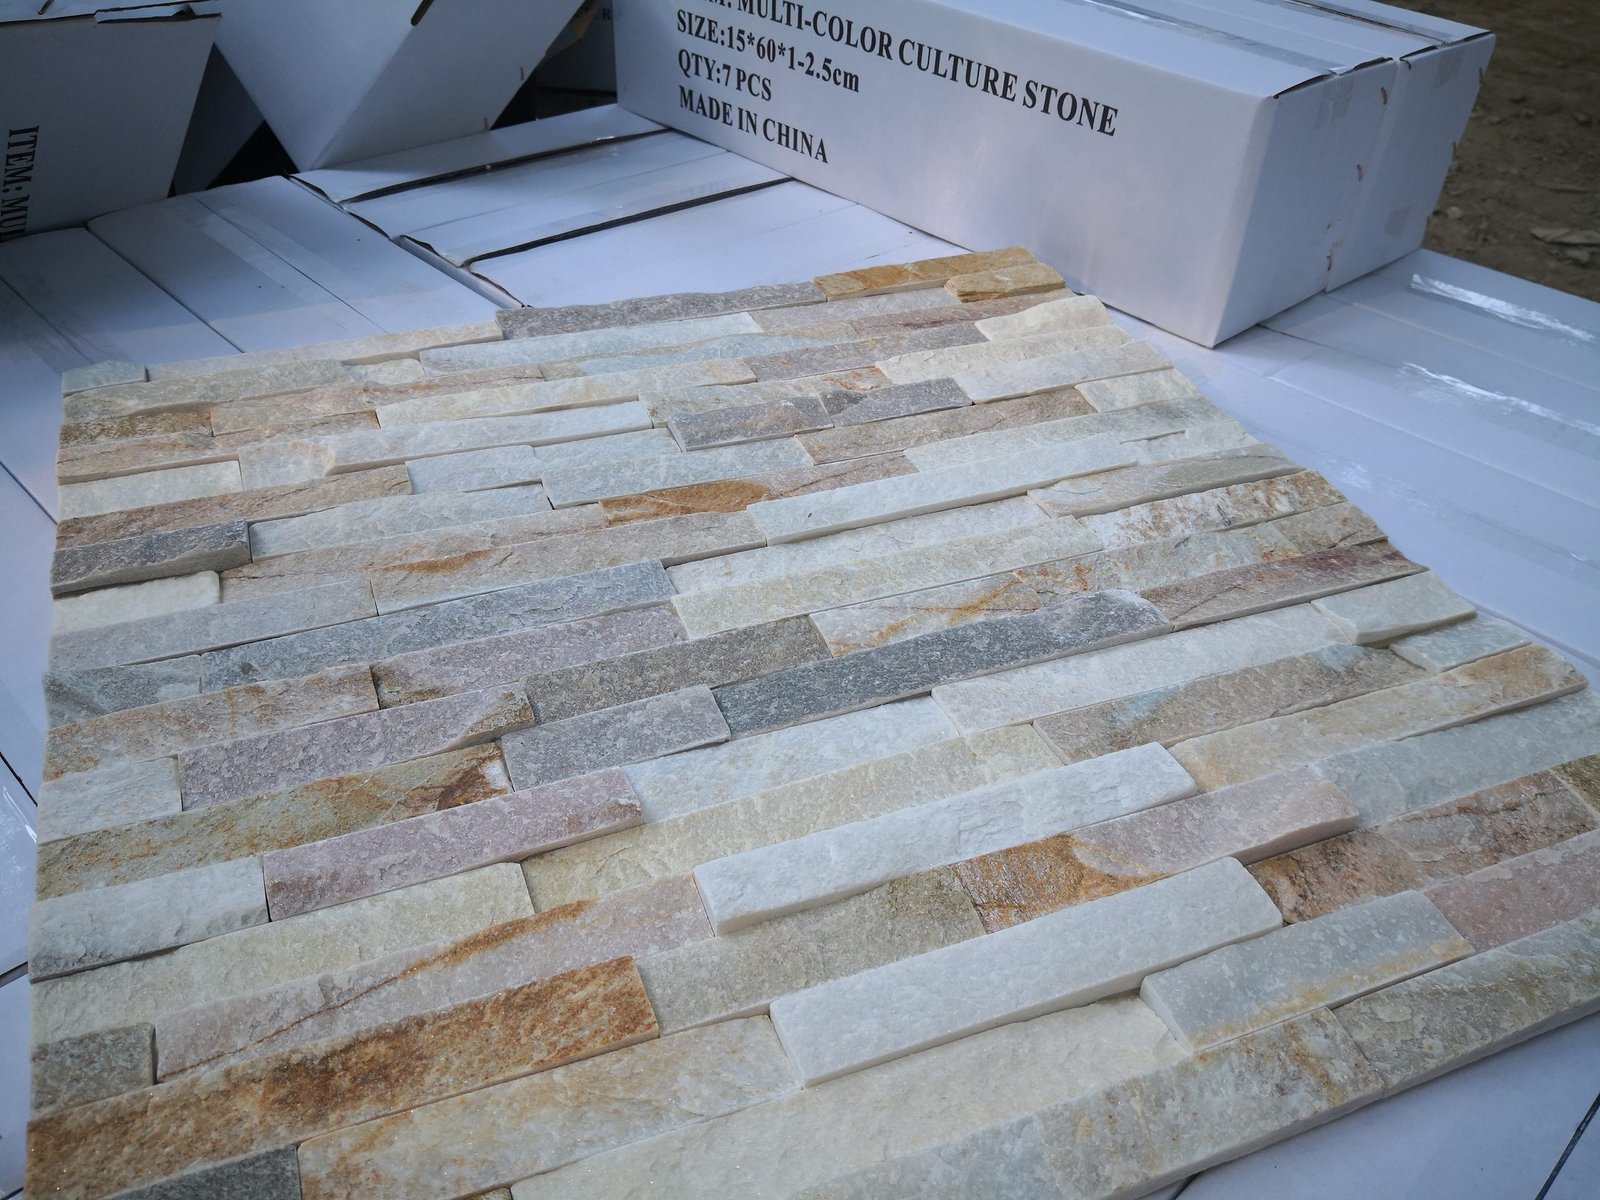
Also check the individual stone strips within the panel. In a well-made stacked stone panel, each strip is cut to the same width (typically 15 mm height for a 150 mm panel). If the strips vary in width by more than 1 mm, the horizontal coursing lines will not align when panels are placed side by side, and the finished wall will show visible “steps” in the ledger pattern.
Check 4: Backing System Quality
Turn the panel over and look at the back. The backing system is what holds the stone strips together as a single installable unit, and its quality determines whether the panel survives shipping, installation, and twenty winters on an exterior wall. Two backing systems dominate the market, and they are easy to distinguish by sight.
Cement backing appears as a grey, troweled surface covering the back of the stone strips. It should be smooth, evenly applied, and free of visible voids or gaps between the stone and the mortar. Press your thumb against the cement and the stone simultaneously and try to push them apart — there should be no movement, no flex, no sound. If you can hear a faint crackling, the bond between the cement and the stone has already failed at a microscopic level, and the panel will delaminate under thermal cycling. The technical differences between backing systems are covered in our comparison of epoxy bond vs cement backing in stone panels.
Epoxy bond appears as a darker, resin-like surface — typically brown, amber, or grey-black. The epoxy should form a continuous film across the back of the panel with no visible gaps, bubbles, or areas where the stone appears to be sitting on top of the epoxy rather than embedded in it. Gently flex the panel by holding opposite ends and applying a slight twist — the stone strips should not move independently of the backing. Any movement indicates a bond failure, and the sample has failed Check 4.
The backing system choice affects the panel’s performance in moisture, freeze-thaw, and impact environments. For exterior cladding in any climate that sees freezing temperatures, epoxy bond is the recommended specification. Cement backing is acceptable for interior feature walls and protected applications where the panel will not see sustained moisture or thermal cycling.
Check 5: Edge Precision and Cut Quality
Place the sample on a flat surface and hold a metal straightedge along each edge. The edge should be straight to within 1 mm over the full panel length (typically 600 mm). Any deviation greater than this will cause visible gaps when panels are installed side by side, and the installer will need to fill those gaps with mortar or caulk — a finish that looks unprofessional on a natural stone wall.
Examine the cut face where the stone was sliced from the block. The cut should be clean, with no visible chipping, spalling, or micro-fractures along the edge. Chipped edges on a sample indicate that the factory is using dull blades or excessive feed speed on the cutting saw, and the production batch will arrive with the same damage on a percentage of panels. A quality factory uses infrared-guided CNC diamond blades that produce clean cuts at controlled speed — the technology is described in our guide to infrared CNC cutting precision for stone panels.
Also check the interlocking edges if the panel has a male-female connection system (common in stone cladding Z-panels). The male tongue should slide into the female groove smoothly, without forcing or excessive play. If the connection is tight enough to require a rubber mallet, the panels will be difficult to install at speed. If the connection is loose enough to rattle, the finished wall will show movement between panels and the structural integrity of the cladding will be compromised.
Check 6: Water Absorption Test
Place three to five drops of clean water on the stone face and start a timer. Observe what happens.
If the water beads on the surface for 30 seconds or more before slowly being absorbed, the stone has low porosity — typical of slate (absorption below 0.4%) and quartzite (below 0.2%). These stones are suitable for exterior applications in freeze-thaw climates because the low absorption prevents water from entering the stone and expanding when it freezes.
If the water is absorbed within 10 to 15 seconds, leaving a dark wet spot on the surface, the stone is moderately porous — typical of sandstone (absorption 1 to 4%). These stones are suitable for interior applications, warm-climate exteriors, and protected locations, but they carry a higher risk of freeze-thaw damage in cold climates unless sealed with a penetrating stone sealer.
If the water is absorbed instantly, soaking into the stone within 3 to 5 seconds, the stone is highly porous — which is a red flag for any exterior application regardless of climate. A stone this porous will absorb rainwater, trap it, and crack during the first freeze-thaw cycle. Reject the sample and ask the supplier for a denser stone type. The freeze-thaw mechanism in detail is covered in our guide to freeze-thaw resistance and why density matters for cold climates.
For a quantitative test, weigh the dry sample on a kitchen scale, submerge it in water for 24 hours, dry the surface with a towel, and weigh it again. The percentage weight gain is approximately the water absorption rate. Compare this number against the product specification — and against the ASTM C97 test standard, which is the benchmark for natural stone absorption testing.
Check 7: Weight and Density
Lift the sample. A standard 15×60 cm stacked stone panel at 15 mm thickness should weigh roughly 1.5 to 2.0 kg depending on stone type. Quartzite is the densest (specific gravity around 2.65), slate is intermediate (2.7 to 2.8, but with more porosity), and sandstone is lightest (2.2 to 2.5).
If the sample feels noticeably lighter than expected, it may be a thinner panel than specified (check with the caliper from Check 3), a more porous stone than described (check with the water test from Check 6), or a manufactured stone with a concrete core (check the edge color from Check 2). If it feels heavier than expected, the panel may be thicker than specified — which adds cost per square meter and increases the structural load on the wall substrate.
Weight is also a proxy for shipping cost. A standard 20GP container loaded with stone panels at 15 mm thickness carries approximately 26 tons of cargo. If the sample weight suggests the production panels are 10% lighter than expected, the container will have unused weight capacity — which means the buyer is paying for air. Conversely, if the panels are 10% heavier, the container will reach its weight limit before it is full, and the buyer is paying for space that cannot be used. The container loading math is covered in our guide on container loading best practices for stone panels.
Check 8: Odor and Chemical Residue
Hold the sample close to your nose and smell it. Natural stone should have little to no odor — a faint mineral smell like wet rock is normal, especially for freshly cut slate. What should not be present is a chemical smell: the sharp, acrid odor of epoxy resin that has not fully cured, the sweet smell of solvent from a surface treatment, or the pungent smell of methyl bromide residue from recent fumigation.
A strong chemical odor on a sample suggests one of three things: the epoxy bond backing has not fully cured (the factory is shipping panels before the 24 to 48 hour cure period is complete), the stone has been treated with a surface sealer or enhancer that the supplier did not disclose, or the sample was packed in a container that still has residual fumigation gas. None of these is acceptable. A stone panel that smells of chemicals when installed in a client’s living room will generate a complaint within the first week — and the odor may indicate volatile organic compounds (VOCs) that are a health concern in enclosed spaces.
Also run your hand across the stone face and check for residue on your fingers. A clean natural stone surface should leave nothing on the skin. If you see a waxy, oily, or powdery residue, the panel has been treated with something that is not part of the standard product specification. Ask the supplier what was applied to the surface and why — and verify that the treatment is listed on the product specification sheet.
Check 9: Accompanying Documentation
A professional stone supplier sends documentation with every sample shipment. The documents should arrive either inside the courier box or by email within 24 hours of dispatch. The standard document set includes:
Product specification sheet. This should list the stone type (slate, quartzite, sandstone), panel format (15×60 cm, 15×55 cm, etc.), thickness range, backing type (cement, epoxy, mesh), weight per square meter, and any surface treatment applied. If the spec sheet is missing, incomplete, or handwritten on a scrap of paper, the factory does not have a formal quality management system — and the production order will reflect the same lack of process control.
Test reports. Accredited laboratory reports for water absorption (ASTM C97), flexural strength (ASTM C99), compressive strength (ASTM C170), and freeze-thaw cycling (EN 12371 or ASTM C666) are the standard set for exterior stone cladding. The reports should be dated within the last 12 months, should reference the specific stone type and quarry source, and should be issued by a recognized testing laboratory — not the factory’s own internal QC department. The ASTM standards that matter most for stone cladding are covered in our guide to ASTM standards for natural stone cladding.
Factory profile or catalog. A professional catalog showing the full product range, factory photographs, quarry images, and production capacity data. This is not a technical document, but it signals the supplier’s investment in their brand and their willingness to be transparent about their operation. A supplier who cannot produce a catalog is unlikely to produce consistent product quality.
If the sample arrives with no documentation, treat it as a data point about the supplier. A factory that ships samples without spec sheets, test reports, or even a business card is signaling that documentation is not a priority — and the production shipment will arrive with the same gaps. That means no ISPM 15 certificates for the wood packaging, no certificate of origin for customs clearance, and no pre-shipment inspection report for quality verification. The documentation requirements for a complete stone import are covered in our stone cladding purchase specification template.
Check 10: Installation Test on a Sample Wall
The final check is the most important and the one most buyers skip. Take the sample to the project site — or to a test wall in your warehouse — and install it the way the production panels will be installed. Use the same substrate (cement board, plywood, or concrete block), the same adhesive (mortar or polymer-modified thinset), and the same technique that the project installer will use.
Install at least two panels side by side to evaluate the coursing alignment, the interlocking edge fit (if applicable), and the visual rhythm of the finished surface. Step back three meters and look at the installed panels as the building owner will look at them. The coursing lines should be straight and continuous across both panels. The color variation between panels should be within the acceptable range you established in Check 2. The thickness step between adjacent panels should be invisible to the eye — if you can feel a ridge where one panel meets the next, the thickness tolerance has failed Check 3 in practice even if the caliper said it passed.
Leave the test wall in place for at least one week, ideally through a rain event if the application is exterior. Check the panels daily for any signs of delamination (stone strips separating from the backing), efflorescence (white salt deposits on the surface, which indicates high absorption or cement backing moisture migration), or color change (which may indicate UV sensitivity in a treated surface). The UV performance of natural stone is covered in our guide to why slate and quartzite never fade under UV exposure.
The test wall is also the moment to evaluate the installer’s experience. If the panels are difficult to cut, if the adhesive does not bond cleanly, if the coursing pattern is confusing to follow — these are installation problems that will multiply across a full project. A good sample should install cleanly with standard tile-setting tools and produce a finished wall that looks like the showroom photograph. If it does not, the sample has failed the most practical test of all, and the production order should not be placed until the supplier explains why.
Frequently Asked Questions
How many stone panel samples should I request before placing a bulk order?
Request at least three samples per stone type and color: one for physical evaluation (caliper, water test, backing inspection), one for a test wall installation, and one to keep as a reference standard for comparing the production shipment when it arrives. For projects with multiple stone colors, request samples for every color to verify batch consistency across the range.
Should the sample represent the exact production batch?
Ideally yes, but most factories ship samples from current stock that represents the same product line, stone type, and backing system. The critical requirement is that the sample comes from the same factory — not from a trade show display or a different supplier. When the production order is placed, request a batch reference sample cut from the actual production run for final comparison on delivery.
What is acceptable thickness tolerance in a stone panel sample?
The industry standard is plus or minus 1 mm from the specified thickness. A panel specified at 15 mm should measure between 14 and 16 mm at any point. Beyond this tolerance, the production batch will produce inconsistent coursing lines and require excessive shimming during installation.
How do I test water absorption on a stone panel sample?
Place a few drops of water on the stone face and time the absorption. Water should bead for at least 30 seconds on exterior-grade stone (slate, quartzite). For a quantitative test, weigh the sample dry, submerge for 24 hours, and weigh again — the weight gain percentage approximates the absorption rate.
What documents should accompany a stone panel sample?
A professional supplier sends a product specification sheet, accredited laboratory test reports (absorption, flexural strength, freeze-thaw), and a factory catalog or profile. Samples arriving with no documentation signal a supplier who does not invest in quality management — and the production order will likely reflect the same gap.
How long does it take to receive stone panel samples from China?
Top Stone Panels dispatches samples within 1 to 3 working days of the request. Courier delivery (DHL, FedEx, UPS) from Yi County, Baoding, typically takes 5 to 7 days to the US and EU. Each sample shipment includes full documentation and is tracked door to door. Request samples through our contact page with your stone type, format, and destination address.
Ready to evaluate samples from Top Stone Panels? Request your sample kit with full documentation by visiting our contact page. For more on sourcing stone panels from China, see our guides on sourcing stone cladding from China, verifying a stone supplier, and negotiating stone panel pricing.