A distributor’s showroom is where stone cladding stops being a catalog photo and becomes something an architect can touch, a contractor can weigh in their hands, and a developer can picture on their building. The display wall is the centerpiece of that experience — and when done right, it is the single highest-converting sales tool in the building.
Yet most stone distributors underinvest in their display walls. They bolt a few sample panels to a plywood board, stick a printed label underneath, and wonder why walk-in customers leave without ordering. The distributors who close the most showroom visits are the ones who treat their display wall as a selling environment: proper substrate, intentional lighting, curated product selection, and clear information architecture that guides a buyer from curiosity to specification.
This guide walks through how to build a stone cladding display wall that earns its floor space. It is written for distributors who source from factories like Top Stone Panels and sell to contractors, architects, and building material retailers in North America and Europe.
Why a Display Wall Converts Better Than Samples in a Rack
Before getting into construction, it helps to understand why the display wall format outperforms the traditional approach of stacking loose samples on shelves or in pull-out racks.
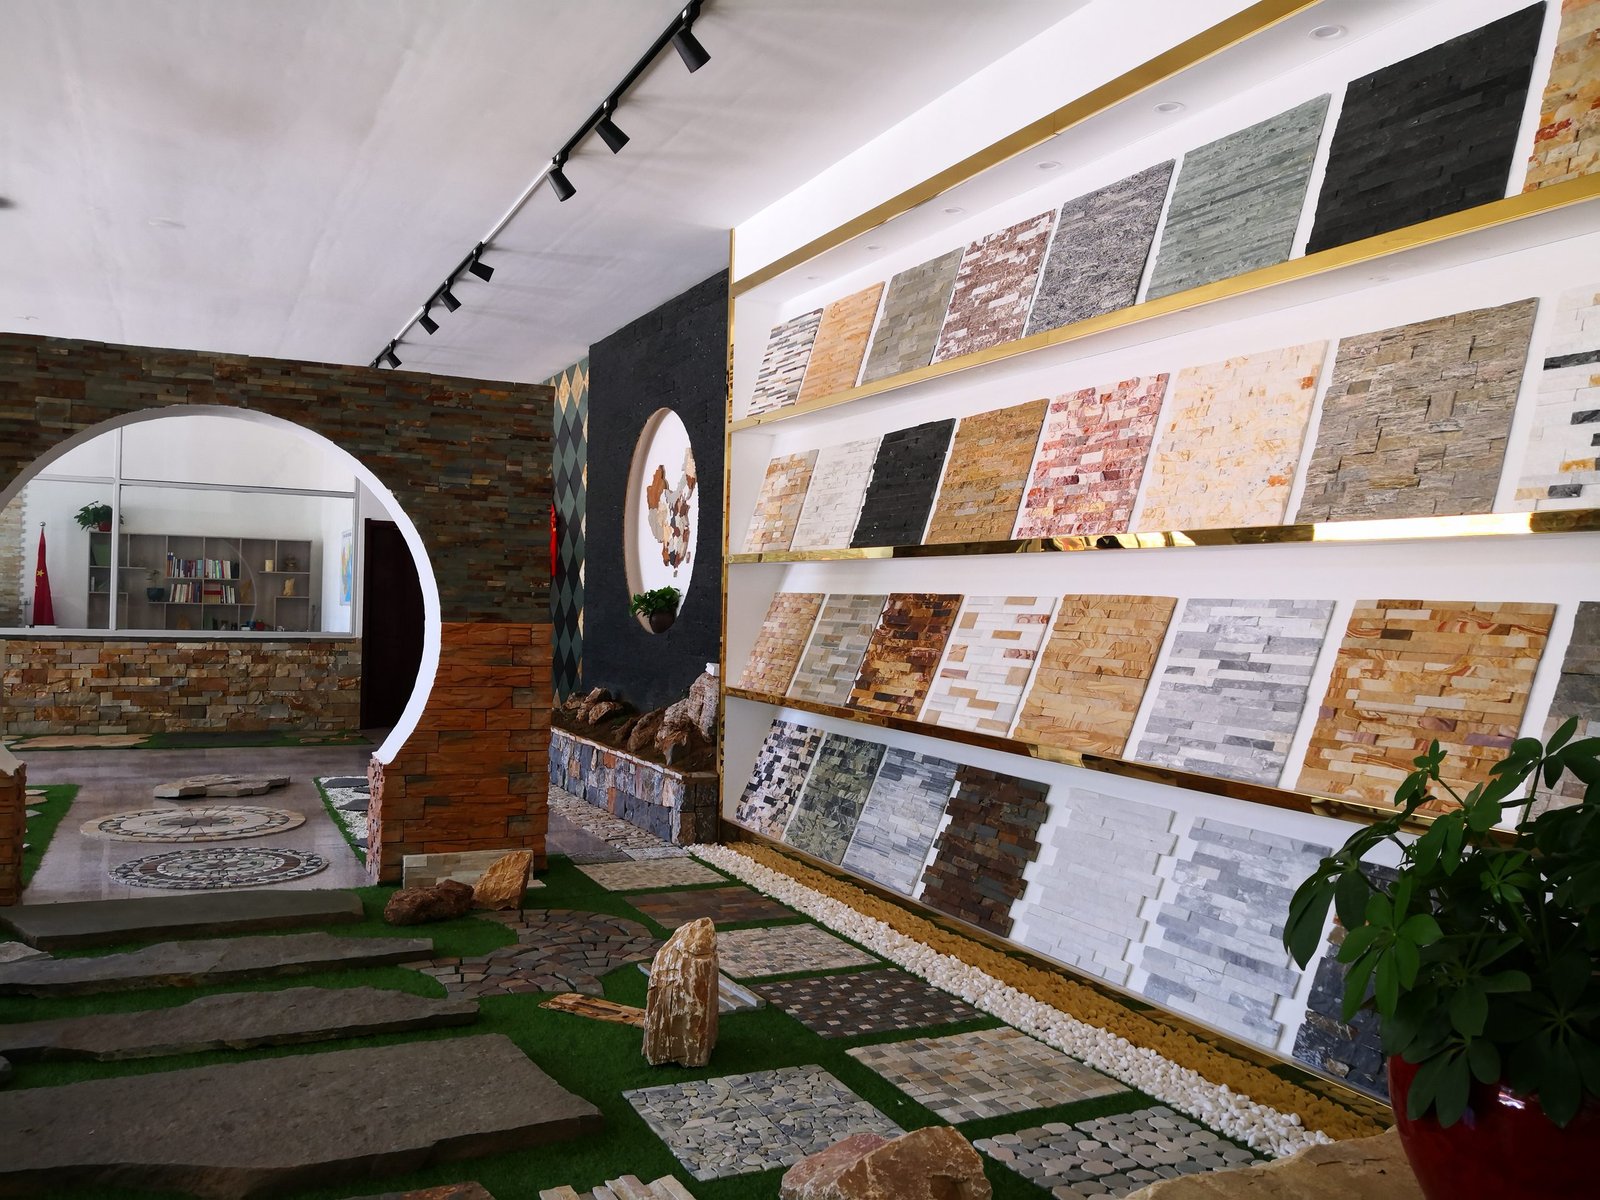
A display wall shows stone cladding the way it will look installed — at full scale, in context, with proper lighting. When an architect sees a 2-meter section of stacked stone panels running vertically with clean coursing and shadow lines, they are seeing their own building. That mental projection is impossible with a 15×15cm sample chip pulled from a cardboard box.
The conversion data backs this up. Distributors who have upgraded from sample racks to full display walls consistently report that average order size increases after the upgrade. The reason is straightforward: customers who see the full visual impact of the product specify more stone per project. They add accent walls, fireplace surrounds, and exterior features they had not originally planned because the display made the application tangible.
Planning Your Display Wall: Size, Location, and Layout
Size
The minimum effective display wall is 2.4 meters wide by 2.4 meters tall. This gives enough surface area to show 6-8 distinct stone types in sections large enough to demonstrate the visual pattern (roughly 60cm × 80cm per section). Anything smaller looks like a sample board rather than a design statement.
The ideal size for a distributor showroom is 3-4 meters wide by floor-to-ceiling height (typically 2.7-3 meters). This accommodates 8-12 stone types with breathing room between sections, plus space for product labels, QR codes linking to technical data sheets, and a small ledge at the base for loose sample pieces customers can pick up.
Location
Place the display wall where natural or controlled lighting is strongest. Avoid positioning it opposite large windows where direct sunlight will wash out the stone texture. The wall should be the first thing a visitor sees when entering the showroom — ideally on the wall directly facing the entrance or on a freestanding partition that creates a natural circulation path.
Layout options
There are three common layout approaches, each suited to a different sales strategy:
By product type — group all stacked stone together, all ledgestone together, all Z-panels together. This layout works when your customers already know what product category they need and want to compare colors within that type.
By application — show an “exterior wall” section combining stacked stone and thin veneer, a “fireplace” section with ledgestone and stacked stone, a “commercial lobby” section with Z-panels and large-format veneer. This layout works when your customers are architects and designers who think in terms of spaces, not products.
By color family — arrange from lightest (cream, white, grey) to darkest (charcoal, black, rust). This layout creates visual impact and helps customers who have a color palette in mind but have not decided on a product type.
Choosing Which Stone Products to Display
The temptation is to show everything. Resist it. An overloaded display wall overwhelms visitors and makes decision-making harder. The goal is curation, not comprehensiveness.
The core selection framework
Show 6-10 stone types that cover the major buying scenarios your customers face:
- One hero product — your best-selling stone, shown in the largest section (at least 80cm wide). This is the panel that most visitors will photograph and the one that anchors their memory of your showroom. For most Top Stone Panels distributors, this is a grey or multi-color stacked stone panel.
- One premium product — a higher-price, visually striking stone that upsells the conversation. Black slate stacked stone or a dramatic quartzite thin veneer works well here.
- One budget product — a price-competitive option that prevents the customer from walking out when they hear the hero product price. Sandstone stacked stone or a basic grey thin veneer fills this role.
- One trend product — whatever is currently gaining specification traction. Z-panels and thin ledgestone have been trend products in 2025-2026 as architects move toward textured, linear aesthetics.
- One application-specific product — flagstone for landscaping, stone column wraps for exterior pillars, or a hearth stone for fireplace applications.
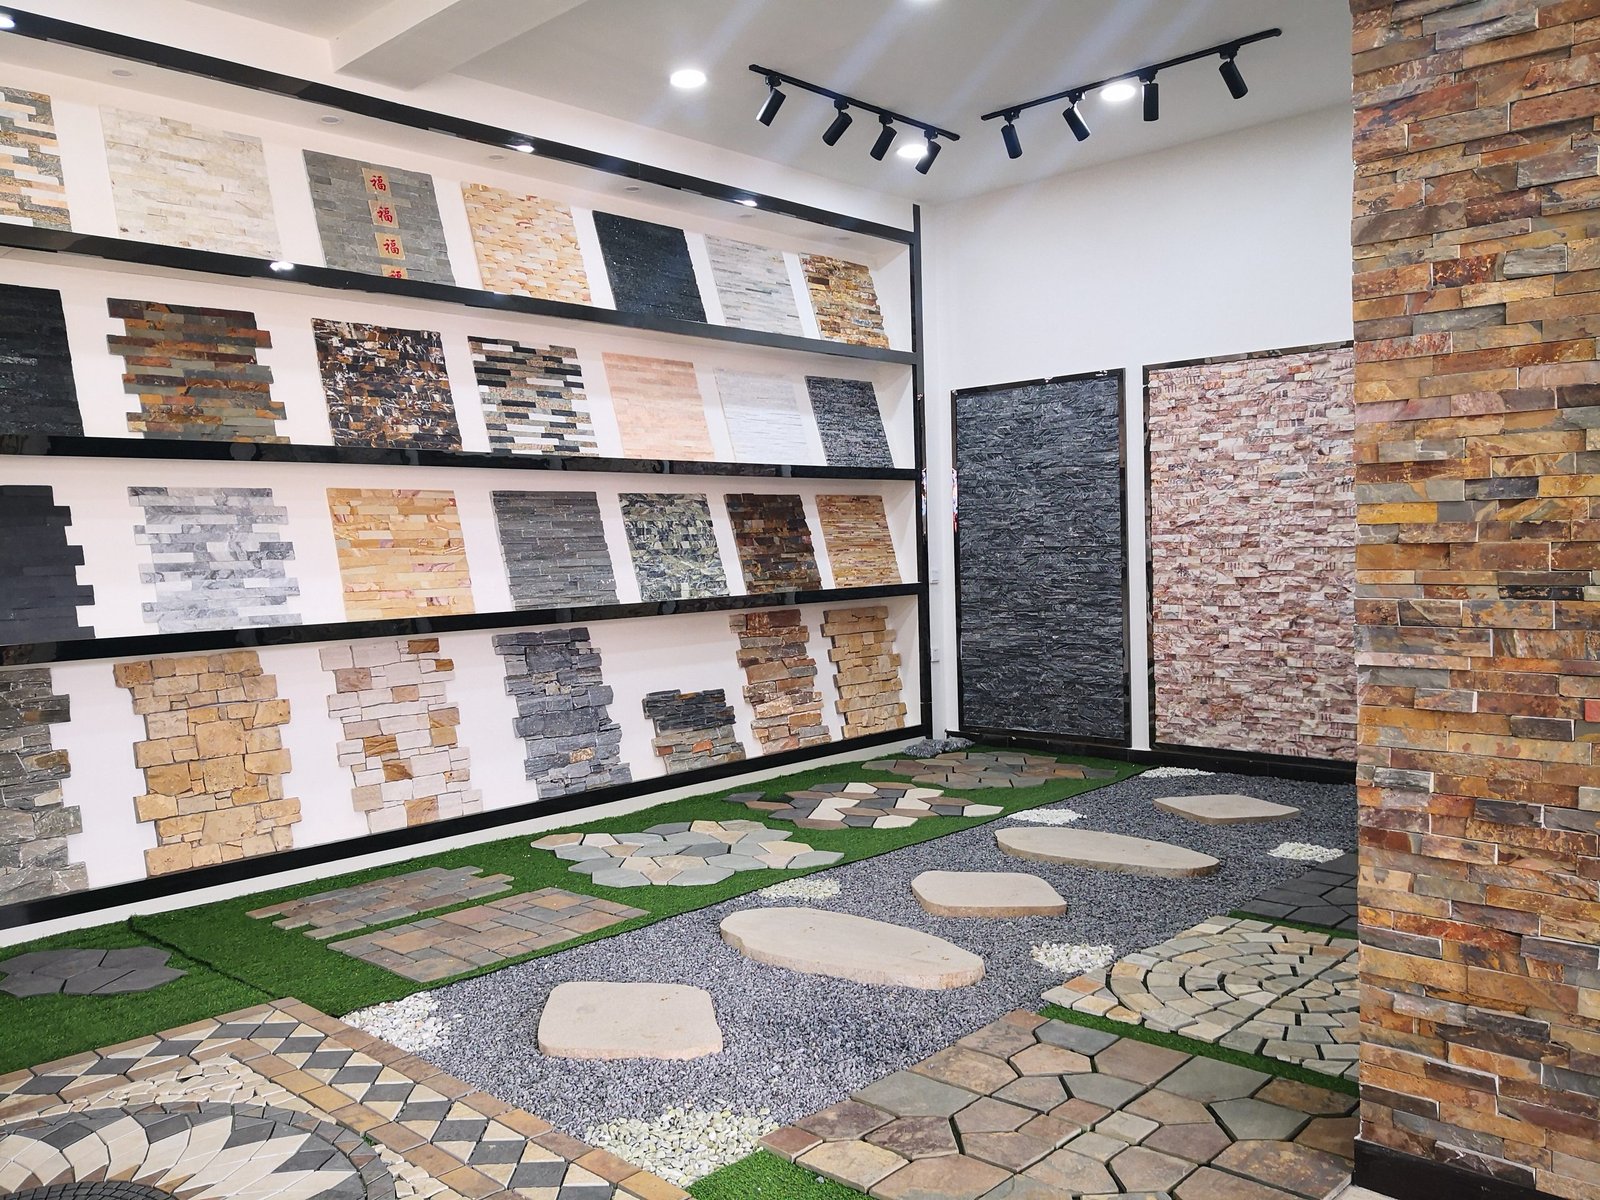
Within each section, show the stone installed as it would appear on a building — with proper coursing, joint treatment, and (where relevant) corner returns. A flat panel glued to a board tells the customer nothing about how the product performs as a cladding system.
Substrate and Framing: Building the Wall Structure
A display wall carries real weight. Natural stone cladding weighs 25-55 kg/m² depending on type and thickness. A 3m × 2.7m wall showing 8 stone types averages 300-400 kg total load. The structure must support that without deflection.
Framing
Use steel stud framing (50mm C-channel at 400mm centers) for freestanding display walls. Steel studs are straight, do not warp with humidity, and can be bolted to the floor and ceiling for stability. Wood stud framing (2×4 at 400mm centers) works for wall-mounted displays attached to an existing structural wall, but verify the wall can carry the additional load through its fasteners.
Substrate
Cement board (12mm HardieBacker or equivalent) is the standard substrate for stone cladding display walls. It provides a flat, stable surface that accepts thin-set mortar or construction adhesive. Do not use drywall — it will sag under the weight and absorb moisture from the adhesive.
For wall-mounted displays, screw cement board directly to the structural wall with concrete screws at 300mm centers. For freestanding partitions, attach cement board to both sides of the steel stud frame (the back side can show technical information, installation photos, or pricing).
Waterproofing (optional but recommended)
Apply a liquid waterproofing membrane over the cement board before installing stone. This is not strictly necessary indoors, but it protects the substrate from moisture in the adhesive during installation and makes future panel swaps cleaner. If you plan to rotate products every few months, the membrane prevents the cement board from degrading with each swap.
Step-by-Step Installation of the Display Wall
The installation process mirrors a real stone cladding installation — which is itself a selling point. When a contractor visits your showroom and sees that the display wall was installed using the same methods and materials they would use on a job site, it builds confidence in the product system.
Step 1: Dry layout
Lay all stone panels on the floor in front of the wall, arranged in the planned sections. Step back and evaluate the color balance, pattern flow, and section sizes. Rearrange until the visual weight is evenly distributed — dark sections balanced against light, textured sections alternating with smoother ones.
Step 2: Establish a level baseline
Snap a chalk line across the bottom of the wall at the height of the first course. Even if the floor is level, do not trust it — stone panels must start from a true horizontal line, not the floor surface.
Step 3: Apply adhesive
Use a polymer-modified thin-set mortar (the same type specified for real installations) applied with a 6mm notched trowel. Work one section at a time — apply mortar to the cement board, press the panel into place, and hold for 10-15 seconds until the adhesive grabs.
Step 4: Install by section
Start with the hero product section (usually center or eye-level) and work outward. Install each stone type as a complete section with clean boundaries — use a 10-15mm gap between sections to create visual separation, or install a thin metal trim strip as a divider.
For stacked stone panels, install in a running bond pattern with staggered vertical joints. For thin ledgestone, follow the manufacturer’s recommended coursing. For Z-panels, interlock each panel with the one below it and beside it as the system is designed.
Step 5: Corner returns
If the display wall has exposed edges (freestanding partition), wrap at least one edge with stone using pre-cut L-corner pieces. This shows customers how the system handles external corners — a question that comes up on nearly every project. A clean corner return is one of the most persuasive details on a display wall.
Step 6: Grouting and cleaning
Not all stone display sections need grout. Stacked stone and Z-panels are typically shown dry-stack (no visible joints). Thin stone veneer sections may benefit from a flush or recessed grout joint to show the finished appearance. After grouting (where applicable), clean the stone surface with a damp sponge and a pH-neutral stone cleaner. Do not use acid-based cleaners on natural stone.
Lighting: The Detail That Makes or Breaks the Display
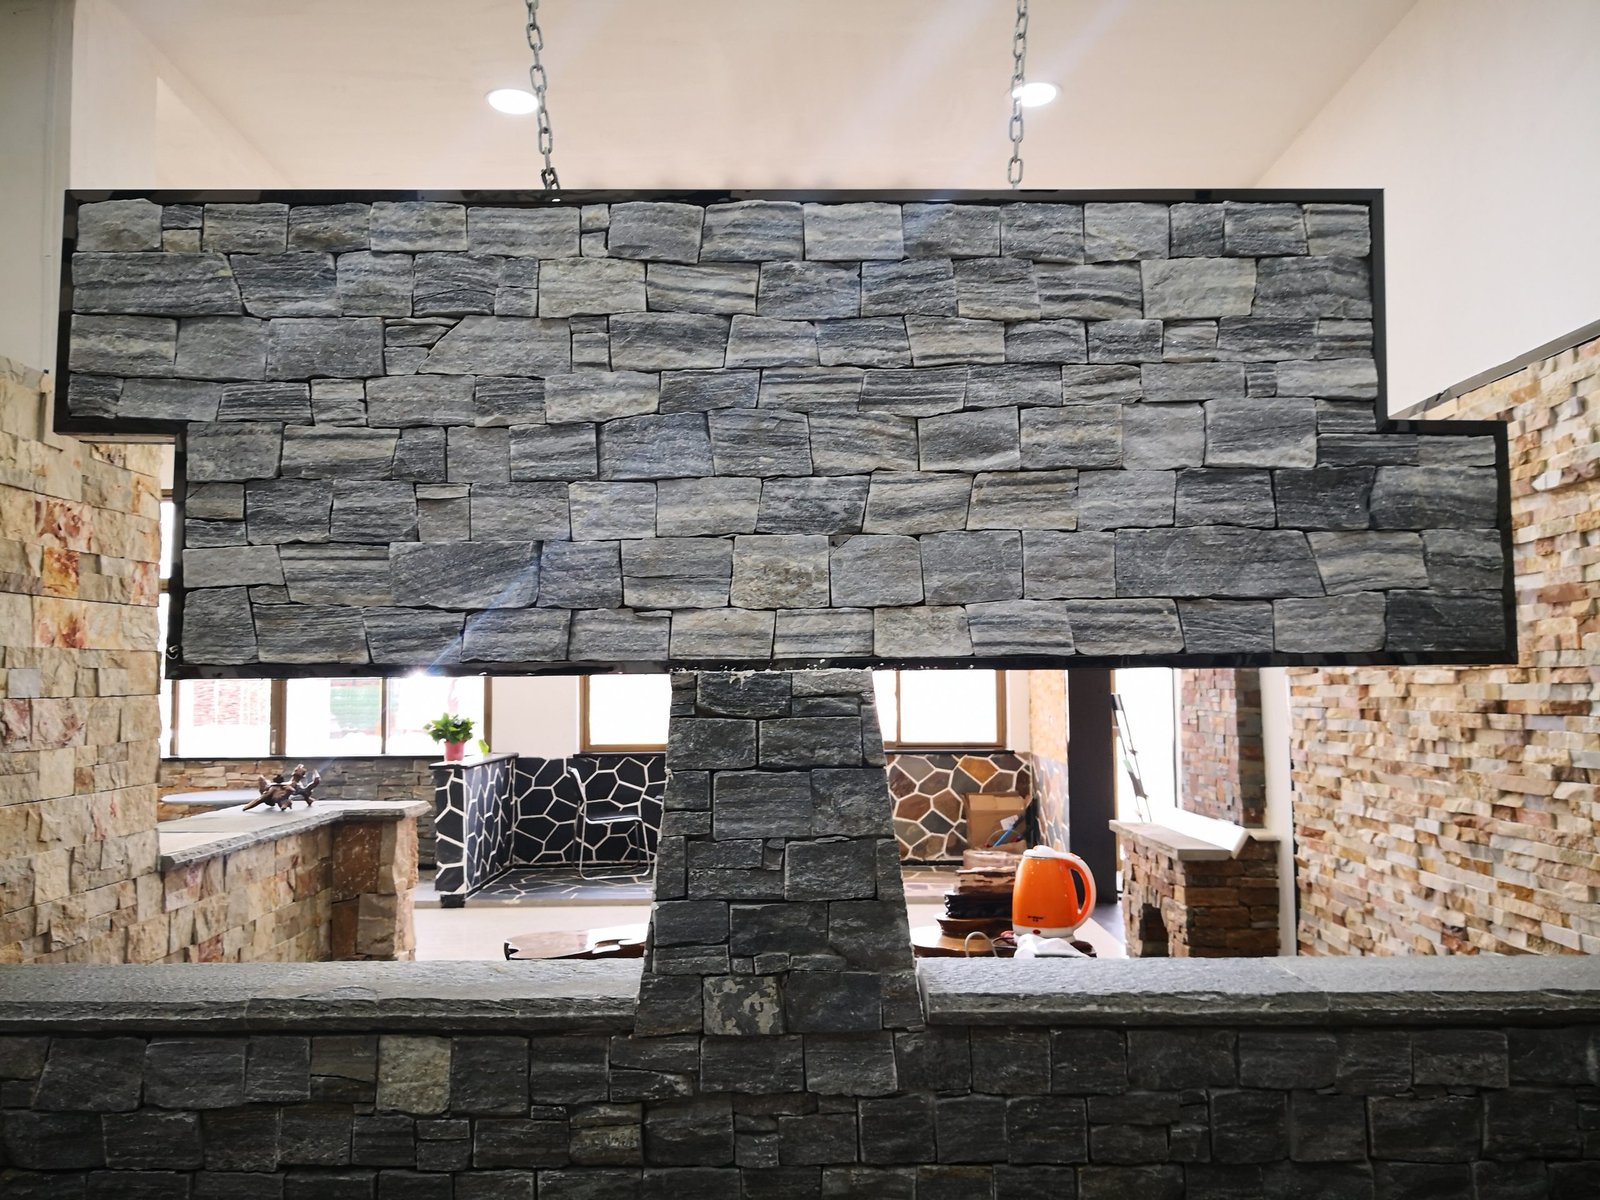
Stone cladding is a three-dimensional product. Its visual appeal comes from texture — the shadow lines between courses, the surface variation of natural cleft faces, the depth created by varying stone thickness. Lighting that flattens these features kills the display. Lighting that enhances them turns visitors into buyers.
Color temperature
Use warm-white LEDs at 2700-3000K. This range renders natural stone colors accurately and enhances warm tones (rust, gold, cream) without making cool tones (grey, charcoal) look muddy. Avoid cool-white (4000K+) and daylight (5000K+) LEDs — they strip warmth from stone and make the display feel clinical.
Angle and position
Mount track lighting or recessed spotlights at 30-45 degrees from the wall surface, aimed downward. This angle creates shadow depth in the stone texture without casting harsh shadows that obscure detail. A light source directly perpendicular to the wall (straight-on) flattens the texture; a light source at too steep an angle (less than 20 degrees) creates deep shadows that hide the stone face.
Intensity
Aim for 300-500 lux on the display wall surface. This is brighter than typical retail ambient lighting (150-200 lux) but not as bright as a gallery (750+ lux). The display wall should be noticeably brighter than the surrounding showroom — it is the focal point, and the eye goes to the brightest surface in a room.
Track vs recessed
Track lighting is more flexible. You can reposition heads when you rotate products or change the layout. Recessed spotlights look cleaner architecturally but lock you into fixed positions. For a distributor showroom that will evolve over time, track lighting is the practical choice.
Labels, Information Design, and Sales Enablement
The stone on the wall gets attention. The information next to the stone closes the sale. Every section of the display wall needs clear, consistent labeling that answers the questions a buyer asks before they ask a salesperson.
What to include on each label
- Product name — use the same name that appears on your website and price lists
- Stone type — slate, quartzite, sandstone, etc.
- Panel dimensions — e.g., 15×60cm
- Weight per m² — critical for structural calculations
- Price range — at minimum, indicate budget / mid / premium tier. If your market tolerates it, show actual per-m² pricing
- QR code — linking to the product page on your website, which should include technical data sheets, installation guides, and a request-for-quote form
Label format
Print labels on matte card stock or engrave them on small metal plaques. Avoid glossy paper (reflections under track lighting) and handwritten labels (undermines the professional impression the stone display creates). Use a consistent typeface and layout across all labels — visual consistency signals product consistency.
Maintenance and Product Rotation
A display wall is not a set-and-forget asset. Stone collects dust, adhesives can stain over time, and product ranges evolve. Build a maintenance routine from day one.
Daily
Quick dust with a soft-bristle brush or microfiber cloth. Do not use compressed air — it drives dust into the stone texture where it is harder to remove.
Monthly
Wipe each section with a damp cloth and pH-neutral stone cleaner. Check for any loose panels (adhesive can degrade if the showroom experiences temperature swings). Replace any chipped or stained panels immediately — a damaged panel on the display wall signals poor quality control to visitors.
Quarterly rotation
Swap 1-2 sections per quarter to reflect seasonal demand and new product launches. In spring, emphasize exterior products (stacked stone siding, flagstone). In fall, shift toward interior products (fireplace veneer, accent wall stone). New products from your factory partner should always get display placement within 30 days of launch.
For guidance on evaluating new products before committing to display inventory, see our guide on evaluating stone panel samples before ordering.
Budget: What a Professional Display Wall Costs
Here is a realistic budget breakdown for a 3m × 2.4m display wall showing 8 stone types with track lighting and proper substrate.
| Item | Cost Range (USD) | Notes |
|---|---|---|
| Steel stud framing + cement board | $400-$600 | Including fasteners and waterproofing membrane |
| Stone panels (8 types, ~8 m² total) | $800-$2,000 | At distributor cost; varies by product mix |
| Thin-set mortar and adhesive | $100-$150 | Polymer-modified, suitable for natural stone |
| L-corner pieces (1 corner return) | $50-$100 | Pre-manufactured, matching hero product |
| LED track lighting (4-6 heads) | $300-$500 | Warm-white, dimmable, including track and transformer |
| Labels and QR code printing | $50-$100 | Matte card stock or engraved plaques |
| Installation labor | $500-$1,000 | 1-2 days for experienced stone installer |
| Total | $2,200-$4,450 |
At distributor cost, the stone itself is often the smallest line item — especially when sourced from a direct factory partner like Top Stone Panels where FOB prices run well below North American wholesale. The framing, lighting, and labor represent the larger investment.
For context on landed stone costs including shipping and customs, see our breakdown of natural stone cladding cost: FOB, shipping, and landed price.
Common Display Wall Mistakes to Avoid
Too many products, too little space
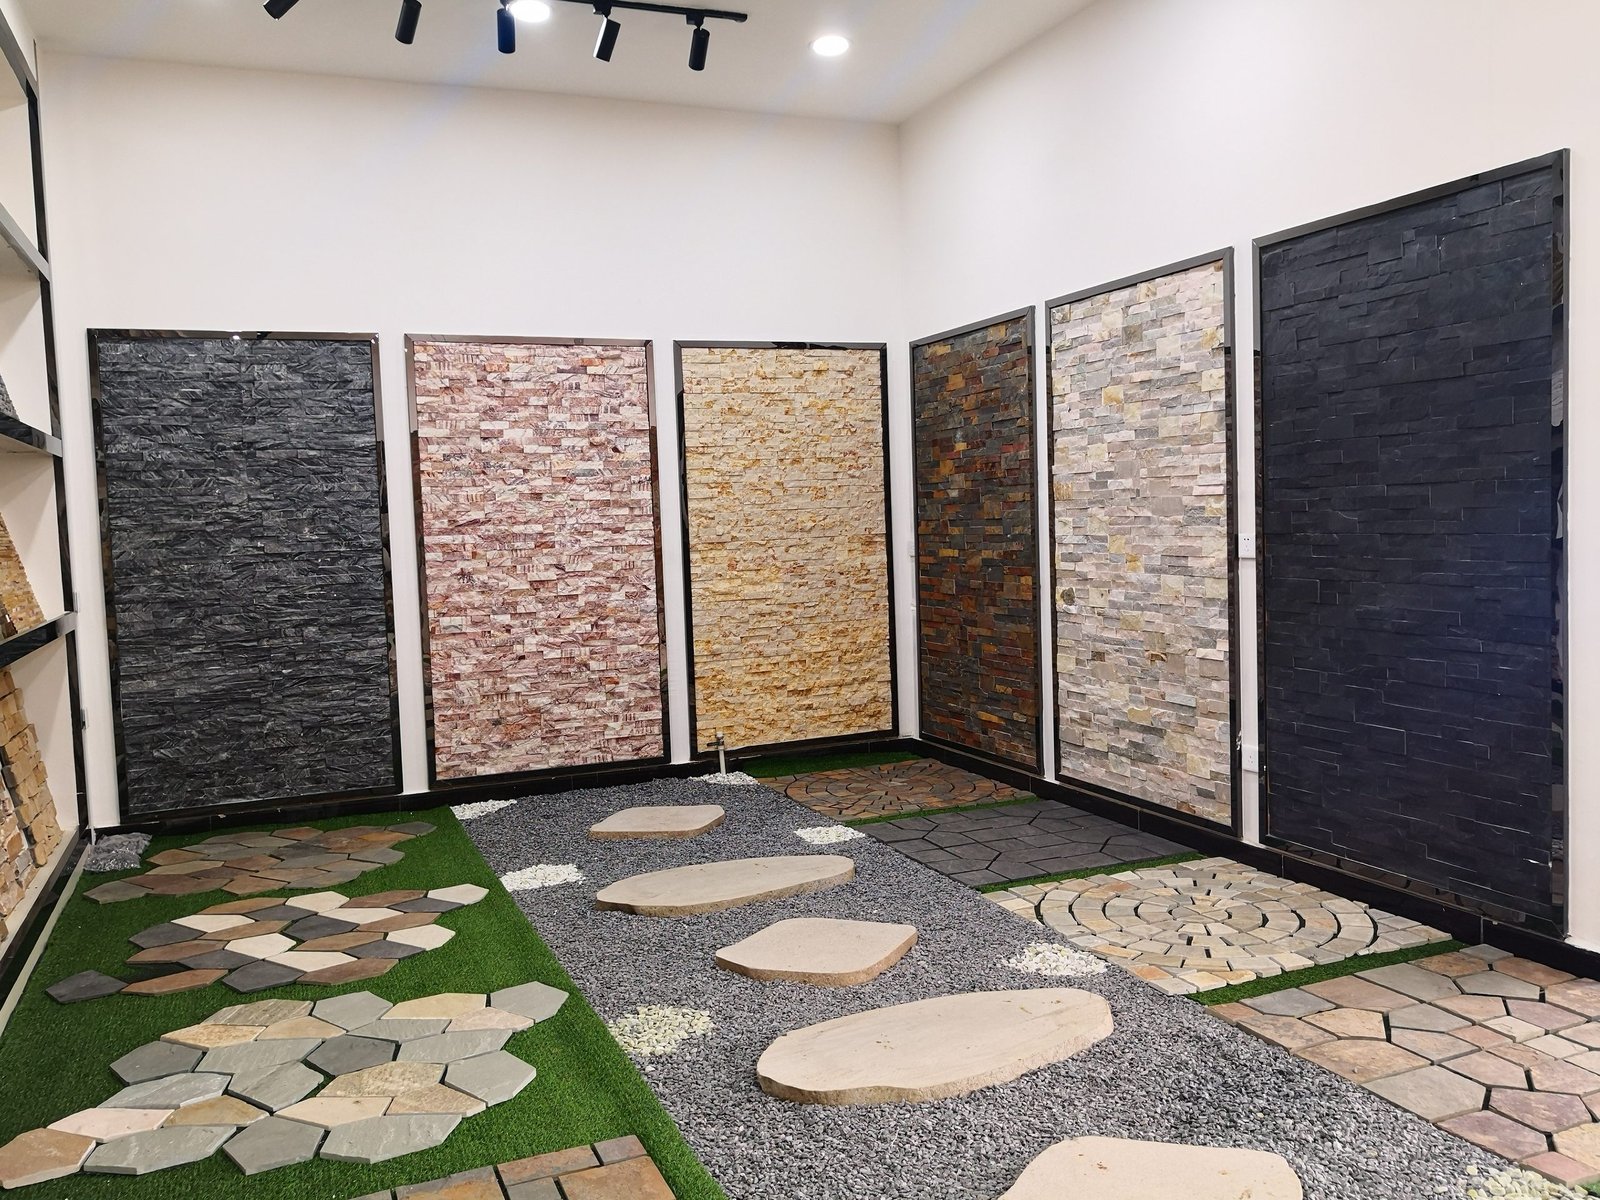
Cramming 15 stone types onto a 2-meter wall creates visual noise. Customers cannot process the information and leave without making a decision. Stick to 6-10 products on a 3-meter wall, with clear section boundaries.
Flat lighting
Overhead fluorescent lighting (common in warehouse-style showrooms) makes all stone look the same. The texture disappears, the color flattens, and the premium product looks identical to the budget option. Invest in directional warm-white LEDs — the lighting budget pays back in every closed sale.
No corner returns
A display wall that ends with an exposed cement board edge looks unfinished and raises the question “how does this look at a corner?” in every visitor’s mind. One corner return costs $50-100 in stone and answers the question before it is asked.
No pricing information
Customers who cannot see a price will not ask for one — they will leave and Google a competitor who lists prices openly. At minimum, show price tiers. Ideally, show per-m² pricing for each product. Transparency builds trust.
Ignoring mobile buyers
Most B2B buyers research products on their phones during or immediately after a showroom visit. If your product pages are not mobile-optimized, with clear photos, specifications, and a prominent quote-request button, the showroom visit does not convert. The QR code on each label bridges the physical-digital gap.
Frequently Asked Questions
How much does it cost to build a stone cladding display wall?
A professional stone cladding display wall typically costs between $3,000 and $8,000 depending on size, stone types, lighting, and substrate preparation. A 3-meter wide by 2.4-meter tall wall using 6-8 stone varieties with LED track lighting and proper substrate runs approximately $5,000 at distributor material cost.
How many stone types should a display wall show?
An effective display wall shows 6-10 stone types arranged in distinct sections. Include at least one from each major category: stacked stone panels, thin ledgestone, thin stone veneer, and Z-panels. Within each category, show 2-3 color options to demonstrate the range available.
What lighting works best for a stone cladding display wall?
Warm-white LED track lighting (2700-3000K) positioned at 30-45 degrees from the wall surface works best for natural stone. Avoid cool-white or daylight LEDs, which flatten the texture and make warm-toned stone look grey. Recessed spotlights create dramatic shadow play that highlights the three-dimensional depth of stacked stone and ledgestone.
How often should a stone display wall be updated?
Rotate featured products every 3-6 months to align with seasonal demand and new product launches. Replace any damaged or heavily soiled panels immediately. A full refresh — new substrate, re-lighting, updated labels — is recommended every 2-3 years to keep the display looking current.
Conclusion: The Display Wall Is Your Best Salesperson
A well-built stone cladding display wall works every hour your showroom is open. It does not take lunch breaks, forget product specifications, or have an off day. It shows your stone at its best, answers the most common buyer questions through clear labeling, and creates the tactile experience that converts a browser into a specifier.
The investment — $3,000-$5,000 for a professional installation — pays back within the first few orders it helps close. For distributors who source from Top Stone Panels, the stone cost component is minimal relative to the total budget, making the display wall one of the highest-ROI investments in the entire sales operation.
Start with the hero product. Build the wall in sections. Light it properly. Label it clearly. Rotate it quarterly. And watch your average order size grow.
Contact Top Stone Panels for display wall stone samples, product photography, and technical data sheets ready for your showroom labels.