
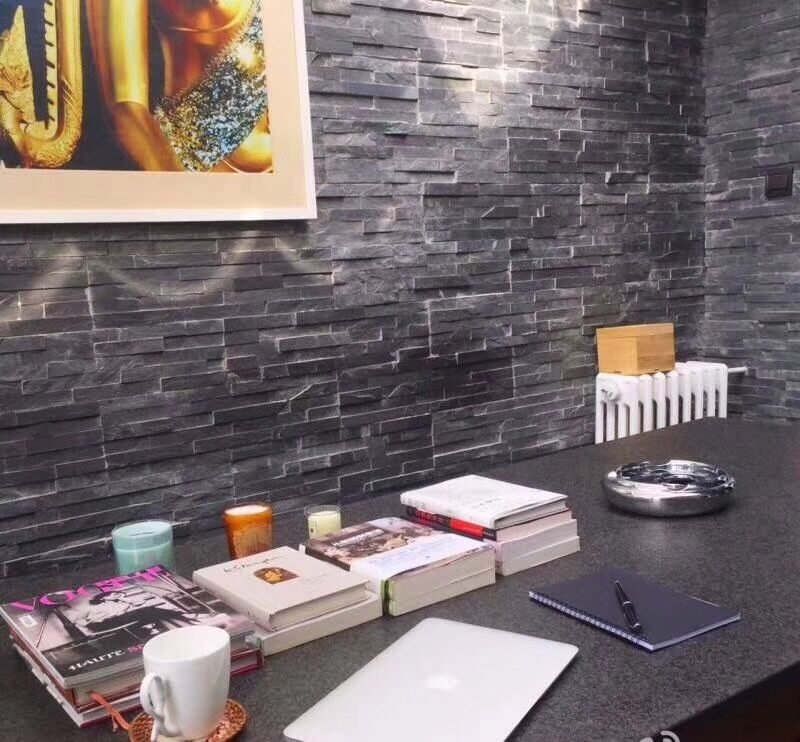
Why Grouting Matters for Stacked Stone Panels
Some installers skip grout entirely, opting for a dry-stacked look where panels butt tightly against each other. That approach works on protected interior walls where aesthetics lean toward the ultra-modern. But on the majority of installations — exterior facades, wet-area surrounds, commercial lobbies — grout does real structural and protective work.
Grout fills the gaps between panels that thinset alone cannot seal. Those gaps, typically 3mm to 8mm wide on natural stone, become channels for water infiltration if left open. In freeze-thaw climates where temperatures swing from -30°C to above freezing within a single day, trapped water expands, spalls the stone edges, and eventually breaks the bond to the substrate. Grout blocks that pathway.
Beyond weatherproofing, grout adds rigidity to the assembly. It locks panels into a unified plane, distributing point loads and reducing the chance that a single impact will dislodge one piece. It also hides minor thickness variations between panels — even with a consistent thickness across the product line, natural stone will have slight irregularities at the edges that grout absorbs visually.
On the aesthetic side, the grout color and joint profile define the wall’s character. A white sanded grout with flush joints on grey slate reads contemporary and clean. A charcoal grout recessed 5mm below golden quartzite reads rustic and textured. Same panels. Completely different buildings.
Types of Grout for Natural Stone Cladding
Not all grouts belong on natural stone. Some contain additives that stain porous surfaces like unsealed slate. Others shrink too much in the wider joints typical of stacked stone installations. Here are the three categories worth knowing.
Sanded Cement Grout (Joints 3mm–8mm)
The workhorse for stacked stone panels. The silica sand gives the grout body, reduces shrinkage, and provides a textured finish that blends well with natural stone surfaces. Use sanded grout whenever your joint width falls at or above 3mm. Available in a wide range of colors from manufacturers like Mapei, Custom Building Products, and Laticrete. For exterior walls, choose a polymer-modified sanded grout — the added polymers improve flexibility and freeze-thaw durability.
Unsanded Cement Grout (Joints Under 3mm)
If your panels fit tightly with joints under 3mm, unsanded grout flows into narrow gaps without the risk of sand particles bridging and creating voids. It shrinks more than sanded grout in wider joints, so respect the width limit. Unsanded grout is the right pick for thin stone veneer installations where panels are set close together.
Epoxy Grout (High-Moisture or Stain-Sensitive Areas)
Epoxy grout costs two to three times more than cement grout and is harder to work with — it sets faster and requires more cleanup effort. But in commercial kitchens, pool surrounds, or anywhere the grout will face constant moisture or chemical exposure, epoxy delivers near-zero absorption and exceptional stain resistance. For most residential and commercial stacked stone walls, sanded cement grout is sufficient. Reserve epoxy for projects where the specification demands it.
What to Avoid
Stay away from standard tile grouts not rated for natural stone. Some contain iron oxide pigments that transfer into porous stone and create rust-colored stains. Always check the product data sheet for a “natural stone compatible” statement. If the bag doesn’t say it, call the manufacturer before mixing.

Flush Joints vs Recessed Joints: Which Should You Choose?
This is the core design decision for any stacked stone grouting project. Both techniques use the same grout materials — the difference lies in how deep you fill the joint relative to the stone face, and how you tool the finished surface.
Flush joints sit level with the top surface of the stone panel. The grout and the stone face form one continuous plane. This gives a smooth, uniform wall that reads as a single surface from a distance. It’s the cleaner look, and it’s easier to wipe down in high-traffic interiors.
Recessed joints sit 3mm to 5mm below the stone face. The grout line becomes a shadow line, emphasizing the individual panels and creating depth. From the side, you can see each panel’s thickness. This is the more traditional masonry look and it’s dominant on exterior facades.
Comparison Table: Flush Joint vs Recessed Joint
| Criteria | Flush Joint | Recessed Joint |
|---|---|---|
| Appearance | Smooth, continuous surface. Modern and minimal. | Shadow lines emphasize each panel. Rustic and textured. |
| Best Applications | Interior feature walls, fireplaces, commercial lobbies | Exterior facades, retaining walls, garden features |
| Difficulty Level | Moderate — requires careful striking to avoid smearing | Easier — jointing tool guides depth, less surface contact |
| Weather Resistance | Good, but water can pool on flat joint surface | Excellent — recessed profile sheds water from stone face |
| Cleanup Effort | Higher — grout contacts more stone surface area | Lower — grout sits below surface, less stone contact |
| Maintenance | Joints more visible if grout discolors over time | Shadow lines mask minor grout discoloration |
| Grout Consumption | Higher — fills joint to full depth | Lower — fills joint to 3-5mm below surface |
For most exterior installations in North America and Europe, recessed joints are the default. They handle rain better, hide weathering, and match the expectation of what natural stonework should look like. Flush joints dominate interiors and on projects where the architect wants the stone to read as a monolithic surface. If you’re not sure which to use, recessed is the safer bet — it’s more forgiving during application and ages more gracefully outdoors.
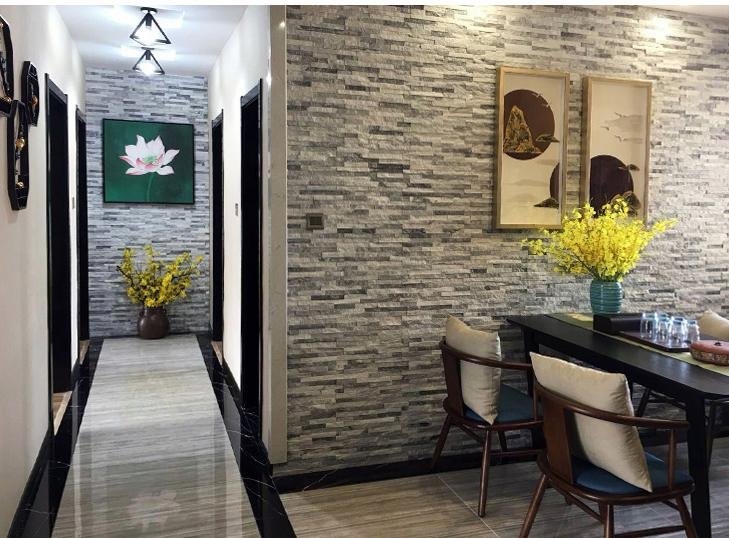
Tools and Materials You Need to Grout Stacked Stone Panels
Having the right tools within arm’s reach before you start mixing grout is non-negotiable. Once grout begins to set, you don’t have time to walk to the truck for a missing trowel. Here’s the full kit for a professional stacked stone grouting job.
Essential Tools
- Mortar bag (grout bag) — A heavy-duty canvas or rubber bag with a metal tip. Gives precise control for filling vertical joints without excessive mess on the stone face.
- Pointing trowel — A narrow, pointed trowel (10-15mm wide blade) for pressing grout into joints and removing excess.
- Jointing tool (convex jointer) — A steel or plastic rod with a rounded end for compressing and shaping recessed joints. Choose a diameter that matches your target joint width.
- Margin trowel — For striking flush joints flat and scraping excess grout from the stone face.
- Stiff bristle brush — For pre-cleaning joints and post-cleaning dried grout haze from textured stone.
- Bucket and drill with mixing paddle — A low-speed drill (under 300 RPM) with a grout mixing paddle produces a lump-free mix faster than hand stirring.
- Clean sponges and rags — Keep at least three sponges and a stack of clean cotton rags nearby. You’ll go through them fast.
- Wire brush — For removing hardened grout spots from stone surfaces after initial cure.
Materials
- Sanded or unsanded grout — Selected based on joint width (see grout types above).
- Penetrating stone sealer — Applied to panel faces before grouting to prevent stain absorption.
- Grout sealer — Applied after grout has fully cured to protect against moisture.
- Clean water — For mixing, cleaning tools, and dampening sponges.
- Painter’s tape — Useful for masking edges around window trim, door frames, and adjacent surfaces.
One note on L-corner pieces: the joints where corner pieces meet flat panels are often tighter than mid-wall joints. Have a narrower pointing trowel on hand for those spots, or use a grout bag with a smaller tip opening.
Surface Preparation Before Grouting
Preparation determines whether your grout bonds cleanly and whether your stone stays stain-free. Skipping any of these steps is how you end up with grout haze permanently embedded in the pores of natural slate.
Step 1: Verify Thinset Cure
Panels should have been installed with thinset mortar on a properly prepared substrate at least 24 hours before grouting. In temperatures below 10°C or high humidity, extend that to 48 hours. Press on a few panels — they should feel completely solid with no flex or hollow sound when tapped.
Step 2: Clean the Joints
Run a stiff bristle brush along every joint to remove dust, loose thinset squeeze-out, and any debris that accumulated during installation. For stubborn thinset that has squeezed into the joint space, use a utility knife or oscillating tool with a grout blade to clear it to a depth of at least 5mm below the stone face. If you’re doing recessed joints, clear to 8-10mm depth.
Step 3: Seal the Stone Faces
This step is critical for natural stone. Apply a penetrating stone sealer to the panel faces using a brush, roller, or low-pressure sprayer. The sealer fills the surface pores and creates a barrier that prevents grout pigments from staining the stone. Let the sealer dry completely — typically 1-2 hours depending on the product and conditions. If you skip this step on unsealed slate or quartzite, grout haze can become nearly impossible to remove from textured surfaces.
Step 4: Mask Adjacent Surfaces
Apply painter’s tape to any trim, window frames, door casings, or adjacent wall surfaces that border the stone installation. Grout is messy. Tape is cheap. See our guide on installing stone veneer around windows and doors for detailed masking strategies at openings.

How to Mix Grout for Stacked Stone Panels
Grout mixing sounds trivial. Add water, stir, done. But the water-to-powder ratio is the single biggest variable in whether the grout cracks, crumbles, or cures properly. Here’s how to get it right.
Follow the Manufacturer’s Ratio — Then Adjust by Feel
Start with the water amount printed on the bag. For most sanded grouts, that’s roughly 0.25 to 0.30 liters of water per kilogram of dry grout. Pour clean, cool water into a clean bucket first, then add the dry grout powder gradually while mixing with a low-speed drill and paddle.
The target consistency is thick peanut butter. The grout should hold its shape when you pull the paddle out — it shouldn’t drip or slump. If it’s too thin, it will sag out of vertical joints and shrink excessively as it dries. If it’s too thick, it won’t pack into the joints and will crumble when you tool it.
The Slake Period Is Not Optional
After initial mixing, let the grout sit undisturbed for 10 minutes. This is called slaking. During slaking, the cement particles fully absorb water and the chemical hydration process begins uniformly throughout the batch. After 10 minutes, remix briefly for 30 seconds — do not add more water. If the grout has stiffened too much, it was mixed too dry. Start a new batch rather than adding water, which weakens the cured grout.
Mix Only What You Can Use in 30-45 Minutes
Cement grout begins to stiffen within 45-60 minutes at room temperature. On a warm day, that window shrinks to 30 minutes. Mix in batches small enough that you can apply the entire batch before it starts to firm up. A good rule: one 5kg bag of grout per batch for a single installer working on stacked stone. For large walls, stagger batches so you’re always working with fresh material.
Step-by-Step Grout Application Technique
With the surface prepped, tools ready, and grout mixed, here’s how to actually fill the joints — covering both flush and recessed techniques.
For Flush Joints
1. Load the grout. Scoop mixed grout into a mortar bag, or load a pointing trowel. If using a bag, snip the tip to match your joint width — a 6mm opening for 6mm joints, slightly smaller for tighter joints.
2. Fill the joint. Squeeze the bag or press the trowel to push grout firmly into each joint. Apply enough pressure that grout fills the entire depth and makes contact with both panel edges. On vertical walls, work from the bottom up so drips fall into unfilled joints below.
3. Overfill slightly. Cement grout shrinks as it cures. Press grout slightly proud of the stone face — about 1mm above the surface.
4. Strike the joint. Once the grout has firmed up enough to resist light finger pressure (typically 10-20 minutes), use a margin trowel held flat against the stone to strike the joint flush. Drag the trowel along the joint in one continuous motion. This compresses the grout and creates a flat, even surface.
5. Clean immediately. Wipe the stone face adjacent to the joint with a damp sponge before moving to the next section.
For Recessed Joints
1. Fill the joint. Use the same bag or trowel technique, but fill the joint to 3-5mm below the stone face rather than overfilling. A depth of 3mm creates a subtle shadow line. A depth of 5mm creates a more dramatic profile that emphasizes the stacked stone panel thickness.
2. Tool the joint. After the grout firms up (10-20 minutes), run a convex jointing tool along each joint. Apply even pressure to compress the grout into a smooth, concave profile. The tool diameter should match or slightly exceed the joint width.
3. Maintain consistent depth. The key to professional-looking recessed joints is uniformity. Every joint should be recessed to the same depth. If your jointing tool bottoms out at different depths because of stone thickness variation, adjust your pressure. Panels with consistent thickness from a quality-controlled manufacturer make this significantly easier.
4. Clean the stone face. The advantage of recessed joints: the grout sits below the surface, so there’s less smearing on the stone. Still, wipe adjacent faces with a damp sponge after tooling each section.
Working with Corner Pieces
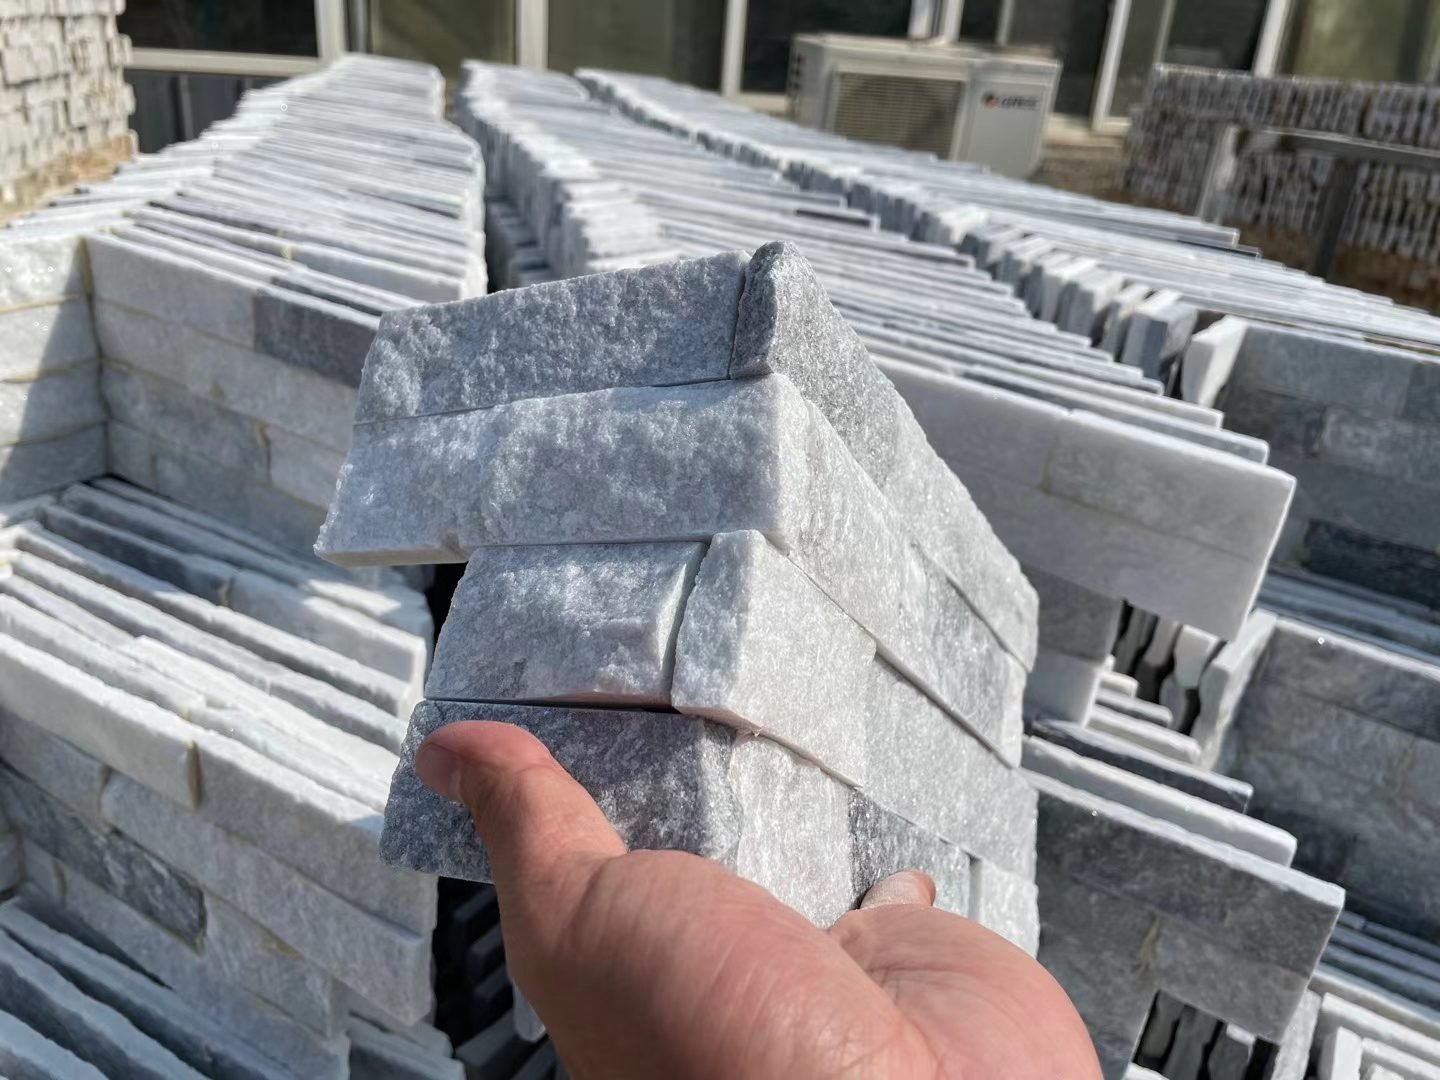
L-corner pieces create 90-degree returns that need grout on two faces. Fill the horizontal joints first, then the vertical joints. Where a corner piece meets a flat panel, the joint is often narrower — use a grout bag with a smaller tip. The corner is a focal point that draws the eye, so take extra care with joint uniformity here. Properly installed L-corner pieces eliminate the need for mitered cuts and keep grout lines consistent around building corners.
Cleaning and Finishing the Grout Lines
Grout cleanup has a narrow window. Too early, and you pull grout from the joints. Too late, and the haze bonds permanently to the stone surface. Here’s how to time it and what to do at each stage.
Stage 1: Initial Wipe (15-30 Minutes After Application)
Once the grout in the joints is firm enough that it doesn’t deform under light pressure, take a damp (not wet) sponge and wipe the stone faces using light, circular motions. Rinse the sponge frequently in clean water. The goal is to remove the bulk of the grout film from the stone surface without disturbing the joints. Work in small areas — one or two square meters at a time.
Stage 2: Haze Removal (1-4 Hours After Application)
As the remaining grout film dries, it forms a whitish haze on the stone surface. Once this haze appears (usually 1-4 hours after grouting, depending on temperature and humidity), buff it off with a clean, dry cotton cloth or a piece of burlap. Use firm, circular motions. On textured split-face stone, a stiff bristle brush may be needed to get into the surface undulations.
Stage 3: Final Cleanup (24-72 Hours After Application)
Any remaining grout spots or stubborn haze can be addressed after the grout has fully cured. For dried grout spots on the stone face, use a wooden stick or plastic scraper — never metal, which can scratch natural stone. For persistent haze, a diluted stone-safe grout haze remover can be applied according to the product directions. Always test on an inconspicuous area first.
Curing Protocol
Cement grout cures by hydration, not by drying. For the first 24 hours, mist the joints lightly with water two or three times per day. This prevents the grout from drying too quickly, which causes shrinkage cracks and a weak, powdery surface. In hot, dry, or windy conditions, cover the wall with plastic sheeting to retain moisture.
After full cure (typically 48-72 hours), apply a penetrating grout sealer to the joints. This protects against water absorption and staining, particularly important on exterior installations. The stone faces should already be sealed from the pre-grout step; if not, apply a second coat of stone sealer over the entire wall now.
Common Grouting Mistakes and How to Avoid Them
These are the errors that show up in callbacks, warranty claims, and unhappy-client phone calls. Every one of them is preventable.
Mistake 1: Grouting Before the Thinset Has Cured
If the thinset mortar hasn’t reached adequate strength, the pressure of pushing grout into joints can shift panels or break the bond. Always wait the full 24 hours minimum — 48 in cold weather. For guidance on proper thinset application, see our guide on applying mortar to stone veneer panels.
Mistake 2: Skipping the Pre-Seal Step
Unsealed natural stone absorbs grout pigments like a sponge. Once those pigments penetrate the pores of slate or quartzite, no amount of scrubbing will remove them. The pre-seal step takes 20 minutes and prevents 95% of staining problems. Do not skip it.
Mistake 3: Mixing Grout Too Wet
Wet grout flows easily, which feels convenient during application. But excess water weakens the cured grout, increases shrinkage, and causes cracking as the water evaporates. If your grout is soupy enough to drip from the trowel, it’s too wet. Add more dry powder and remix, or start a new batch.
Mistake 4: Not Cleaning in Time
Grout haze that sits on natural stone for more than 24 hours begins to chemically bond with the surface. At that point, you’re into acid washing or mechanical grinding to remove it — both of which risk damaging the stone. Clean within the first 1-4 hours. Set a timer if you have to.
Mistake 5: Ignoring Expansion Joints
On long wall runs (over 6 meters horizontally or 3.6 meters vertically), the grout and stone assembly needs expansion joints to accommodate thermal movement. These are typically filled with a color-matched, flexible sealant rather than rigid cement grout. Skipping expansion joints on a long exterior wall virtually guarantees cracked grout lines within the first freeze-thaw cycle. Learn more about waterproofing behind stone veneer on exterior walls to understand the full moisture management system.
Mistake 6: Inconsistent Joint Depth
Recessed joints that vary between 2mm and 6mm depth across the same wall look sloppy. Use the same jointing tool for the entire wall, maintain consistent pressure, and check your depth periodically by holding a straight edge across two adjacent panels and measuring to the grout surface.
Frequently Asked Questions
Do I need to grout stacked stone panels, or can they be installed dry-stacked?
Stacked stone panels can be installed both ways. Dry-stacking (no visible grout) gives a tight, shadow-line look. Grouting fills gaps between panels for a more finished appearance and adds weather resistance on exterior installations. The choice depends on the design intent and exposure conditions. For exterior walls in freeze-thaw climates, grouting is recommended to prevent water infiltration behind the stone.
What type of grout works best for stacked stone panels with 3-8mm joints?
For joints between 3mm and 8mm wide, sanded grout is the standard choice. The sand particles add body and reduce shrinkage cracking in wider joints. For joints narrower than 3mm, use unsanded grout to avoid forcing coarse particles into thin gaps. Always select a grout rated for natural stone to prevent staining from pigments or additives.
How long should I wait after installing stacked stone panels before grouting?
Wait a minimum of 24 hours after adhering the panels with thinset mortar. This allows the thinset to reach initial cure strength. In cold or humid conditions, extend the wait to 48 hours. Grouting too early risks disturbing the bond between the panel and substrate.
Can I use a grout bag instead of a trowel for stacked stone panel joints?
Yes. A grout bag (mortar bag) gives excellent control for filling joints on stacked stone panels, especially on vertical walls. It reduces mess on the stone face and lets you target narrow joints precisely. Many professional installers prefer bags over trowels for natural stone cladding because they minimize cleanup time.
Should I seal the stone before or after grouting stacked stone panels?
Seal the stone before grouting. A pre-application of penetrating stone sealer creates a barrier that prevents grout from staining the porous surface of natural slate or quartzite. Apply the sealer after the panels are installed and the thinset has cured, but before any grout touches the stone. You can apply a second coat of sealer over both the stone and cured grout afterward for complete protection.
Final Thoughts on Grouting Natural Stone Panels
Grouting is the finish work that determines whether a stacked stone wall looks installed or just stuck on. The techniques in this guide — proper surface prep, correct grout consistency, controlled application, and timely cleanup — apply whether you’re working with thin ledgestone on a bathroom accent wall or full-thickness panels on a commercial building facade. The difference between flush and recessed joints is ultimately a design choice, but the execution standards are the same: uniform depth, clean stone faces, and fully cured grout that will last as long as the stone itself.
For installers planning a full stacked stone project, our complete stacked stone veneer installation guide covers substrate preparation, thinset selection, panel layout, cutting, and the grouting process in context. If you’re comparing panel types for an upcoming project, our overview of six stone veneer panel types breaks down which product lines suit different applications and joint styles.
Have questions about grout compatibility with a specific stone type or joint configuration? The technical team at Top Stone Panels is available to walk through your project specifications. Reach out through our contact page with your joint width, stone type, and interior/exterior application — we’ll recommend the grout product and technique that fits.



