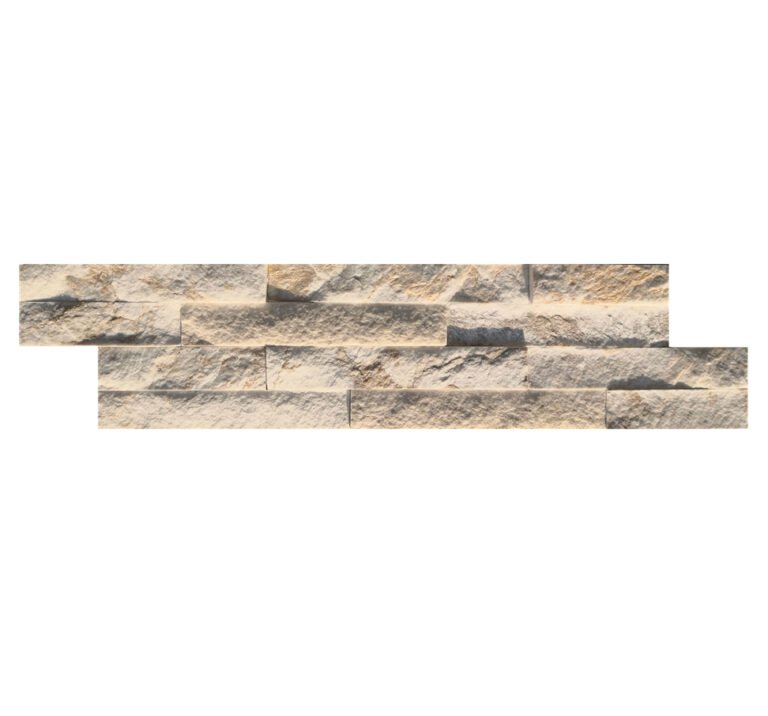
Yes, stone veneer belongs on a garage wall. The honest part of the job is that a garage is one of the easiest places to do it well and one of the easiest places to do it wrong. The wall is a big flat field, which keeps the layout simple. The door opening, the header over it, the slab at the base, and the exhaust heat put more moisture and movement stress on the cladding than a bedroom wall ever will.
This guide is the full sequence for installers and contractors. It runs from system selection and substrate prep through lath and scratch coat, dry layout, full-coverage setting, corner and reveal detailing, and the coverage math that tells you how many boxes to buy. The product numbers come from Top Stone Panels, the quarry-source factory in Yixian County, Hebei, which has supplied natural stone panels for 18+ years.
- A garage wall is a large flat field with edge conditions; most failures trace to the substrate, the barrier, the lath, or a mortar bed that was not full.
- Match the system to the wall: stacked stone panels 15x60cm and 15x55cm, thin stone veneer splitters, or z-panels 20x55cm and 15.2x61cm, all backed for full-bed bonding.
- Prep the substrate, install the weather barrier and flashing, and set lath and scratch coat where the system and code require them before any stone goes on.
- Set every panel into a full mortar bed with complete coverage; spot-bonding fails on schedule and pulls the whole wall into repair calls.
- Coverage math: one 15x60cm panel covers 0.09 m2, about 11.1 panels per m2, and one 36x10cm ledgestone panel covers 0.036 m2, about 27.8 panels per m2.
1. What Makes a Garage Wall Different
A garage wall is a veneer job with four edge conditions most interior walls do not have. There is the door opening with its header and jambs, the slab at grade with splash-back and snow melt, and the vehicle exhaust that heats the wall surface in winter. On top of that sits the wide field that makes coursing errors obvious from the street. None of these stop the project; each one changes a detail.
The door opening is the first thing to plan. The header above a garage door carries load and moves slightly with temperature, so the stone above it needs a proper lintel detail or a control joint, not a run of mortar holding a dead straight line. The jamb reveals get cut panels or pre-made corners, and every edge against the door frame gets sealed so water never enters behind the face.
The slab is the second. Stone veneer stops above the concrete apron, not at it. Splash-back from rain and melted snow sits at the base of the wall for weeks in cold states. The veneer needs clearance, a weep screed or similar drainage detail at the bottom, and flashing that kicks water away from the sheathing. Getting the base wrong is how a garage wall fails from the bottom up while the top still looks new.
2. Choose the Veneer System
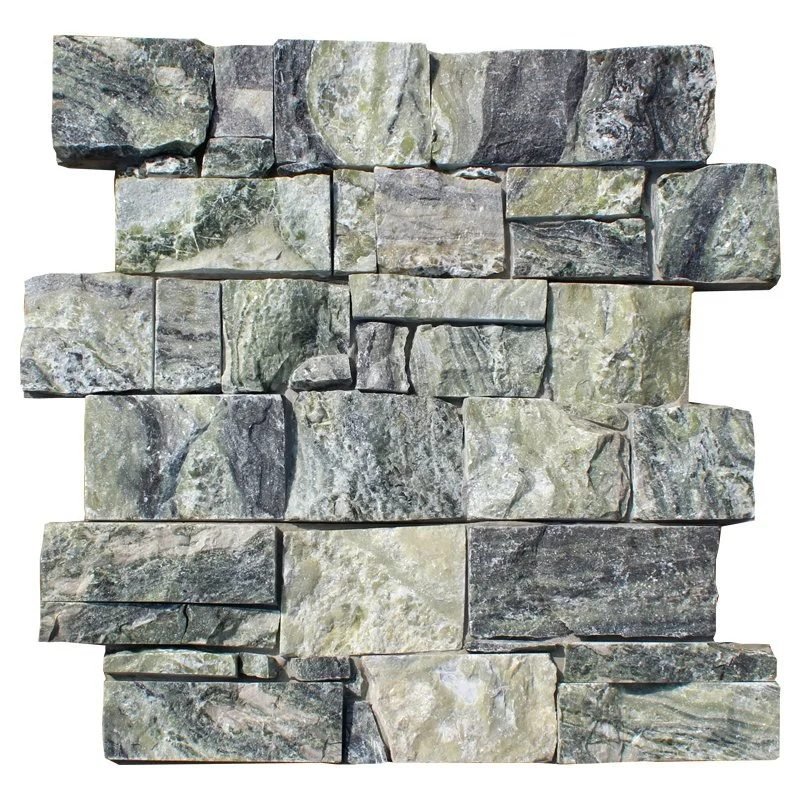
Three product families cover most garage walls, and the choice comes down to the look you want and the wall you have. All three are 100% natural stone, and all are designed for adhered installation over a prepared substrate.
| System | Format | Backing | Best garage use |
|---|---|---|---|
| Stacked stone panels | 15x60cm / 15x55cm with L-corner kits | Cement or mesh | Full walls and door surrounds |
| Thin stone veneer splitters | Random long-split, same-vein sorted | Mesh | Rustic field and mixed texture |
| Interlocking z-panels | 20x55cm / 15.2x61cm | Cement or mesh | Fast large-area coverage |
Stacked stone panels give the classic ledger look with predictable coursing, and the pre-made L-corner kits remove the trickiest cutting on the job. Thin stone veneer splitters give a looser, hand-placed feel but demand more layout attention in a field as wide as a garage. The interlocking z-panels speed up large flat areas because the male-female connection sets the joint spacing for you. The adhesive and mortar selection guide covers which bonding system pairs with which backing.
3. Substrate and Weather Barrier
Do the prep in this order and the wall goes on clean. Clean the substrate first: the surface must be sound, flat, and free of oil, laitance, and old paint. Masonry block, poured concrete, and exterior-grade sheathing with the correct barrier are fine foundations; gypsum wallboard is not an accepted substrate for adhered stone veneer, and no shortcut changes that.
Exterior garage walls need a weather barrier that laps into the flashing. Wrap the wall, then install kickout flashing and sill flashing at the openings, and run the barrier behind the flashing so water sheds outward, not into the cavity. The International Code Council’s code resources point to the current IBC and IRC veneer sections that define these requirements, and the TCNA installation handbooks give the membrane and mortar standards shared by thin stone and tile.
Leave a gap at the base for drainage. If the system uses a weep screed, nail it level at the planned veneer height. The vertical leg goes up inside the wall so water collects and exits through the weep holes instead of pooling behind the stone. Keep the finished stone at least 50-75 mm above the concrete slab where weather allows, and never bury the screed in the apron.
4. Lath and Scratch Coat
On exterior garage walls and wet areas, the code and most manufacturers require metal lath over the barrier. The lath carries the weight of the mortar and stone, and its fasteners must be corrosion-resistant and driven at the spacing called out in the specification. A lath sheet that ripples or pulls loose is a future bulge wearing a stone costume.
Install the lath so horizontal laps shed like shingles, then embed it in a scratch coat of mortar, troweled flat and scored for the veneer set. Let the scratch coat cure before the stone goes on, typically overnight to the manufacturer’s timeline. The veneer code guide walks through the IBC and IRC sections on lath fastening, weight limits, and substrate rules.
Skip the scratch coat on an interior garage wall only when the veneer manufacturer and code accept direct adhered application, and even then the substrate must be the approved board, not painted drywall. When in doubt, lath and scratch; it costs a day and prevents the most common garage wall failure.
5. Layout Before You Mix Mortar
Layout is the twenty minutes that saves the install. Dry-fit the first course along the base and the reveal courses around the door before any mortar is mixed. Mark the coursing with a chalk line from the top of the weep screed. Work the layout so cut panels land at the corners and against the door, not in the middle of the wall where they read as mistakes.
Subtract for the joints. Stacked and z-panel systems set a repeatable course height when you keep the joint width consistent, so chose the joint size on the mockup and stick to it. Keep the vertical joints staggered across courses; a running seam is the fastest way to turn a good panel job into an obvious pattern.
Plan the corner stock before the field. If the system ships pre-made corners, order the corner quantity listed in the product data; if the job uses cut corners, add that cutting time to the schedule. Corners consume more material per square foot than the field, and running out mid-wall is a reorder you cannot hide.
6. Set the Panels with Full Coverage
Full mortar coverage is the sentence to memorize on this job: every panel gets a full bed, not dabs, not a perimeter ribbon. Spot-bonding fails on schedule, and the first dead thud on a garage wall comes from the empty pocket behind a panel that was set with five trowel dabs instead of a bed.
- Butter the back of the panel. Apply the mortar or adhesive to the stone itself with a notched trowel, then add a skim coat on the substrate so no air pocket survives.
- Bed and tap. Press the panel into the wall and tap it flush with a rubber mallet or the heel of your hand, working from one edge so the mortar keys into the mesh or cement backing.
- Check the level often. Run a level across each course and against the reveal lines; a garage wall’s long horizontal lines expose a 3 mm drift immediately.
- Keep the coursing true. Follow the chalk line every course, and check the vertical joints for the stagger you marked in layout.
- Clean as you go. Wipe mortar off the split faces before it cures; the mineral texture hides residue once done, but acid cleaning is a project nobody budgets for.
Weatherproofing the joints matters as much as the bed. The joint waterproofing guide covers tooling and sealant details that keep water out of the mortar joints on an exposed garage wall. For large-format and panel systems, the backing systems guide explains how cement and mesh backings key the mortar and why coverage is a mechanical requirement, not polish.

7. Corners, Reveals, and Trim
Corners decide whether a garage wall looks built or assembled. Pre-made L-corner kits turn the outside corner into a factory-cut 90-degree piece with staggered joints, so the installer handles no field mitering and the joint pattern keeps running. Stacked stone panels from Top Stone Panels ship with matching L-corner kits for exactly this reason.
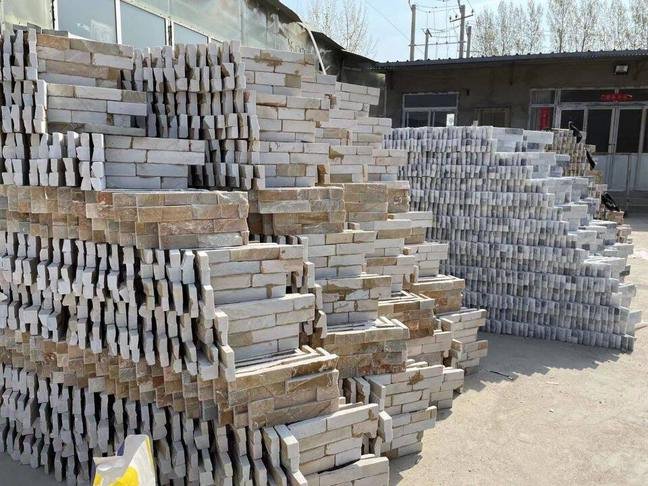
Trim the door reveal last. The stone edge against the garage door frame needs a clean termination, either with a matching trim profile or with a cut-and-sealed edge that sheds water. The trim profiles guide lists the corner, cap, and edge trims that finish these junctions without inventing a detail on site. Seal the joint between the stone and the frame with a compatible backer rod and sealant, but never fill the thermal seam with rigid mortar.
8. How Much Stone You Need
Coverage math starts with the panel area and adds a cut allowance. A 15x60cm stacked stone panel covers 0.09 m2, so 1 m2 needs about 11.1 panels; a 36x10cm ledgestone panel covers 0.036 m2, so 1 m2 needs about 27.8 panels. Measure the wall, subtract the door opening, divide by the panel area, and add 5-10% for cuts and the corners near the opening.
| Panel format | Panel coverage | Panels per m2 | Allowance |
|---|---|---|---|
| Stacked stone 15x60cm | 0.09 m2 | ~11.1 panels | +5-10% |
| Mini ledgestone 36x10cm | 0.036 m2 | ~27.8 panels | +5-10% |
Use the calculator approach from the facade quantity calculator guide for a gable or a wall with windows, where every opening shaves panels off the order. Order the full quantity in one lot so the batch matches; reordering a half-pallet later risks a vein shift that a garage wall will expose.
9. Cold Weather and Cure
Garage walls in cold states get installed when it is cold, and the mortar reacts to it. The natural stone takes the temperature swings, rated for -30 C to +50 C thermal cycling at Top Stone Panels, but fresh mortar needs protection from freezing until it cures. If the forecast dips below about 4 C, use winter-grade mortar set rules, heat the work zone, or delay the set. The winter installation guide has the full cold-weather sequence.
Cure time is the last discipline. Full mortar coverage does its job only if the bed cures before the wall takes abuse, typically 24-48 hours before grouting and longer before heavy load. A garage door that gets slammed open against a fresh set, or a car that idles against a wet wall, undoes work in seconds that took a day to place.
FAQ
Can I install stone veneer over drywall in a garage?
Not for exterior walls and not for direct-adhered thin stone veneer on painted interior drywall. Use the approved substrate, which usually means removing drywall or installing cement board for the veneer area.
Do I need metal lath for exterior garage stone veneer?
Yes for most exterior applications. Metal lath over the weather barrier carries the mortar and stone, and its fasteners must be corrosion-resistant and follow the code spacing.
How long does stone veneer installation take on a garage?
A standard two-car garage wall with prep runs roughly three to five working days for a two-person crew, plus lath and scratch time and the 24-48 hour cure before grouting.
Will car exhaust damage garage stone veneer?
No. Natural stone veneer is non-combustible and rated A-class, and the panels tolerate the temperature swings and moisture of a vented garage; keep the wall flashed and drained correctly.
Do I need to seal the stone on a garage wall?
Seal only if the product data specifies it. Natural slate and quartzite do not need a coating for weather; the waterproofing priority is flashing, drainage, and sound joints.
Conclusion
A garage wall is a big, exposed field of adhered natural stone, and it rewards the five details installers sometimes skip: substrate, barrier and flashing, lath and scratch, full mortar coverage, and clean corners and reveals. Nail those, and the wall outlives the cars it looks over.
Key Takeaways
- Prep beats patching: sound substrate, weather barrier, flashings, and a weep detail at the base protect the wall from the inside out.
- Lath and scratch on exterior garages, approved substrate everywhere, and full mortar coverage on every panel prevent the failures that bring calls.
- Order L-corners with the panels, trim the door reveal, and calculate the order with a 5-10% cut allowance so one lot covers the wall.
- Cold-weather installs need winter mortar rules and a protected cure; the stone itself takes the temperature range, the fresh mortar does not.
Supplying a garage wall project? Top Stone Panels offers stacked stone panels with L-corner kits, thin stone veneer splitters, and interlocking z-panels, all from natural slate and quartzite, with samples in 1-3 days and MOQ of one 20GP container. Send the wall dimensions for a coverage quote.