
A chimney is the most demanding wall on a house to cover with stone. It stands in rain, snow, wind, and full sun; it carries heat from the flue; and any moisture mistake inside it gets discovered at the worst moment — mid-winter, mid-load of firewood. Yet chimney stone veneer is also one of the highest-reward renovations a home can get, because the chimney is the most visible point of the roof.
The good news: the stone is the easy part. Natural stone is non-combustible by nature, so it is one of the few claddings code officials happily accept around chimney chases and fireplaces. Real stone veneer installation work is a checklist — clearances, flashing, substrate, setting, caps — and the checklist, not the material, is what keeps a chimney safe for thirty years. This guide walks the method a professional crew runs, and flags where homeowners commonly cut corners they will later regret.
- Natural stone veneer is non-combustible and A-rated — the right material family for chimney chases when installed correctly.
- Heat safety comes from the substrate and setting materials: cement-backed panels, cement board over framing, and Portland-based bonding systems.
- Check flue integrity and clearances before you cover anything — heat and mortar joints need air space, not a burial.
- Flashing under the crown and at the roof line is mandatory; once the stone is up, fixing flashing means removing the stone.
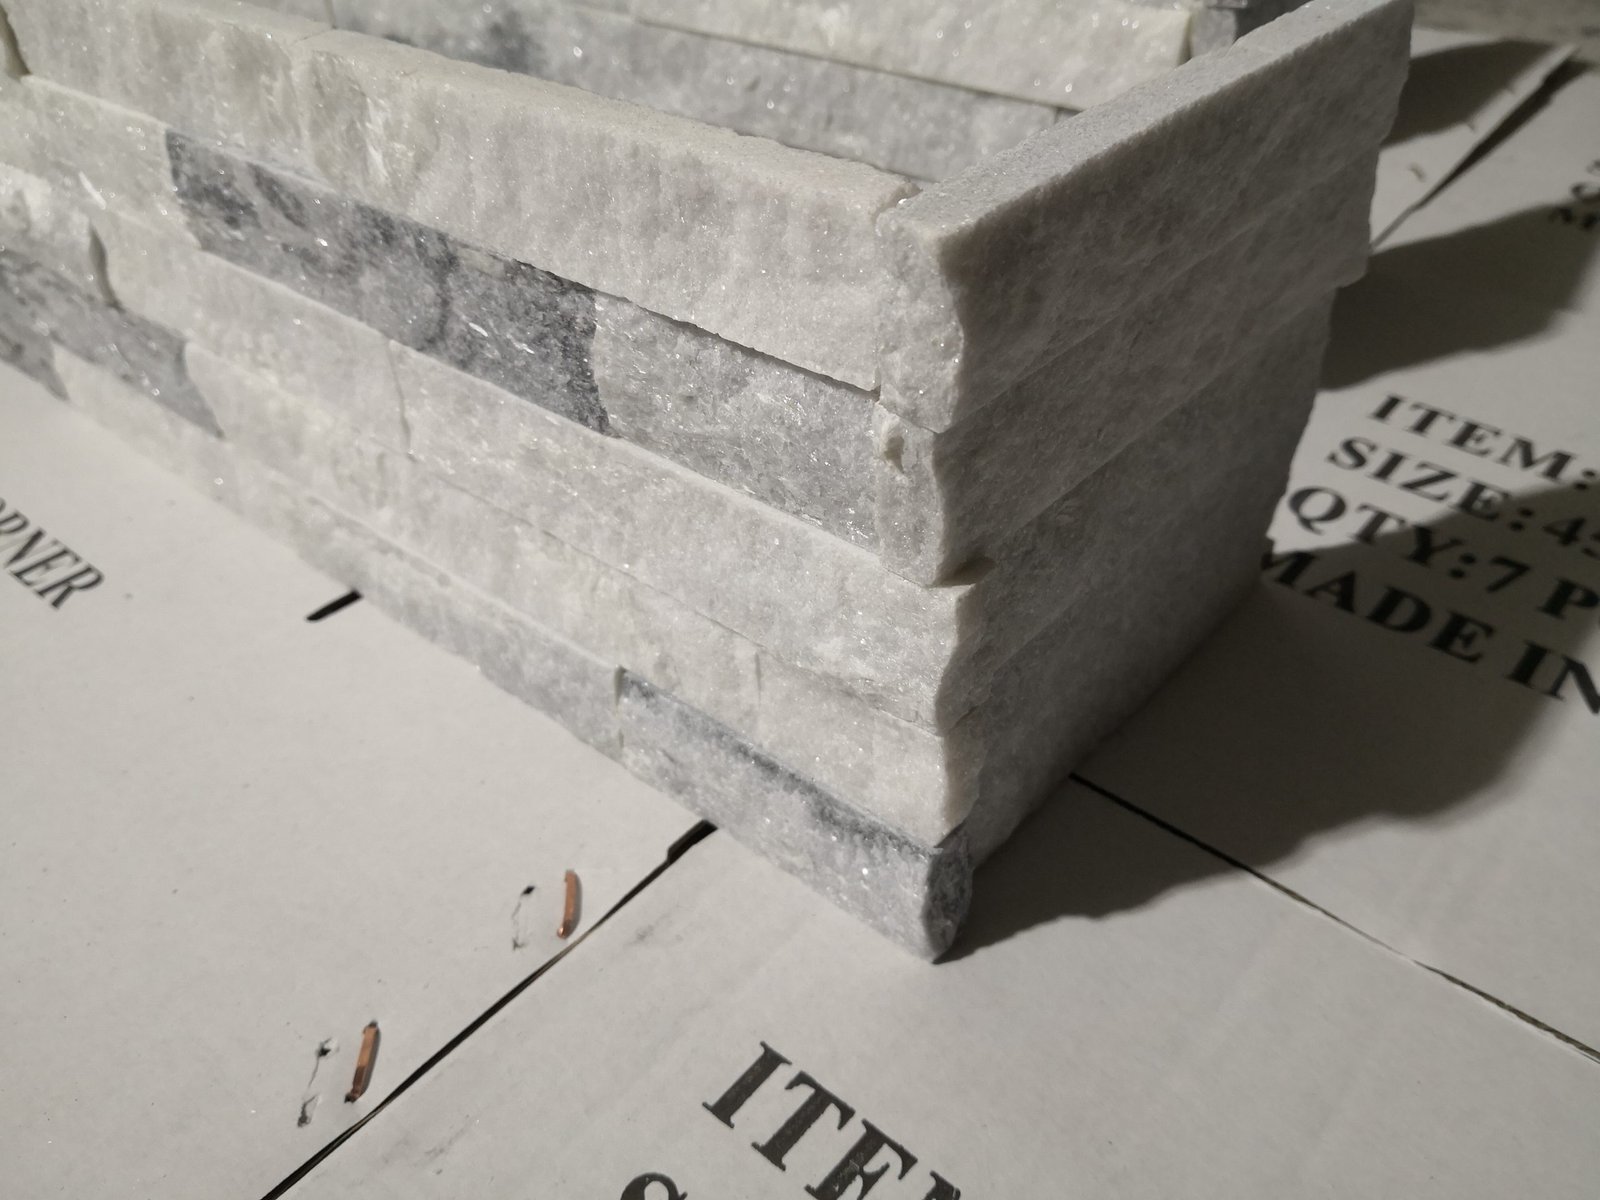
- Prefabricated L-corners turn 90-degree chimney corners cleanly and cut corner labor roughly in half.
Is Stone Veneer Safe on a Chimney?
Start with the direct answer: yes, stone veneer is safe on a chimney, and it is safer than most alternative claddings because natural stone does not burn. No ignition, no melting, no off-gassing — a dense slate or quartzite panel sitting against a warm chase simply conducts heat and stays stone. That is why natural stone carries a natural A-class fire rating and why it has been the default fireplace material for centuries.
The safety question, properly asked, is not “does the stone burn?” It is “what is behind the stone, and what is between the stone and the flue?” A chimney veneer job fails in two ways: something combustible sits inside the assembly where it should not, or a clearance the manufacturer and code required gets eaten by installers in a hurry. Both are preventable, and both are addressed step by step below.
Two different heat zones exist on any chimney project, and they need different thinking. The interior fireplace wall — the face around a firebox or wood stove — sees radiant heat and short clearance distances; only listed, non-combustible assemblies belong there. The exterior chimney chase — the masonry column running up outside — sees flue heat through the liner plus weather; it needs the same heat discipline near the top but adds a full moisture program. This guide covers both, with the interior rules visible in our hearth-to-mantel fireplace veneer walkthrough.
Choosing the Right Panels for a Chimney
Chimney proportions are narrow and tall, so the panel format should read in scale. Three families from the natural stone panel lines do this well:
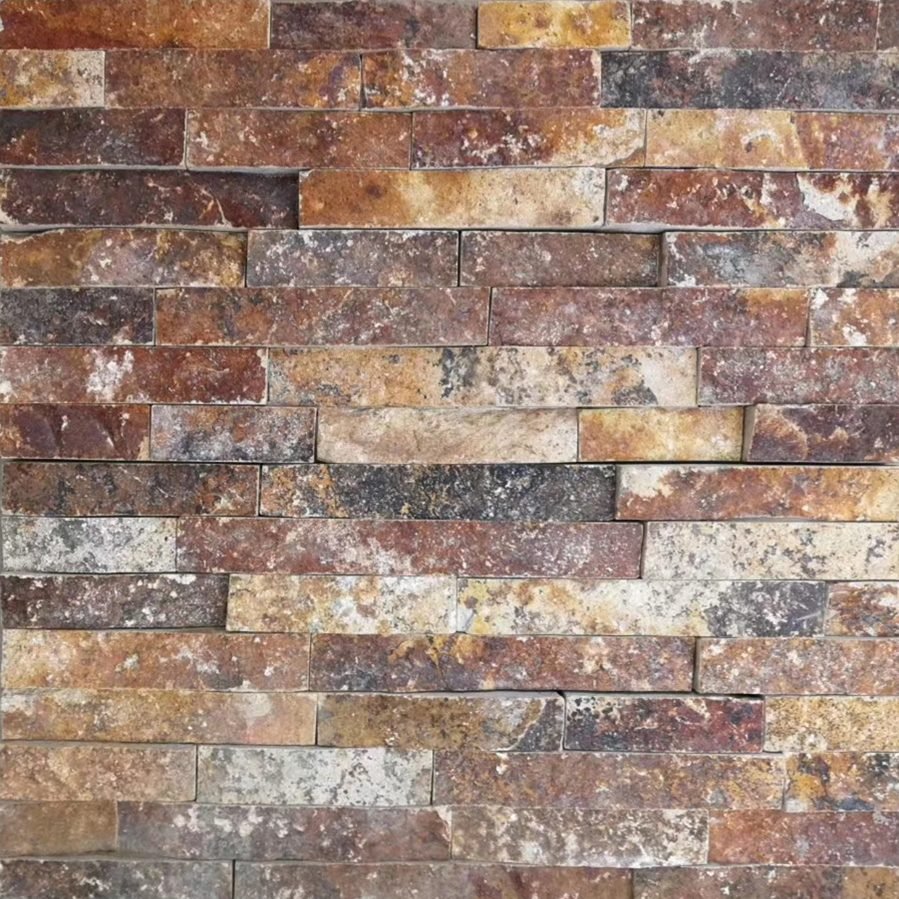
- Stacked stone panels (15x60cm / 15x55cm). The classic chimney look — staggered ledges that give a tall chase a sculpted, Romanesque presence. Available with prefabricated L-corners so the chimney’s four edges turn cleanly. This is the default for exterior chimney chases and is the top choice in the stacked stone fireplace design guide.
- Ultra-thin ledgestone panels (36x10cm). Small-format ledges with a light footprint — ideal when the chase is a retrofit over a frame structure or when the goal is a fine, European-style mosaic texture. A 36x10cm unit packs more pieces per square meter, which suits narrow chimney faces.
- Thin stone veneer random strips. The most organic option — random-length split strips, quarry-matched by vein, for a true dry-stack field. Great on tall modern chimneys where the panel grid would look mechanical.
On backing, the chimney is the one place where the choice is less about aesthetics and more about fire science. A cement-backed panel keeps the entire assembly mineral, which is the safest profile near flue heat and the easiest for code review. A marine-grade epoxy-bonded panel is a fine product for fireplace feature walls away from direct flue exposure, but confirm the adhesive’s heat rating with the factory before using it on a chimney body. Top Stone Panels carries both constructions and will tell you plainly which one suits chimney conditions; the product comparison is laid out in the natural versus manufactured veneer breakdown, and the 36x10cm line itself is shown in the thin ledgestone product page.
Step 1: Inspect Before You Cover
Nothing gets covered until the chimney passes inspection. Run this list, in order:
- Crown and cap. The concrete crown should sit intact, with a proper cap and a rain cap on the flue. A cracked crown lets water run down the flue’s exterior, where your new stone will trap it.
- Flue liner. Mortar joints in the liner carry heat and gas. Spalling liner or open joints are a fire-safety and carbon-monoxide issue — have a certified chimney professional assess the liner before any cosmetic work. The flue channel itself must stay exactly as the liner manufacturer and chimney spec require.
- Clearances. Measure the air space around factory-built chimney pipe or the masonry flue; if a required air space is missing, the fix is structural and belongs before the veneer, not inside it.
- Structure. Tap the masonry. Loose bricks, efflorescence bleed, or soft mortar means the chase needs repointing or replacement before it carries stone.
- Existing siding contact. The point where the chimney meets the roof and the main wall is where flashing lives. Look for failed step flashing, cracked counterflashing, or a gap where the drip edge should have been. The roof-to-chimney junction is the most common water entry point on a house.
Skip this list to save a morning and you convert a repairable problem into a buried one. The veneer around openings guide shows the same discipline applied to door and window transitions.
Step 2: Fix Flashing and Moisture Paths First
Flashing is the most skipped step in chimney veneer — and the most expensive one to skip, because once the stone is on, the flashing is under it. Order of work:
- Under the crown. If the crown is being replaced or repaired, install watertight flashing so moisture sheds past the masonry, not through it.
- At the roof line. Counterflashing must sit in the chimney masonry or the new stone — installed now, designed to continue up behind the veneer. Step flashing at the roof slope gets renewed the same day.
- At the base. Where the chase meets the roof deck or a wall, a drip edge and weep path keep water off the veneer’s base. Veneer is not waterproofing; it is a facade that looks terrible when water runs behind it and exits through mortar joints.
The moisture rules behind a chimney are the same ones that protect any exterior stone wall, documented in the exterior waterproofing guide — just with higher consequences, because the geometry of a chimney concentrates water at two seams, the crown and the roof.
Step 3: Prepare the Bonding Surface
The veneer must bond to a surface that is sound, flat, and compatible with the panel backing. Three situations cover most chimneys:
| Chimney condition | Preparation | Notes |
| Solid masonry, sound mortar | Clean, dampen, apply a bonding agent or a scratch coat per the panel manufacturer’s spec | Keep the mortar family consistent from masonry to panel backing |
| Repointed masonry | Allow the repoint mortar to cure before veneer work; re-inspect for water issues | New mortar shrinks — don’t set panels on fresh joints |
| Frame chimney chase (factory-built or built-up) | Install non-combustible cement board approved for the application; treat joints and fasteners per board spec | No wood surface may sit inside the veneer assembly near flue heat |
One rule governs all three rows: the assembly from the flue to the face of the stone must remain non-combustible through the entire heat zone. If a wall cavity contains framing or insulation, it must be the exact assembly the chimney manufacturer and local code permit — a veneer installation is not the place to improvise a chase.
Step 4: Dry-Lay the Field
Chimneys are narrow, so layout errors are expensive. Dry-lay every panel course on the ground next to the job, in the order it will go on the wall:
- Mark where cuts will fall and what gets cut (the base, the top, or around a roof edge — never the middle of a visible course).
- Check color flow across the lot. Batch-sorted veneer — what controlled vein selection delivers — should already read coherently; your dry layout confirms it before it is stuck.
- Plan the corner sequence. With pre-made L-corners, each course includes a corner piece; count corner pieces against courses before you start.
- Reserve the flattest, cleanest panels for the crown area where the eye lands first.
Cutting comes next: the techniques for scoring, splitting, and trimming veneer survive on the L-corner and finish guide, and the specifics for stacked panel cutting steps are in the corner piece cutting walkthrough.
Step 5: Set Panels the Heat-Safe Way
Setting panels on a chimney is the same wet trade as any veneer wall, with three chimney-specific disciplines:
- Full-contact bedding. Trowel the thin-set or mortar onto the entire back of the panel, not just the edges. A hollow panel behind a chimney is a heat pocket and an acoustic drum; full bedding gives 100% transfer of both sound and heat to the masonry.
- Correct mortar family. For cement-backed panels over masonry, work in the Portland thin-set or Type S system the manufacturer approves — organic thinset and mastic have no business near flue heat. If the project is in a code-enforced zone, keep the receipts: the assembly needs to be documentable as non-combustible.
- Course discipline. Set course by course from the bottom up, leveling each row and letting the panel backing follow the wall. Do not squeeze a course into place by tilting it; a tilted panel breaks the bond and shows as a shadow joint for the building’s life.
Work in weather that lets mortar cure properly, and protect the fresh work from rain and frost. The full setting rhythm for exterior walls — substrate through jointing — is in the thin veneer exterior installation guide.
Step 6: Corners, Caps, and the Crown
A chimney has four vertical corners plus a crown — more right angles per square foot than any other wall on the house. This is where prefabricated L-corners earn their keep. Pre-made 90-degree corner pieces from the same quarry lot keep every turn crisp, keep the pattern wrapping uniformly, and — because no one is mitering on a ladder — cut the corner labor roughly in half. Set the corner piece with each course, check plumb with a level every three courses, and the whole chase stays true.
At the top, the veneer must end below a sound crown or a cap system. The crown sheds water; the stone never touches the flue. Leave the manufacturer-required air space around the flue and let the cap overhang the veneer — that overhang is the drip edge that keeps the top course dry. The same cap-and-coping logic used on stone columns applies to chimney crowns — pre-assembled column and cap systems show how a stone cap should terminate a vertical stone assembly.
Step 7: Grout, Cure, and Seal
Let the setting material cure before any joint work — manufacturers specify cure windows in days, not hours, because thick setting beds shrink as they hydrate. Then finish the joints per the look you chose: flush grout for a continuous masonry face, recessed joints for a crisp stacked look, or open dry-stack joints left un-grouted where the design calls for it. The grout technique guide covers flush versus recessed handles in detail.
Sealing is optional on dense natural stone, and the chimney is no exception. If the project spec calls for a sealer, apply it to a fully cured wall and only with a product rated for exterior masonry; the when-to-seal guide explains why skipping the sealer is often the right decision on slate and quartzite.
Heat-Specific Rules: Clearances and Non-Combustible Zones
Three principles keep the heat side of a chimney veneer job honest:
- Clearances belong to the appliance and the code, not the stone. Factory-built chimneys and wood stoves come with manufacturer-installed clearance requirements; NFPA 211 governs chimneys, fireplaces, and vents for solid-fuel burning appliances, and local building officials can add their own. Measure, photograph, and preserve those clearances — then build the veneer outside them.
- Air spaces stay air. Many chimney assemblies specify an air space around the flue for heat ventilation. A veneer crew that fills gaps at the top of the chase “to keep it neat” is turning a ventilated chimney into a heat trap. Keep required air paths open all the way up.
- Firebox-adjacent work is a listed-assembly question. Around a firebox or stove, veneer must be installed per a listed non-combustible assembly and the appliance manufacturer’s spec — not per “what usually works.” Dense natural stone is a great material for this zone; the assembly details are still the manufacturer’s property, and the crew’s job is to follow them.
For interior fireplace surrounds where radiant heat is the question, the companion guide install thin ledgestone panels on a fireplace surround covers the tight-clearance side of this trade.
Common Chimney Installation Mistakes
- Covering flashing problems. The single most expensive stone-chimney mistake — a water leak that costs the full installation to access.
- Using organic adhesives near the flue. Mastic and organic thinset have no place in a heat zone. Stay in the non-combustible family.
- Burying a required air space. Chases need ventilation; filling the top void with mortar is a slow-burn defect.
- Mitering corners on site. Slow, drift-prone, and visually loud — pre-made L-corners fix it before it starts.
- Skipping the dry layout. A narrow chimney exposes pattern mistakes within three courses. Dry-lay first.
- Grouting before cure. Setting beds shrink; grout over a moving bed cracks. Give the assembly its full cure window.
Frequently Asked Questions
Can stone veneer go over a metal factory-built chimney? Only over the assembly the chimney manufacturer approves. Factory-built chimneys have strict clearance rules; the veneer wraps the chase, not the pipe, and required air spaces must stay open.
Does stone veneer make a chimney too heavy? Not when it is thin veneer panels (roughly 1-2cm plus backing) on a sound masonry chase. Confirm the structure carries the added load; a compromised chase gets repaired first.
Should I seal stone veneer on an exterior chimney? Generally no for dense slate and quartzite. Sealing is optional; if specified, use an exterior-rated masonry sealer on a fully cured wall.
Why do my chimney corners keep looking off without L-corners? Because miter cuts drift and turn against the grain. Pre-made L-corner pieces match the courses and hold a clean 90 degrees on every corner.
Conclusion
Stone veneer chimney installation is a checklist with consequences: inspect the chimney, protect the flue, repair the flashing, prepare a non-combustible bonding surface, dry-lay, set with full-contact Portland systems, finish with L-corners and a sound crown, and leave every required air space alone. Follow the list in order and natural stone gives the chimney what it has always given buildings — a permanent, non-combustible skin that weathers well and sells the house.
Choose the panel format by scale: stacked panels for classic chases, ultra-thin ledgestone for modern narrow ones, random veneer strips for organic facades. Choose the backing by heat: cement for the chimney body, epoxy only where the factory confirms its heat rating. Get those two decisions right and the rest is disciplined handwork.
Top Stone Panels supplies natural slate and quartzite veneer panels — stacked, ultra-thin ledgestone, and random strips — with prefabricated L-corners and cement-backed construction for exterior chases. See the stacked stone line or compare the thin veneer options, and request a sample in 1-3 days before you commit the crew.



